Salta al contenuto principale

Visual Land Prestige Elite 7Q Speaker Replacement

Cosa ti serve

  1. Visual Land Prestige Elite 7Q Speaker Replacement, Speaker: passo 1, immagine 1 di 2 Visual Land Prestige Elite 7Q Speaker Replacement, Speaker: passo 1, immagine 2 di 2
    • At the bottom of the tablet, remove the two 3.6mm screws with a Phillips #000 screwdriver.

  2. Visual Land Prestige Elite 7Q Speaker Replacement: passo 2, immagine 1 di 2 Visual Land Prestige Elite 7Q Speaker Replacement: passo 2, immagine 2 di 2
    • Wedge a plastic opening tool into the edges of the tablet to pry it open.

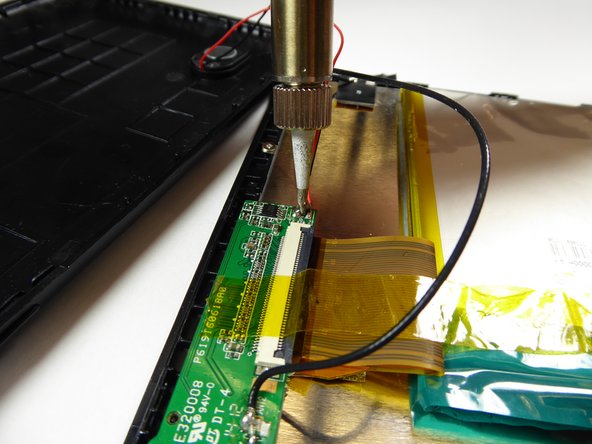
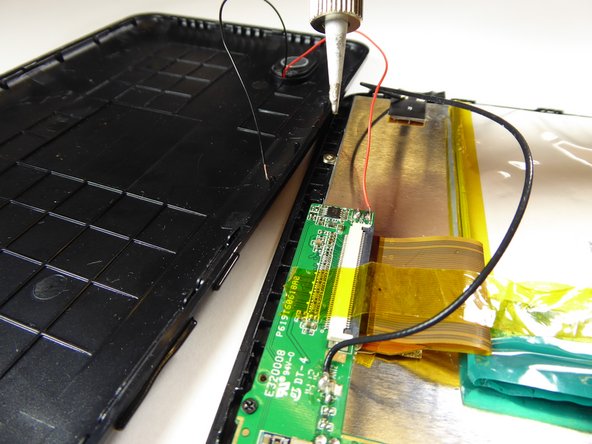
  3. Visual Land Prestige Elite 7Q Speaker Replacement: passo 3, immagine 1 di 3 Visual Land Prestige Elite 7Q Speaker Replacement: passo 3, immagine 2 di 3 Visual Land Prestige Elite 7Q Speaker Replacement: passo 3, immagine 3 di 3
    • Soldering iron may be dangerous for inexperienced users. For additional information on how to use a soldering iron, click here.

    • Use a soldering iron to detach the speaker wires from the motherboard.

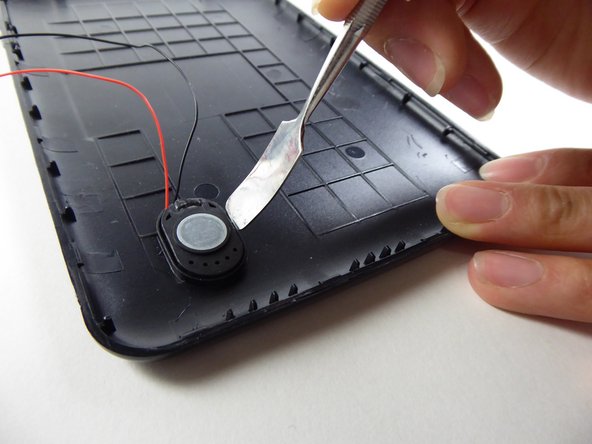
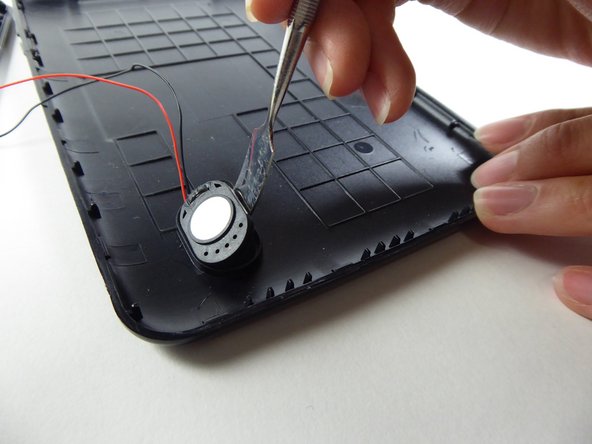
  4. Visual Land Prestige Elite 7Q Speaker Replacement: passo 4, immagine 1 di 3 Visual Land Prestige Elite 7Q Speaker Replacement: passo 4, immagine 2 di 3 Visual Land Prestige Elite 7Q Speaker Replacement: passo 4, immagine 3 di 3
    • Use a curved metal spudger to remove the speaker from the back case.

    • The speaker is held in place by an adhesive and can be difficult to remove.

Conclusione

To reassemble your device, follow these instructions in reverse order.

Team

UC Davis, Team 2-1, Oliver Fall 2016 Membro di UC Davis, Team 2-1, Oliver Fall 2016

UCD-OLIVER-F16S2G1

5 Membri

12 Guide realizzate

0 Commenti

Aggiungi Commento

Visualizza Statistiche:

Ultime 24 Ore: 0

Ultimi 7 Giorni: 0

Ultimi 30 Giorni: 4

Tutti i Tempi: 182