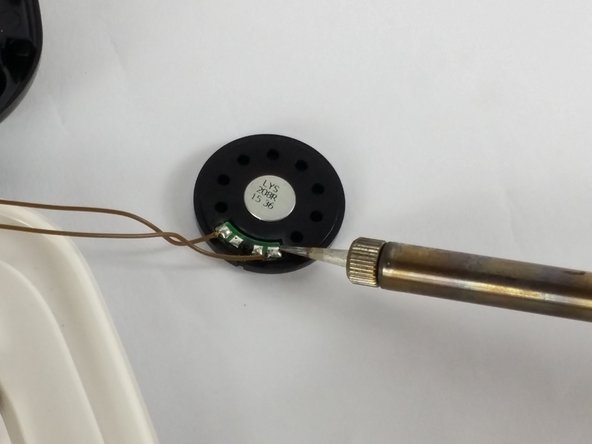
Salta al contenuto principale

VTech Little Apps Tablet Speaker Replacement

Cosa ti serve

  1. VTech Little Apps Tablet Speaker Replacement, Battery: passo 1, immagine 1 di 1
    • Remove the 9.9 mm screw covering the batteries with a PH1 driver head.

  2. VTech Little Apps Tablet Speaker Replacement: passo 2, immagine 1 di 1
    • Use a plastic opening tool to pry the batteries out of their holding.

    • If replacing your batteries with new ones, be careful to insert them as indicated on the device.

  3. VTech Little Apps Tablet Speaker Replacement, Back Cover: passo 3, immagine 1 di 2 VTech Little Apps Tablet Speaker Replacement, Back Cover: passo 3, immagine 2 di 2
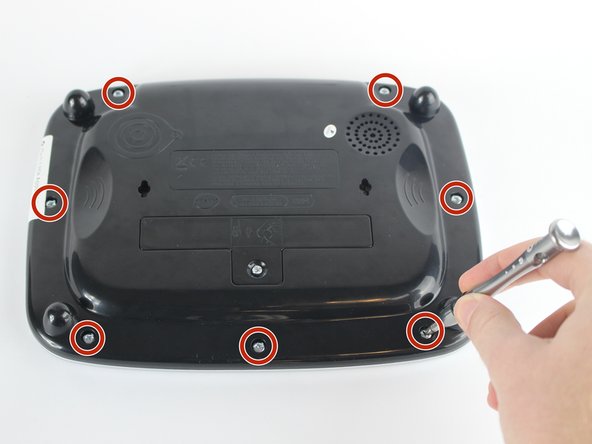
    • Position the VTech Little Apps Tablet face-down on a flat surface so that you can clearly see the back of the device.

    • Remove all seven 9.6 mm screws located around the perimeter of the back cover with a PH1 driver head.

  4. VTech Little Apps Tablet Speaker Replacement: passo 4, immagine 1 di 2 VTech Little Apps Tablet Speaker Replacement: passo 4, immagine 2 di 2
    • Gently remove the back cover then flip it 180 degrees so that the back cover of the device is now face-down.

    • Proceed with caution as there are wires attaching the back cover to the front cover of the device that could be easily detached.

  5. VTech Little Apps Tablet Speaker Replacement, Speaker: passo 5, immagine 1 di 2 VTech Little Apps Tablet Speaker Replacement, Speaker: passo 5, immagine 2 di 2
    • The speaker should be located at the bottom-right side of the back cover from your perspective.

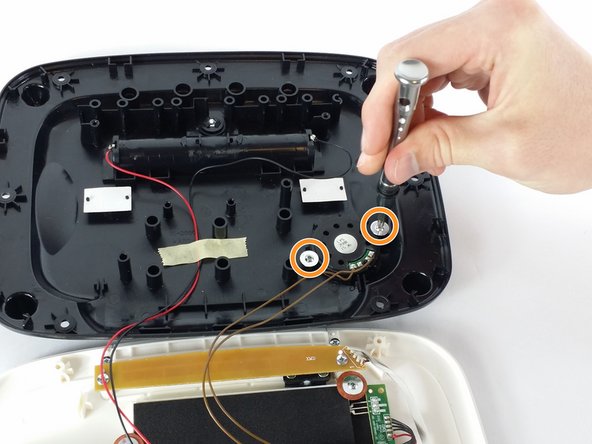
    • Remove the two 7.3 mm panhead screws holding down the speaker with a PH0 driver head.

    • Be careful not to disturb the wires while removing the screws.

  6. VTech Little Apps Tablet Speaker Replacement: passo 6, immagine 1 di 2 VTech Little Apps Tablet Speaker Replacement: passo 6, immagine 2 di 2
    • Remove the speaker from its holding and place it to the side of the device.

    • Desolder the brown wires from the speaker connections.

    • Soldering is the most difficult step in this guide. If you are in need of assistance with this step, refer to this Soldering Guide.

Conclusione

To reassemble your device, follow these instructions in reverse order.

Team

USF Tampa, Team 2-6, Sullivan Spring 2016 Membro di USF Tampa, Team 2-6, Sullivan Spring 2016

USFT-SULLIVAN-S16S2G6

3 Membri

12 Guide realizzate

0 Commenti

Aggiungi Commento

Visualizza Statistiche:

Ultime 24 Ore: 0

Ultimi 7 Giorni: 4

Ultimi 30 Giorni: 17

Tutti i Tempi: 973