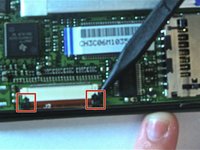
Salta al contenuto principale

Tungsten E Power Button Repair

Cosa ti serve

  1. Tungsten E Power Button Repair, Tungsten E Disassembly: passo 1, immagine 1 di 2 Tungsten E Power Button Repair, Tungsten E Disassembly: passo 1, immagine 2 di 2
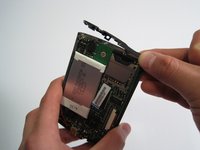
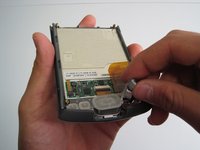
    • Remove the stylus and SD card.

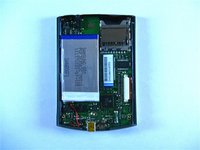
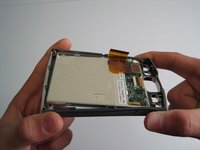
    • Using a T5 torx screwdriver, remove all 4 back panel screws.

    • The screws are small and can be lost easily. Be sure to place them in a secure area.

  2. Tungsten E Power Button Repair: passo 2, immagine 1 di 3 Tungsten E Power Button Repair: passo 2, immagine 2 di 3 Tungsten E Power Button Repair: passo 2, immagine 3 di 3
    • Insert a plastic opening tool under the USB and power input slots.

    • Slide the plastic opener along the seam and gently pry the cover from the PDA body to remove the cover completely.

  3. Tungsten E Power Button Repair: passo 3, immagine 1 di 2 Tungsten E Power Button Repair: passo 3, immagine 2 di 2
    • Your device may not have a screen protector. If not, you can move on to step four.

    • Remove the screen protector by lifting the hinge out of the plastic housing.

    • Remove the top cover by gently pulling it away from the device with a plastic opening tool or your fingers.

  4. Tungsten E Power Button Repair: passo 4, immagine 1 di 2 Tungsten E Power Button Repair: passo 4, immagine 2 di 2
    • Carefully remove motherboard from the standoffs without damaging the LCD flex connector.

    • Using a spudger, unlock both sides of the flex connector block by pushing down.

    • Remove motherboard completely.

    • Metal washers may pop out of the device during this step

  5. Tungsten E Power Button Repair: passo 5, immagine 1 di 3 Tungsten E Power Button Repair: passo 5, immagine 2 di 3 Tungsten E Power Button Repair: passo 5, immagine 3 di 3
    • Remove buttons using fingers.

    • Gently flex frame to release screen from plastic frame.

    • Lift out screen.

  6. Tungsten E Power Button Repair: passo 6, immagine 1 di 1
    • Congratulations! You have successfully taken apart a Palm Tungsten E.

  7. Tungsten E Power Button Repair, Tungsten E Power Button Repair: passo 7, immagine 1 di 1
  8. Tungsten E Power Button Repair: passo 8, immagine 1 di 1
    • On the motherboard, find the power button near the upper right corner.

    • Check for disconnection of the power button.

  9. Tungsten E Power Button Repair: passo 9, immagine 1 di 1
    • Use soldering iron to reattach the damaged power button to the motherboard.

Conclusione

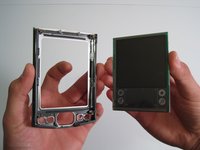
To reassemble your device, follow these instructions in reverse order.

Un'altra persona ha completato questa guida.

Kathleen Hix

Membro da: 01/21/10

49 Reputazione

2 Guide realizzate

Team

Cal Poly, Team 13-22, Maness Winter 2010 Membro di Cal Poly, Team 13-22, Maness Winter 2010

CPSU-MANESS-W10S13G22

4 Membri

4 Guide realizzate

0 Commenti

Aggiungi Commento

Visualizza Statistiche:

Ultime 24 Ore: 0

Ultimi 7 Giorni: 0

Ultimi 30 Giorni: 2

Tutti i Tempi: 5,185