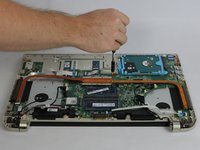
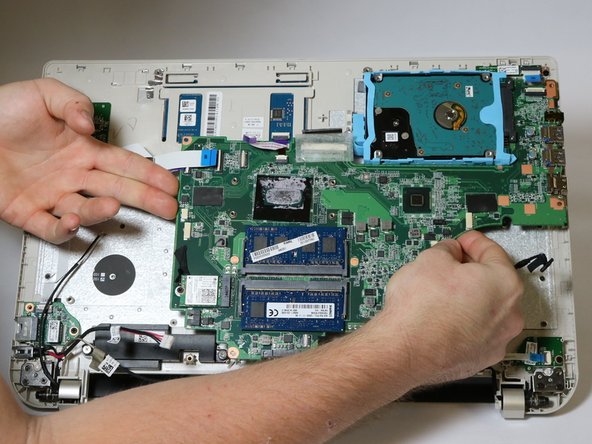
Salta al contenuto principale

Toshiba Satellite S55T-B5335 Motherboard Replacement

Cosa ti serve

  1. Toshiba Satellite S55T-B5335 Motherboard Replacement, Battery: passo 1, immagine 1 di 1
    • Remove the two 7 mm Phillips #1 screws that hold the battery in place.

  2. Toshiba Satellite S55T-B5335 Motherboard Replacement: passo 2, immagine 1 di 3 Toshiba Satellite S55T-B5335 Motherboard Replacement: passo 2, immagine 2 di 3 Toshiba Satellite S55T-B5335 Motherboard Replacement: passo 2, immagine 3 di 3
    • Pull the battery from laptop.

  3. Toshiba Satellite S55T-B5335 Motherboard Replacement, Bottom Cover: passo 3, immagine 1 di 2 Toshiba Satellite S55T-B5335 Motherboard Replacement, Bottom Cover: passo 3, immagine 2 di 2
    • Remove the ten 7 mm Phillips #1 screws that secure the back cover.

  4. Toshiba Satellite S55T-B5335 Motherboard Replacement: passo 4, immagine 1 di 1
    • Wedge the tip of a plastic opening tool between the back cover and the metal frame.

    • Twist the plastic opening tool, while wedged, in order to release the retaining tabs from the frame.

    • Repeat these steps in a circular pattern around the laptop to release all retaining tabs.

  5. Toshiba Satellite S55T-B5335 Motherboard Replacement: passo 5, immagine 1 di 1
    • Once all retaining tabs are released from the frame, you can pull up on the back cover to remove it.

  6. Toshiba Satellite S55T-B5335 Motherboard Replacement, Cooling Fans: passo 6, immagine 1 di 1
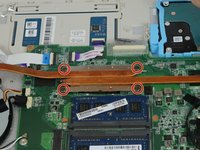
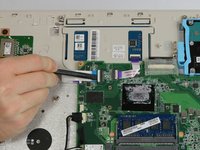
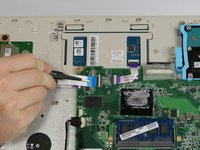
    • Remove the two 3.5 mm Phillips #1 screws that hold the cooling fan in place.

  7. Toshiba Satellite S55T-B5335 Motherboard Replacement: passo 7, immagine 1 di 1
    • Wedge the flat end of the spudger between the connector and its socket.

    • Twist back and forth in order to pry the connector loose from its socket.

    • Although you can pull on the connector wires to remove it from the socket, it is not recommended until the connector is loose to prevent damage to the wires.

  8. Toshiba Satellite S55T-B5335 Motherboard Replacement: passo 8, immagine 1 di 1
    • Lift up on the cooling fan to remove it from the laptop.

    • Repeat steps 6-8 for the other cooling fan.

  9. Toshiba Satellite S55T-B5335 Motherboard Replacement, Motherboard: passo 9, immagine 1 di 1
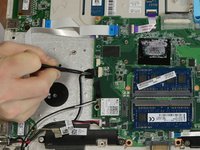
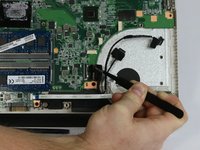
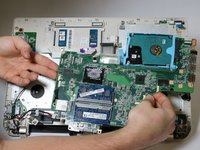
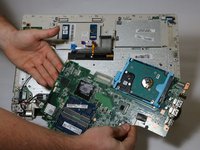
    • Remove the three 4 mm Phillips #1 screws holding the motherboard in place.

  10. Toshiba Satellite S55T-B5335 Motherboard Replacement: passo 10, immagine 1 di 2 Toshiba Satellite S55T-B5335 Motherboard Replacement: passo 10, immagine 2 di 2
    • Remove the four 4 mm Phillips #1 screws mounting the heat sink to the motherboard.

  11. Toshiba Satellite S55T-B5335 Motherboard Replacement: passo 11, immagine 1 di 1
    • Gently lift on either side of the heat sink to separate it from the laptop.

    • When reassembling the device, be sure to apply new thermal paste to the heat sink and processor.

  12. Toshiba Satellite S55T-B5335 Motherboard Replacement: passo 12, immagine 1 di 2 Toshiba Satellite S55T-B5335 Motherboard Replacement: passo 12, immagine 2 di 2
    Attrezzo utilizzato in questo passaggio:
    Tweezers
    $4.99
    Compra
    • On all ZIF (Zero Insertion Force) connectors, use a spudger to lift the lock.

    • Use tweezers to pull on the designated pull tab to remove each ZIF connector.

  13. Toshiba Satellite S55T-B5335 Motherboard Replacement: passo 13, immagine 1 di 2 Toshiba Satellite S55T-B5335 Motherboard Replacement: passo 13, immagine 2 di 2
    • On all No-Fuss Ribbon Cable Connectors use tweezers, on the designated tabs, to remove them.

  14. Toshiba Satellite S55T-B5335 Motherboard Replacement: passo 14, immagine 1 di 1
    • Lift on the motherboard from the USB port area while pulling the frame away from motherboard.

  15. Toshiba Satellite S55T-B5335 Motherboard Replacement: passo 15, immagine 1 di 3 Toshiba Satellite S55T-B5335 Motherboard Replacement: passo 15, immagine 2 di 3 Toshiba Satellite S55T-B5335 Motherboard Replacement: passo 15, immagine 3 di 3
    • Once all connectors are separated from the motherboard and the USB port area is freed, carefully lift on either side of the motherboard to remove it.

Conclusione

To reassemble your device, follow these instructions in reverse order.

Team

USF Tampa, Team 2-1, Blackwell Fall 2016 Membro di USF Tampa, Team 2-1, Blackwell Fall 2016

USFT-BLACKWELL-F16S2G1

4 Membri

7 Guide realizzate

Un commento

Hello

I got to this address through my search for a motherboard for toshiba satellite c55

Can you tell me where to buy it because the one that I own has broken down

Thank you

akad100@gmail.com

alakad100 - Replica

Aggiungi Commento

Visualizza Statistiche:

Ultime 24 Ore: 1

Ultimi 7 Giorni: 11

Ultimi 30 Giorni: 28

Tutti i Tempi: 2,749