Questa versione può contenere modifiche errate. Passa all'ultima istantanea verificata.
Cosa ti serve
-
Questo passaggio è privo di traduzione. Aiuta a tradurlo
-
Lift the tank lid up and away from the toilet tank.
-
-
Questo passaggio è privo di traduzione. Aiuta a tradurlo
-
Shut off the stop valve underneath the toilet by turning it clockwise until it becomes hand tight.
-
-
Questo passaggio è privo di traduzione. Aiuta a tradurlo
-
Disconnect the fill valve's rubber refill tube from the top of the overflow tube.
-
-
-
Questo passaggio è privo di traduzione. Aiuta a tradurlo
-
Push down the flush lever.
-
Hold the lever down until water stops draining from the tank.
-
-
Questo passaggio è privo di traduzione. Aiuta a tradurlo
-
Use a sponge to soak up and remove any remaining water from the toilet tank.
-
Periodically squeeze the excess water from the sponge.
-
-
Questo passaggio è privo di traduzione. Aiuta a tradurlo
-
Place a bucket under the supply tube to catch any dripping water.
-
Turn the coupling nut on the supply tube clockwise until it releases from the threaded shank on the bottom of the tank.
-
-
Questo passaggio è privo di traduzione. Aiuta a tradurlo
-
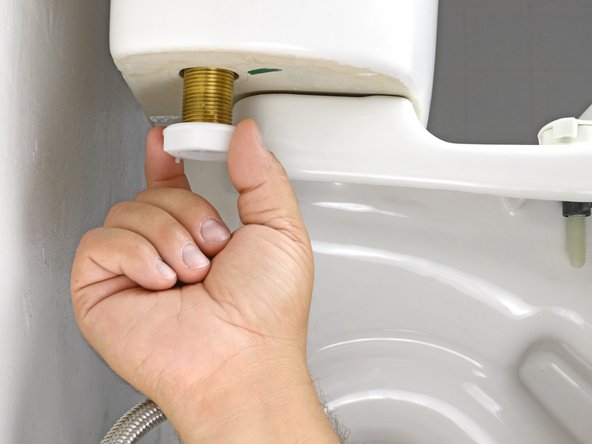
Using an adjustable wrench, turn the locknut on the threaded shank counter-clockwise until it becomes loose.
-
-
Questo passaggio è privo di traduzione. Aiuta a tradurlo
-
Turn the locknut counter-clockwise until it releases from the threaded shank.
-
-
Questo passaggio è privo di traduzione. Aiuta a tradurlo
-
Lift the entire fill valve out of the tank.
-


Annulla: non ho completato questa guida.
Altre 11 persone hanno completato questa guida.


4 Commenti
Great guide for removing the fill valve, but we're missing the steps for installing the new one. In the case of a Fluidmaster fill valve, you'll want to adjust the height to either match the one being replaced, or the more time-consuming (but not hard) method of marking the fill line of water on the tank, adjusting the fill valve to be just above that, then testing. Or ... is that another guide? For the present, I'd call this "removal." Perhaps we can create a new one for "installing a new fill valve." Ping me for assistance if needed.
Hi David,
Thanks for checking out our guide! By default, all iFixit replacement guides conclude with "To reassemble your device, follow these instructions in reverse order." Our guide is intended to be a basic procedure that works for most fill valves. This particular fill valve is a Fluidmaster, and we do have an adjustment guide currently in the works. We'll also be updating our existing toilet guides, so make sure to check back soon.
We hope this clears everything up!
Awesome guide!
It will definitely help him who wants to replace toilet fill valve by his own. I just want to know from my curiosity that , if I want to replace my fill valve should I also replace other parts like flapper or any other parts.
Thanks… :)
Fluidmaster fill valve frequently fails to cut off, runs for awhile into overflow, THEN cuts off. Won’t cut off when manually toggled either. Water is hard, so could be lime deposit somewhere inside of valve. When water is turned off and tank drained for a couple of days, valve works for a few days. Any information appreciated.