Introduzione
Usa questa guida per sostituire le coperture dei tasti di plastica e i contatti del tasto di gomma di qualsiasi controller DualShock 3.
Cosa ti serve
-
-
Svita le cinque viti a croce Phillips da 7,2 mm che tengono ferma la copertura posteriore.
-
-
-
Solleva la batteria dalla scheda madre per avere accesso al suo connettore.
-
-
-
-
Rimuovi l'unica vite a croce Phillips da 7,2 mm che fissa la scheda madre al case anteriore.
-
-
-
Solleva i contatti del tasto di gomma dalla parte anteriore della custodia del controller per avere accesso alle coperture dei tasti di plastica.
-
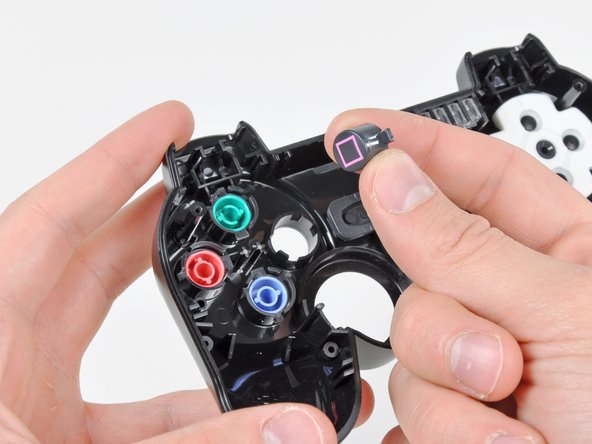
Togli tutte le coperture dei bottoni di plastica danneggiate dalla custodia del controller.
-


Per riassemblare il tuo dispositivo, segui queste istruzioni in ordine inverso.
Per riassemblare il tuo dispositivo, segui queste istruzioni in ordine inverso.
Annulla: non ho completato questa guida.
Altre 97 persone hanno completato questa guida.
Un ringraziamento speciale a questi traduttori:
100%

Questi traduttori ci stanno aiutando ad aggiustare il mondo! Vuoi partecipare?
Inizia a tradurre ›

6 Commenti
My Dualshock 3 didn't have the three armed plastic piece on the D-pad. Mine's a red one, relatively recent. My controller also had the problem where it would randomly send button press events when using the L-stick. I traced the problem to the ribbon connector between the board and the contacts, which was very dirty. I cleaned the contacts and put the controller back together with an additional rubber shim between the back cover and the battery, which got rid of the creakiness of the somewhat loose-fitting case. Works great now.
How do you clean the contacts? Is there a special way?
Are these instructions the same for the dual-shock 2?
TNX-could not really figure out where the 3-armed plastic should fit in but tnx to step 11 i know-now im going to dismantle my controller again.