Introduzione
Se devi sostituire il piedistallo del tuo Microsoft Surface Pro 6, questa guida ti mostrerà come fare.
Il piedistallo è la parte del tablet che gli permette di stare in piedi. Se si rompe o viene danneggiato, potresti volerlo sostituire. È possibile che il tuo piedistallo diventi instabile dopo un lungo utilizzo o se lo fai cadere. La riparazione non è difficile, e non dovrai smontare il Surface Pro 6. Dovrai solo rimuovere e sostituire il piedistallo.
Cosa ti serve
-
-
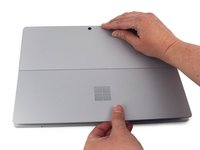
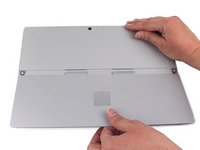
Svita le quattro viti Torx T3 da 2,7 mm, due su ogni lato del piedistallo.
-
-
-
-
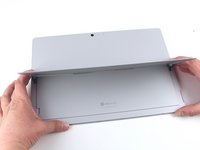
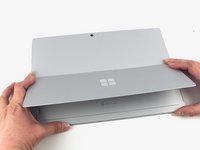
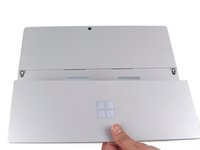
Rimuovi il piedistallo dalla copertura posteriore.
Heute selbst durchgeführt. Hilfreich wäre, die Beschreibung um folgende Info zu ergänzen: wie man die Scharniere nach Schritt 4 wieder aus den Einbuchtungen im Gehäuse hochgestellt bekommt, um das neue Kickstand zu montieren. Nach eigenen Überlegungen konnte ich die Schaniere durch Einführen des benutzten Torx-Schraubenziehers in die äußere Schraubenbohrung des Scharniers und ganz behutsamen Hochdrücken des Scharniers mit Hilfe des Schraubenziehers lösen.
-


Per rimontare il tuo dispositivo, segui le istruzioni in ordine inverso.
Per rimontare il tuo dispositivo, segui le istruzioni in ordine inverso.
Annulla: non ho completato questa guida.
Altre 7 persone hanno completato questa guida.
Un ringraziamento speciale a questi traduttori:
100%
Daniele Carminati ci sta aiutando ad aggiustare il mondo! Vuoi partecipare?
Inizia a tradurre ›


7 Commenti
Any way to replace the hinges themself?
Also trying to find this out.
Thank you so much. I use the Surface 6 in portrait mode to read and use the kickstand as a grip/hand rest to prevent wrist strain. This meant the screws came loose constantly and I had to try and tighten them using my fingertip; not ideal. With the newly purchased Manta kit, and this guide, they are properly tightened again for the first time in over a year.
If you find that that the kickstand screws are still coming loose, I suggest applying a dab of blue Loctite (or nail polish if in a pinch) to the screws to help them hold in place.
The hinge mechanism has come completely loose so that the stand will not glide back into position. I thought it was the adhesive pads keeping it in place. Reading the instructions above, I now see that these pads can be put back into position. There is a whole Youtube showing the headaches of this kickstand hinge situation. The best bet is to buy a cover with a kickstand attached.
Thanks for the useless information on how to turn a screw! The hinges are broken! Why else would I be replacing the kickstand? The flap itself has no moving parts to break! How do you replace the hinges??? You've wasted my time and your own time writing the most obvious trash.
Wow, that sounds like such an annoying problem to have with your device! Unfortunately this guide only shows a walk-though for the stand itself. We don’t have a guide for that specific repair but we’d love if you made one! We rely on our amazing community members to help us complete our guide collections so that we can help everyone repair every thing. Head over to our Contribute page and click on “Create a new repair guide” to get started. If you follow the steps of our Surface Pro 6 Battery Replacement, it should get you pretty far into the repair. Good luck!!