Introduzione
Usa questa guida per sostituire la parte posteriore o superiore danneggiata, o per aprire il case per accedere agli altri componenti della tua macchina fotografica.
Noi consigliamo vivamente di usare un tappetino da lavoro magnetico o un vassoio di organizzazione. Questa fotocamera ha molti tipi diversi di viti e differenziarle è la chiave per un riassemblaggio corretto.
Cosa ti serve
-
-
Rimuovi l'obiettivo.
-
Ruota la macchina fotografica sottosopra per localizzare il compartimento della batteria.
-
Fai slittare il bottone verso l'alto per aprire il compartimento.
-
Fai slittare il bottone arancione verso l'alto per far uscire la batteria.
-
Premi per rimuovere la scheda SD.
-
-
-
Rimuovi le due viti a croce Phillips lunghe 4,3 mm da entrambi i lati della fotocamera.
-
-
-
Rimuovi le tre viti a croce Phillips lunghe 3,7 mm dalla parte inferiore della fotocamera.
-
-
-
-
Rimuovi le due viti a croce Phillips lunghe 3,7 mm.
-
Rimuovi la vite a croce Phillips lunga 3,1 mm.
-
Rimuovi le due viti a croce Phillips lunghe 3,2 mm.
-
-
-
Fai leva lentamente e fai scivolare in basso la copertura inferiore.
-
-
-
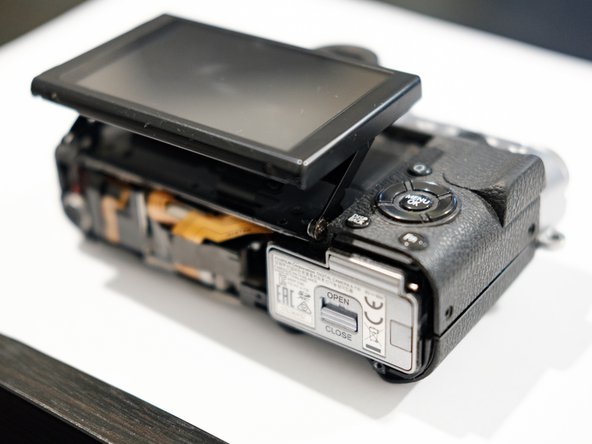
Inizia a fare leva e solleva la parte posteriore dell'LCD.
-
Per rimuovere il cavo a nastro, fai scattare la chiusura BIANCA sul lungo connettore ZIF con la parte piatta di uno spudger.
-
-
-
Per rimuovere il cavo a nastro, fai scattare la chiusura NERA sui connettori con la parte piatta di uno spudger.
-
Tira fuori i cavi a nastro con cautela.
-
-
-
Rimuovi le due viti a croce Phillips lunghe 2,1 mm.
-
Rimuovi la vite a croce Phillips lunga 6 mm dalla parte in fondo della custodia.
-
-
-
Fai leva lentamente e solleva la parte superiore dal corpo della fotocamera.
-
FATTO!
-


Per riassemblare il tuo dispositivo, segui queste istruzioni in ordine inverso.
Per riassemblare il tuo dispositivo, segui queste istruzioni in ordine inverso.
Annulla: non ho completato questa guida.
Altre 8 persone hanno completato questa guida.
Un ringraziamento speciale a questi traduttori:
100%

Questi traduttori ci stanno aiutando ad aggiustare il mondo! Vuoi partecipare?
Inizia a tradurre ›
7 Commenti
Hello community,
my x-t10 is broken: as soon as the camera lens attaches, the screen (also EVF) was blinking, switching on and off, after roughly 20s LCD displays "Lens Error". As described in detail in this post (https://www.fuji-x-forum.com/topic/8121-...), some people were able to disassemble the motherboard and change broken fuses.
Can someone help me to find the correct spare part fuse?
Is there a manual for changing fuses from a motherboard?
Unfortunately I do not have any experience with such projects.
Thanks in advance
Juri
Hi Juri,
Personally I am not a complete beginner, but was not able to identify which is a broken part.
Ended up replacing the motherboard and in the meantime made this manual.
If you feel comfortable in soldering and have patience for microscopic things try to watch some youtube videos about SMD soldering, motherobard repairs, broken fuse and capacitors identification.
You will also likely to need hot air station, as parts are really microscopic, and regular soldering iron will be too large.
Spare fuses can be found for example in DigiKey, or AliExpress.
Best of luck! and please share your experience if you manage to fix it!
I may be able to fix my old board too and make new tutorial as this seems common issue with this camera.
Rimvydas -
Does anyone know what type of fuse this mainboard uses? I saw the issue on the fuji link and figured I'd ask here. Looking to replace the fuses on mine but am not sure what Ampfuse to use. Thanks
Hi, I think I researched what each letter means, and ordered those:
https://www.aliexpress.com/item/40004126...
https://www.aliexpress.com/item/40008129...
But did not have any luck repairing the board.
Please post about what worked or not for you :)
Rimvydas -