Introduzione
Usa questa guida per rimuovere e sostituire il gruppo display e relativo telaio del tuo Huawei P10 Lite.
Se il vetro del display è rotto, posiziona ampie strisce di nastro adesivo su di esso prima di iniziare la riparazione. In questo modo proteggerai gli occhi e favorirà la pulizia.
In fase di riassemblaggio, applica del nuovo adesivo dove necessario.
Cosa ti serve
-
-
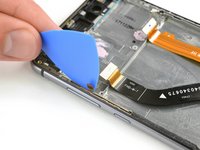
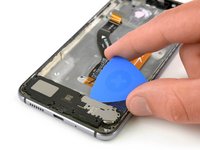
Inserisci la punta di un plettro di apertura tra la cover posteriore e il telaio centrale e fallo scorrere attorno al telefono per tagliare l'adesivo.
-
Può facilitare le cose usare una ventosa per sollevare la cover posteriore e creare una fessura iniziale dove inserire il plettro di apertura.
-
-
-
Rimuovi la vite a croce che tiene in posizione la piastra del connettore della batteria.
-
Rimuovi la piastra del connettore della batteria.
-
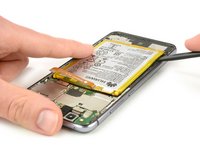
Usa l'estremità piatta di uno spudger per disconnettere il cavo flessibile della batteria.
-
-
-
Usa un iOpener per ammorbidire l'adesivo sotto la batteria.
-
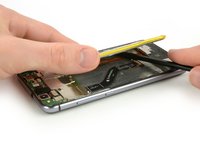
Inserisci uno spudger tra la batteria e il telaio centrale per creare una fessura.
-
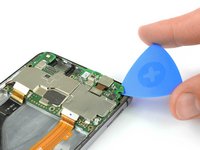
Inserisci un plettro di apertura oppure usa lo spudger nella fessura per tagliare l'adesivo sotto la batteria.
-
-
-
-
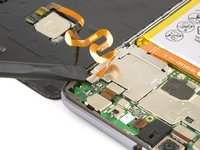
Usa uno strumento di rimozione SIM o una punta cacciavite specifica e premi nel piccolo foro nel vassoio della scheda SIM.
-
Rimuovi il vassoio della scheda SIM.
-
-
Attrezzo utilizzato in questo passaggio:Tweezers$4.99
-
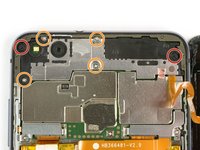
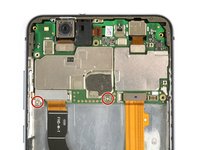
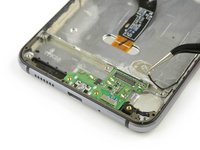
Rimuovi le due viti a croce Phillips #00.
-
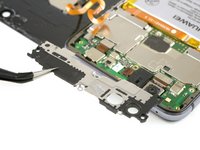
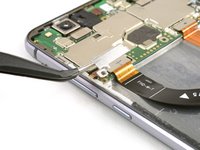
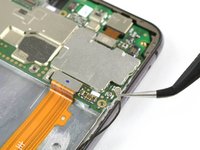
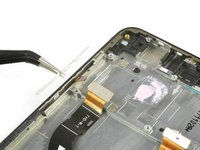
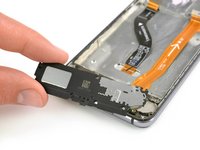
Rimuovi la staffa del cavo flessibile del display con delle pinzette.
-
-
-
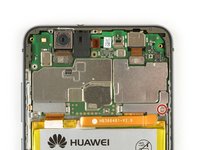
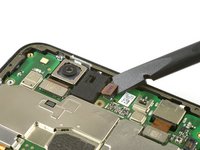
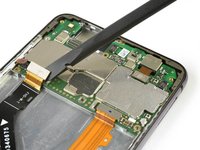
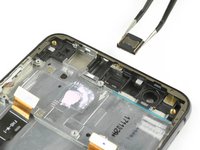
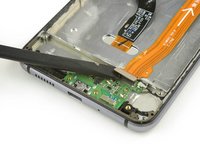
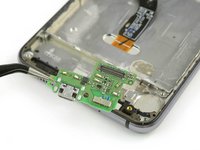
Stacca il cavo di antenna con delle pinzette.
-
I punti di saldatura di alcuni cavi di antenna potrebbero essere fragili, quindi stai attento a non romperli mentre tiri via il cavo dalla scheda madre.
-
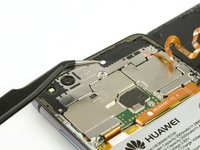
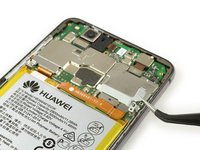
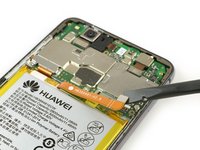
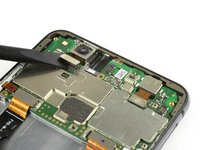
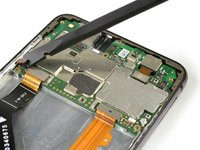
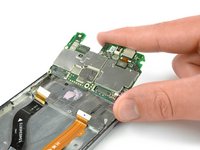
Usa un plettro di apertura per sollevare la scheda madre fino ad avere una buona presa con le dita.
-
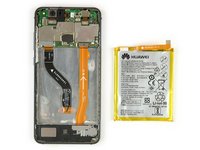
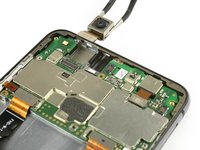
Togli la scheda madre.
-


Per rimontare il tuo dispositivo, segui queste istruzioni in ordine inverso.
Per rimontare il tuo dispositivo, segui queste istruzioni in ordine inverso.
Annulla: non ho completato questa guida.
Altre 12 persone hanno completato questa guida.
Un ringraziamento speciale a questi traduttori:
100%


Questi traduttori ci stanno aiutando ad aggiustare il mondo! Vuoi partecipare?
Inizia a tradurre ›


4 Commenti
Hello!
Thanks for the assembly guide! My phones display glass was broken, and I bought new display with frame (since the frame might have been bent), and this guide proved to be helpful. Though, I ought to mention that you did not show how the upper left metal cover for display port was removed (not that I needed it).
However, I think I slightly damaged the main cord between upper and lower motherboards, the orange one, when I was removing the battery. I can still recharge my phone and listen to music through loudspeaker, but I can not hear or be heard when I am having a phone call with someone. I can use hands-free with a microphone to get around the problem, but I wanted to ask that is it possible for the damaged cord to cause this problem, or could it be something else? I would imagine that I should at least hear the other person even if the cord is slightly damaged.
- Jesse
Hello Jesse
It could be, that cable sends data from the top to the bottom. The micro of the calls is the lower one, so the information could not reach the top if that part is damaged. Look at step 17, in that small plate is the microphone, it could be covered by dirt or not embedded in its hole. But the headset does not depend on that cable, could it have misplaced the headset? Look at step 13, if it is reversed, it will not work.
Oscar -
Hello all!
As we continue getting more and more boards with the same problem, I’d like to point out that you should be very careful when disconnecting the antenna cable. The soldering quality is probably not the best, and this may lead to the antenna cable coming out of the board along with the connector to which it is connected.. This is not so critical, but you will have to do some jewelry work to solder the detached connector.
Thank you for the good guide which helped us to save my son’s phone!
P.S.: I recommend buying the spare parts here - I had ordered the first display on ebay (this was before my brother recommended ifixit to me) and it was broken. The parts from ifixit came in perfect quality.