Salta al contenuto principale

Sony SRS-XB43 Speaker Replacement

Cosa ti serve

  1. Sony SRS-XB43 Speaker Replacement, Faceplate: passo 1, immagine 1 di 2 Sony SRS-XB43 Speaker Replacement, Faceplate: passo 1, immagine 2 di 2
    • Insert the metal spudger into the mesh's seam/opening located at the bottom of the speaker.

    • Begin applying pressure, prying along the run of the seam until the mesh cover begins to come loose.

    • Fully open the hinged mesh cover and pry it off the unit.

  2. Sony SRS-XB43 Speaker Replacement: passo 2, immagine 1 di 1
    • Turn the speaker so the back is facing you.

    • Remove the factory tamper seal below the speaker volume toggle to reveal a single screw.

    • Remove the single screw using a T8 Torx.

  3. Sony SRS-XB43 Speaker Replacement: passo 3, immagine 1 di 1
    • Remove all ten screws using a Phillips #1 screwdriver.

  4. Sony SRS-XB43 Speaker Replacement: passo 4, immagine 1 di 2 Sony SRS-XB43 Speaker Replacement: passo 4, immagine 2 di 2
    • Slowly lift the speaker face off of the housing unit.

    • Unplug the six wires connecting the faceplate to the motherboard.

  5. Sony SRS-XB43 Speaker Replacement, Speaker: passo 5, immagine 1 di 3 Sony SRS-XB43 Speaker Replacement, Speaker: passo 5, immagine 2 di 3 Sony SRS-XB43 Speaker Replacement, Speaker: passo 5, immagine 3 di 3
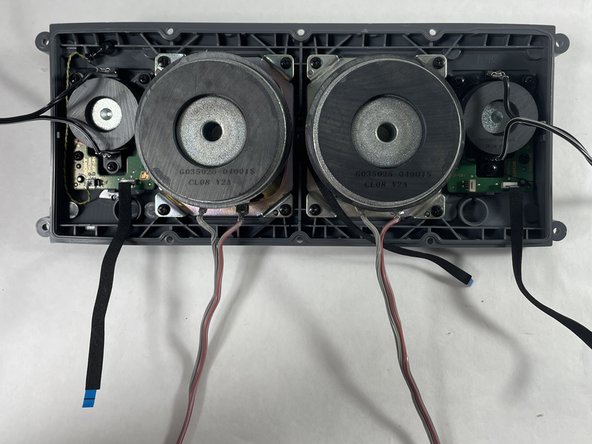
    • On the face plate of the speaker, locate the black ribbon cable plugged into the green circuit board to your right.

    • Grab the ribbon cable from its base and apply a light verticle force upwards to unplug it from the PCB.

    • This step prevents the cable from getting in the way of the right speaker as it is being removed.

  6. Sony SRS-XB43 Speaker Replacement: passo 6, immagine 1 di 1
    • Remove eight black 10 mm screws attached to the speaker plate using a Phillips #1 screwdriver.

  7. Sony SRS-XB43 Speaker Replacement: passo 7, immagine 1 di 2 Sony SRS-XB43 Speaker Replacement: passo 7, immagine 2 di 2
    • Remove the two individual speakers.

Conclusione

To reassemble your device, follow these instructions in reverse order.

Altre 2 persone hanno completato questa guida.

Team

UMass Dartmouth, Team 3-5, Botvin Fall 2022 Membro di UMass Dartmouth, Team 3-5, Botvin Fall 2022

UMASSD-BOTVIN-F22S3G5

4 Membri

5 Guide realizzate

1Commento della guida

Hey I have a question how many pins on the black ribbon cable have where the cable connects to the tweeters into the main board because I accidentally broke the black ribbon cable on the right side end so I only see the two woofer with there strobe lights on and the left tweeter also the strobe works so just the right side doesn’t work so I currently have the lights off

Techspeakerpro45 - Replica

Aggiungi Commento

Visualizza Statistiche:

Ultime 24 Ore: 1

Ultimi 7 Giorni: 12

Ultimi 30 Giorni: 36

Tutti i Tempi: 1,324