Introduzione
Use this guide to remove a faulty Bluetooth component.
Cosa ti serve
-
-
To gain access to the 6 bottom screws remove the following. Remove the adhered 4 corner foam pads on the bottom of the speaker using the blue plastic opening tool to reveal the screws underneath. Remove the adhered 2 center plastic squares.
-
-
-
To remove the speaker grill, first push down slightly on the 2 plastic hook tabs to release them, then push the middle plastic screw tab out.
not sure how to do this.
some how the middle parts is hard to push
Remove the panel NOT by pushing or pulling the centre tab or you will break it. Instead, you’ll see two small tabs that must gently be pushed a little. Do not apply too much force. Once the grille comes loose pull it up. The upper side of the grille simply locks into place by moulded lips that fit into the top section of the product. Take care not to damage the now exposed loudspeakers.
-
-
-
-
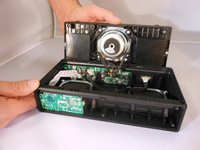
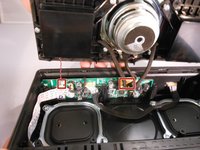
Unplug the 6-pin speaker connector and 2-pin microphone connector from the motherboard by squeezing the sides of the plastic ends.
where can i buy a spare speaker????????
Hey lovely ifixit folk. Could you do us the favour of reading off the first picture the details on the back of the centre driver? I can see from the picture that it say 4ohm but can’t read beyond that.
I’m trying to repair mine and need to replace that centre driver with the closest spec equivalent.
-
-
-
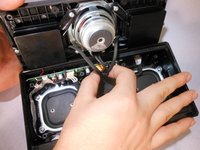
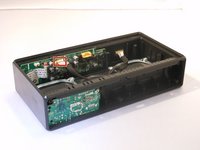
Unplug the cord connected to the motherboard by squeezing the plastic sides.
-
-
-
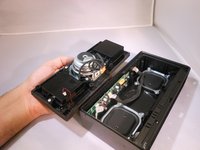
Remove the motherboard.
Good disassembly directions, but titlle is Bluetooth replacement. No parts needed? How do we replace bluetooth part?
-


To reassemble your device, follow these instructions in reverse order.
To reassemble your device, follow these instructions in reverse order.
Annulla: non ho completato questa guida.
Altre 2 persone hanno completato questa guida.

Team

Eastern Washington University, Team 2-6, Mathisen Fall 2016 Membro di Eastern Washington University, Team 2-6, Mathisen Fall 2016
EWU-MATHISEN-F16S2G6
4 Membri
5 Guide realizzate
Be consistent with vocabulary. For example, on the first step you used "foam pieces" and "pads" to identify the same thing and it may be confusing for some users.
Yuri Borges - Replica