Salta al contenuto principale

Questa guida ha delle modifiche più recenti. Passa all'ultima versione non verificata.

Sony PlayStation 3D Display Side Speakers Replacement

Cosa ti serve

  1. Sony PlayStation 3D Display Side Speakers Replacement, Rear Case: passo 1, immagine 1 di 2 Sony PlayStation 3D Display Side Speakers Replacement, Rear Case: passo 1, immagine 2 di 2
    • Remove the base by pushing in the button and sliding out the unit.

  2. Sony PlayStation 3D Display Side Speakers Replacement: passo 2, immagine 1 di 3 Sony PlayStation 3D Display Side Speakers Replacement: passo 2, immagine 2 di 3 Sony PlayStation 3D Display Side Speakers Replacement: passo 2, immagine 3 di 3
    • Remove USB port cover from back plate with a metal spudger.

    • This will prevent the cover from falling under the back plate once it is removed.

  3. Sony PlayStation 3D Display Side Speakers Replacement: passo 3, immagine 1 di 2 Sony PlayStation 3D Display Side Speakers Replacement: passo 3, immagine 2 di 2
    • With the Phillips #02 screwdriver, remove the six 6 mm length x 6 mm head screws from the back plate.

    • With the Phillips #02 screwdriver, remove the ten 6 mm length x 8 mm head screws from the back plate.

    • These screws have different threads and need to be kept separate.

  4. Sony PlayStation 3D Display Side Speakers Replacement: passo 4, immagine 1 di 3 Sony PlayStation 3D Display Side Speakers Replacement: passo 4, immagine 2 di 3 Sony PlayStation 3D Display Side Speakers Replacement: passo 4, immagine 3 di 3
    • Remove back plate with a plastic opening tool by slowing prying around the entire plate.

    • Be gentle to avoid breaking the plastic clips which hold the plate.

    • Once separated the plate easily lifts off.

  5. Sony PlayStation 3D Display Side Speakers Replacement, Side Speakers: passo 5, immagine 1 di 3 Sony PlayStation 3D Display Side Speakers Replacement, Side Speakers: passo 5, immagine 2 di 3 Sony PlayStation 3D Display Side Speakers Replacement, Side Speakers: passo 5, immagine 3 di 3
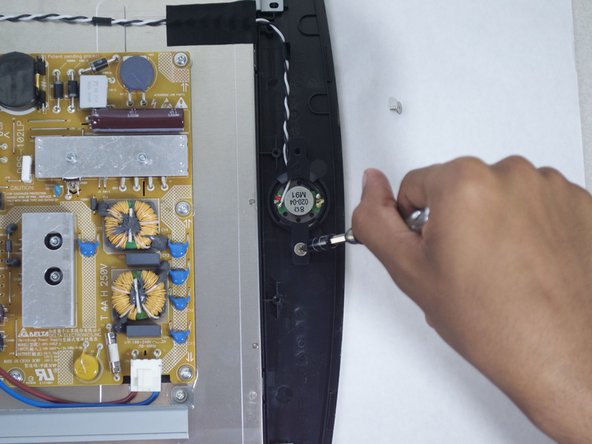
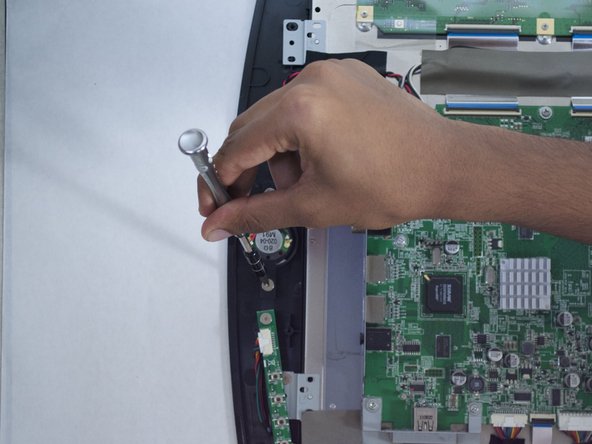
    • With the Phillips #01 screwdriver, remove the four 5 mm length x 7 mm head screws from the assembly (two for each side speaker).

  6. Sony PlayStation 3D Display Side Speakers Replacement: passo 6, immagine 1 di 3 Sony PlayStation 3D Display Side Speakers Replacement: passo 6, immagine 2 di 3 Sony PlayStation 3D Display Side Speakers Replacement: passo 6, immagine 3 di 3
    • Remove the plastic plate covering the speaker.

    • When reassembling, make sure the arrow on the plastic plate is facing up.

    • Lift the speaker out of its holding tray.

  7. Sony PlayStation 3D Display Side Speakers Replacement: passo 7, immagine 1 di 2 Sony PlayStation 3D Display Side Speakers Replacement: passo 7, immagine 2 di 2
    • Remove the speaker by depressing the white tab on the speaker wire connector.

Conclusione

To reassemble your device, follow these instructions in reverse order.

Altre 3 persone hanno completato questa guida.

viharim

Membro da: 10/22/15

200 Reputazione

1 Guida realizzata

Team

Cal Poly, Team 12-16, Maness Fall 2015 Membro di Cal Poly, Team 12-16, Maness Fall 2015

CPSU-MANESS-F15S12G16

4 Membri

8 Guide realizzate

Un commento

Speakers in this page are out of stock, do you think these will work? https://www.amazon.com/Speaker-Speakers-...

Ferserk - Replica

Aggiungi Commento

Visualizza Statistiche:

Ultime 24 Ore: 0

Ultimi 7 Giorni: 0

Ultimi 30 Giorni: 8

Tutti i Tempi: 2,522