Questa versione può contenere modifiche errate. Passa all'ultima istantanea verificata.
Cosa ti serve
-
Questo passaggio è privo di traduzione. Aiuta a tradurlo
-
Remove the base by pushing in the button and sliding out the unit.
-
-
Questo passaggio è privo di traduzione. Aiuta a tradurlo
-
Remove USB port cover from back plate with a metal spudger.
-
-
Questo passaggio è privo di traduzione. Aiuta a tradurlo
-
With the Phillips #02 screwdriver, remove the six 6 mm length x 6 mm head screws from the back plate.
-
With the Phillips #02 screwdriver, remove the ten 6 mm length x 8 mm head screws from the back plate.
-
-
-
Questo passaggio è privo di traduzione. Aiuta a tradurlo
-
Remove back plate with a plastic opening tool by slowing prying around the entire plate.
-
Once separated the plate easily lifts off.
-
-
Questo passaggio è privo di traduzione. Aiuta a tradurlo
-
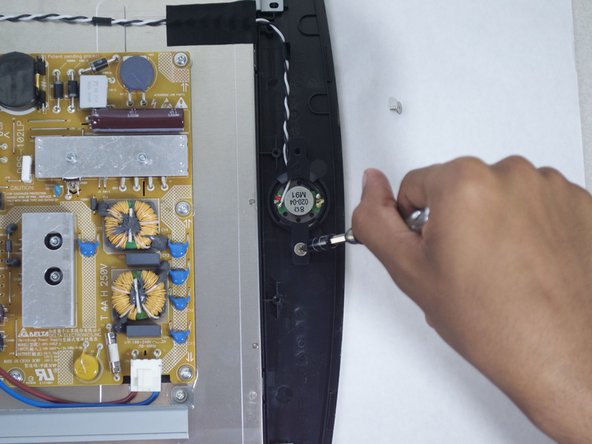
With the Phillips #01 screwdriver, remove the four 5 mm length x 7 mm head screws from the assembly (two for each side speaker).
-
-
Questo passaggio è privo di traduzione. Aiuta a tradurlo
-
Remove the plastic plate covering the speaker.
-
Lift the speaker out of its holding tray.
-
-
Questo passaggio è privo di traduzione. Aiuta a tradurlo
-
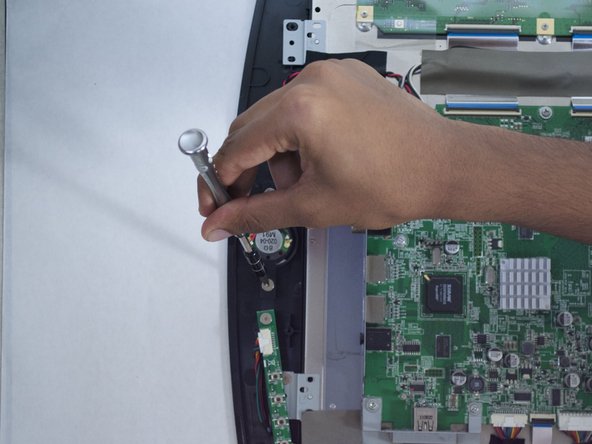
Remove the speaker by depressing the white tab on the speaker wire connector.
-


Annulla: non ho completato questa guida.
Altre 3 persone hanno completato questa guida.
Team

Cal Poly, Team 12-16, Maness Fall 2015 Membro di Cal Poly, Team 12-16, Maness Fall 2015
CPSU-MANESS-F15S12G16
4 Membri
8 Guide realizzate
Un commento
Speakers in this page are out of stock, do you think these will work? https://www.amazon.com/Speaker-Speakers-...