Salta al contenuto principale

Solio Rocsta Charging Cable Replacement

Cosa ti serve

  1. Solio Rocsta Charging Cable Replacement, Charging Cable: passo 1, immagine 1 di 2 Solio Rocsta Charging Cable Replacement, Charging Cable: passo 1, immagine 2 di 2
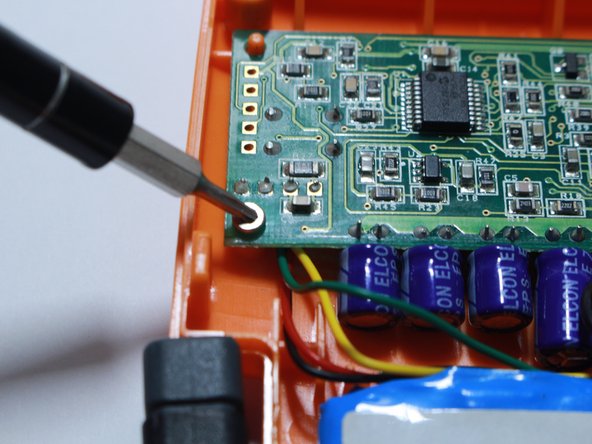
    • Locate, and unscrew, the three 5.72 mm screws that hold down the top cover using the T6 Torx screwdriver.

  2. Solio Rocsta Charging Cable Replacement: passo 2, immagine 1 di 2 Solio Rocsta Charging Cable Replacement: passo 2, immagine 2 di 2
    • Remove top cover.

    • Caution: the solar cell is attached to the top cover and connected to the circuit board by a short wire.

  3. Solio Rocsta Charging Cable Replacement: passo 3, immagine 1 di 1
    • Using the spudger, pry the battery off the back cover.

  4. Solio Rocsta Charging Cable Replacement: passo 4, immagine 1 di 1
    • Unscrew the 5.66 mm screws attaching the circuit board to the case.

  5. Solio Rocsta Charging Cable Replacement: passo 5, immagine 1 di 1
    • With the circuit board flipped, locate the battery connector.

    • Hold the component attached to the circuit board the battery is connected to and wiggle the cable out.

  6. Solio Rocsta Charging Cable Replacement: passo 6, immagine 1 di 1
    • With a Soldering Iron, desolder the four cables that connect the charging cable to the circuit board.

    • The power cable is a series of four cables. Make note of each cable placement for easy resoldering.

    • For more information on how to solder and desolder connections, please visit this guide.

Conclusione

To reassemble your device, follow these instructions in reverse order.

David Vazquez

Membro da: 10/10/17

577 Reputazione

5 Guide realizzate

Team

USF Tampa, Team S13-G13, Cagle Fall 2017 Membro di USF Tampa, Team S13-G13, Cagle Fall 2017

USFT-CAGLE-F17S13G13

4 Membri

6 Guide realizzate

0 Commenti

Aggiungi Commento

Visualizza Statistiche:

Ultime 24 Ore: 0

Ultimi 7 Giorni: 1

Ultimi 30 Giorni: 1

Tutti i Tempi: 181