Introduzione
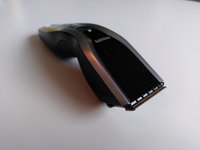
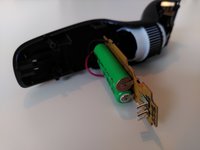
Un veloce smontaggio del mio Philips HC5450 1415 /A. Dovevo cambiare le batterie.
Cosa ti serve
-
-
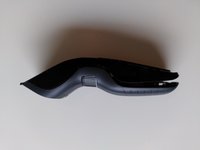
Per prima cosa, bisogna togliere la parte davanti, come si fa normalmente quando si pulisce.
-
-
-
Stacca la guarnizione argentata. È fissata saldamente. Inizia dal davanti e prosegui. Sul davanti, ha delle linguette con un grande gancio, quindi si smonterà completamente quando le avrai allentate di molto e riuscirai ad allargarle un po'.
-
Durante questo passaggio, ho rotto l'ultimo gancio della guarnizione. Peccato, ma rimane ancora salda quando viene riassemblata.
-
-
-
-
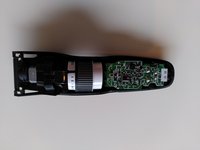
Smonta la parte nera superiore. Io ho iniziato dal basso. È fissata da dei gancetti ma non saldamente quanto la guarnizione argentata.
-
-
-
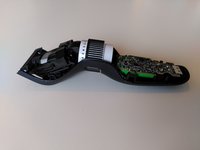
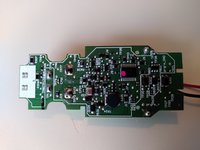
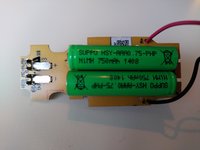
Adesso si può tirare fuori il PCB. Il collegamento tra i poli di ricarica non è avvitato o saldato, ma un connettore a forma di U bloccato solo dall'attrito.
-
-
-
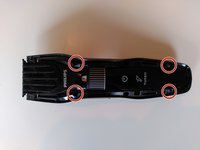
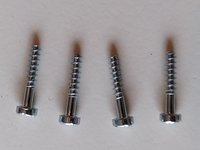
L'assemblaggio è tenuto insieme da una vite Torx T8, identica a quelle del passo 3.
-
L'anello dell'apparecchio che regola la lunghezza può scorrere in basso. Una piccola molla verrà fuori, non perderla! Serve per fare lo scatto quando viene ruotato l'anello.
-
Non ho smontato ulteriormente questo apparecchio.
-


Per rimettere insieme il tuo dispositivo, segui questi passaggi in ordine inverso.
Per rimettere insieme il tuo dispositivo, segui questi passaggi in ordine inverso.
Annulla: non ho completato questa guida.
Altre 11 persone hanno completato questa guida.
Un ringraziamento speciale a questi traduttori:
100%

Questi traduttori ci stanno aiutando ad aggiustare il mondo! Vuoi partecipare?
Inizia a tradurre ›
8 Commenti
You helped me replace batteries in otherwise completely fine trimmer. Thanks!
Anyway I also snapped the last silver clip...
I joined ifixit just to say thank you for this. Trimmer working perfectly other than a dead battery. I just couldn't see how to get into it until I found this guide. Some advice for others:
Use the pry bar around every part of the bezel. I left the very bottom catch attached and broke it pulling on it. On the other hand, if you have to break one catch, that one is the least important.
A credit card makes a very good pry bar.
This battery seems better than the original in several ways: https://www.amazon.co.uk/dp/B0921ZJX11. It is cheaper. It is easier to install. It will likely be easier to uninstall.
Thanks for your help. All went as you described it - even the small broken pin :-)
Unfortunately I couldn’t replace the batteries, because they are welded to the PCB. Phillips don’t want the lifespan of their devises to be easily extended…
Just unsolder it from the circuit board. Obviously that requires a soldering iron and a solder sucker, but those are very useful purchases if you don't already own them. If you then replace with the battery I suggest, you wont even need the solder sucker next time you need to do the job.