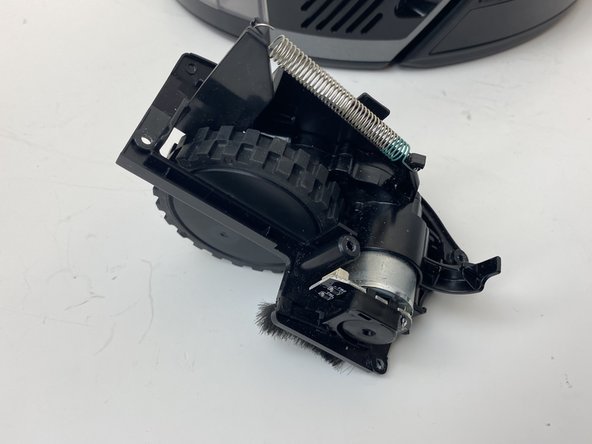
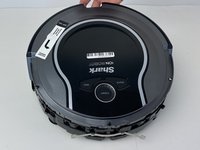
Salta al contenuto principale

Shark ION Robot R75 Side Brush Motor Replacement

Cosa ti serve

  1. Shark ION Robot R75 Side Brush Motor Replacement, Battery: passo 1, immagine 1 di 3 Shark ION Robot R75 Side Brush Motor Replacement, Battery: passo 1, immagine 2 di 3 Shark ION Robot R75 Side Brush Motor Replacement, Battery: passo 1, immagine 3 di 3
    • Make sure the robot is shut off by pressing the power button on top.

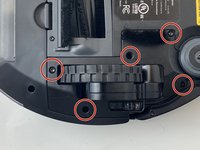
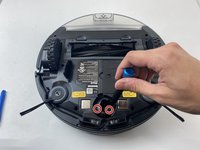
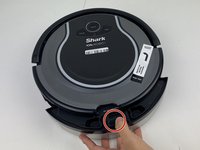
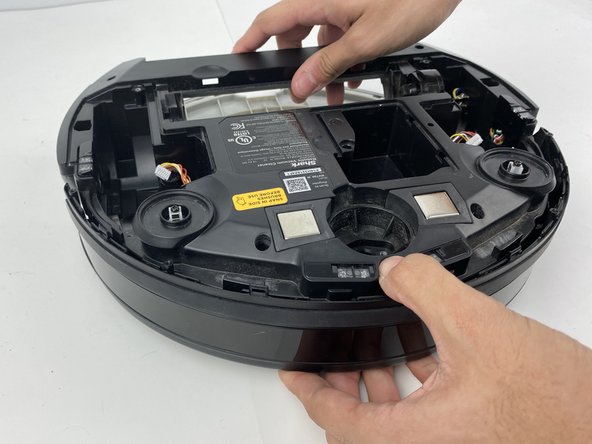
    • Flip the R75 over so that the underside is facing up.

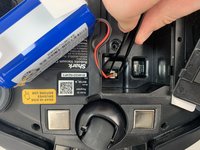
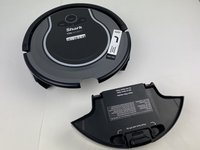
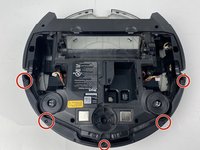
    • Using a Phillips #1 screwdriver, remove the 4mm screw in the battery cover.

    • Remove the battery cover.

  2. Shark ION Robot R75 Side Brush Motor Replacement: passo 2, immagine 1 di 3 Shark ION Robot R75 Side Brush Motor Replacement: passo 2, immagine 2 di 3 Shark ION Robot R75 Side Brush Motor Replacement: passo 2, immagine 3 di 3
    • Be careful when removing the battery, as it will still be connected to a wire.

    • Slowly pull the white tabs outward to remove the battery.

  3. Shark ION Robot R75 Side Brush Motor Replacement: passo 3, immagine 1 di 2 Shark ION Robot R75 Side Brush Motor Replacement: passo 3, immagine 2 di 2
    • Be careful when removing the connector, as the part can break if too much force is used.

    • Push down on the tab of the battery connector using a set of tweezers and pull the connector away from the robot to free the wire.

    • Remove the battery from the device.

  4. Shark ION Robot R75 Side Brush Motor Replacement, Main Brush: passo 4, immagine 1 di 1
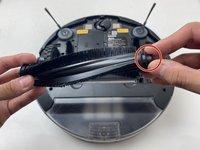
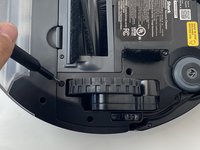
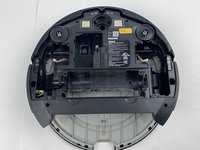
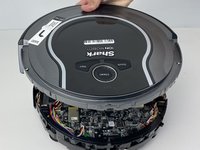
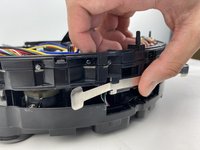
    • Push on the two tabs on the edge of the main brush cover and pull up to remove the cover.

  5. Shark ION Robot R75 Side Brush Motor Replacement: passo 5, immagine 1 di 1
    • Pull the main brush slightly to the right to remove it from the compartment.

  6. Shark ION Robot R75 Side Brush Motor Replacement: passo 6, immagine 1 di 2 Shark ION Robot R75 Side Brush Motor Replacement: passo 6, immagine 2 di 2
    • Remove the rubber end cap indicated by the red circle.

    • This step is not needed for a replacement. However, it is important for maintenance. Hair will build up in this area over time, and will cause error messages to pop up, as well as stopping the R75 from cleaning and moving.

    • Inspect this component at least every six months. This time may be less if you have animals.

  7. Shark ION Robot R75 Side Brush Motor Replacement, Side Brush: passo 7, immagine 1 di 3 Shark ION Robot R75 Side Brush Motor Replacement, Side Brush: passo 7, immagine 2 di 3 Shark ION Robot R75 Side Brush Motor Replacement, Side Brush: passo 7, immagine 3 di 3
    • Grab the side brushes by the plastic tab at the base of the bristles, and gently lift up.

    • It's recommended to clean the area with a dry microfiber cloth during replacement, as debris can collect beneath the brush during use.

  8. Shark ION Robot R75 Side Brush Motor Replacement, Drive Wheel Assembly: passo 8, immagine 1 di 1
    • Flip the R75 to its underside.

    • Make sure the R75 is shut off.

    • For extra security, disconnect the battery by following the prerequisite guide.

  9. Shark ION Robot R75 Side Brush Motor Replacement: passo 9, immagine 1 di 3 Shark ION Robot R75 Side Brush Motor Replacement: passo 9, immagine 2 di 3 Shark ION Robot R75 Side Brush Motor Replacement: passo 9, immagine 3 di 3
    • Using a Torx T15 screwdriver, remove the five screws from the drive wheel assembly.

    • Carefully lift the drive wheel assembly from the wheel well by gently pulling up on the wheel.

    • The assembly will still be connected to the motherboard via a cable, so be sure not to pull so hard that the cable rips.

  10. Shark ION Robot R75 Side Brush Motor Replacement: passo 10, immagine 1 di 3 Shark ION Robot R75 Side Brush Motor Replacement: passo 10, immagine 2 di 3 Shark ION Robot R75 Side Brush Motor Replacement: passo 10, immagine 3 di 3
    • Flip the wheel assembly over and disconnect the cable connector on its underside.

    • Remove the drive wheel assembly.

    • Repeat this process for the other side if necessary.

  11. Shark ION Robot R75 Side Brush Motor Replacement, Shark ION Robot R75 Caster Wheel: passo 11, immagine 1 di 1
    • Orient the device with the bottom facing up.

  12. Shark ION Robot R75 Side Brush Motor Replacement: passo 12, immagine 1 di 3 Shark ION Robot R75 Side Brush Motor Replacement: passo 12, immagine 2 di 3 Shark ION Robot R75 Side Brush Motor Replacement: passo 12, immagine 3 di 3
    • Using a plastic opening tool, pry first one side of the wheel, then the other out of the caster.

    • Remove the wheel.

  13. Shark ION Robot R75 Side Brush Motor Replacement: passo 13, immagine 1 di 3 Shark ION Robot R75 Side Brush Motor Replacement: passo 13, immagine 2 di 3 Shark ION Robot R75 Side Brush Motor Replacement: passo 13, immagine 3 di 3
    • Using a Torx TR9 screwdriver, remove both screws from the caster assembly beneath the wheel.

    • Pull the caster assembly up from its slot in the device.

  14. Shark ION Robot R75 Side Brush Motor Replacement, Top Cover: passo 14, immagine 1 di 3 Shark ION Robot R75 Side Brush Motor Replacement, Top Cover: passo 14, immagine 2 di 3 Shark ION Robot R75 Side Brush Motor Replacement, Top Cover: passo 14, immagine 3 di 3
    • Push down on the black tab and remove the dust bin

  15. Shark ION Robot R75 Side Brush Motor Replacement: passo 15, immagine 1 di 2 Shark ION Robot R75 Side Brush Motor Replacement: passo 15, immagine 2 di 2
    • Using a Torx TR15 screwdriver, remove the five screws from the bottom cover.

  16. Shark ION Robot R75 Side Brush Motor Replacement: passo 16, immagine 1 di 3 Shark ION Robot R75 Side Brush Motor Replacement: passo 16, immagine 2 di 3 Shark ION Robot R75 Side Brush Motor Replacement: passo 16, immagine 3 di 3
    • Make sure the robot is facing rearward

    • Using a Torx TR15 screwdriver, remove the five screws along the front edge of the device.

    • Pull the bottom part of the bump guard away from the body of the device.

  17. Shark ION Robot R75 Side Brush Motor Replacement: passo 17, immagine 1 di 3 Shark ION Robot R75 Side Brush Motor Replacement: passo 17, immagine 2 di 3 Shark ION Robot R75 Side Brush Motor Replacement: passo 17, immagine 3 di 3
    • Lift the top cover up from the rear of the robot to separate the top cover from the rest of the robot.

    • Be careful when separating the top from the rest of the robot, as the plastic clips can break if excessive force is applied.

    • From here, easy access to all sensors, the main brush motor, and the fan are all granted.

  18. Shark ION Robot R75 Side Brush Motor Replacement, Side Sensor: passo 18, immagine 1 di 2 Shark ION Robot R75 Side Brush Motor Replacement, Side Sensor: passo 18, immagine 2 di 2
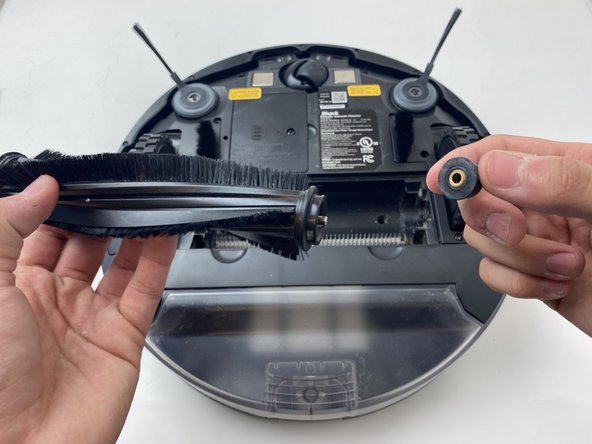
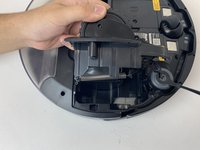
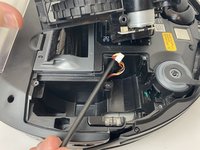
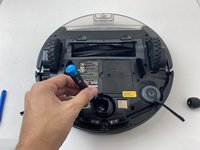
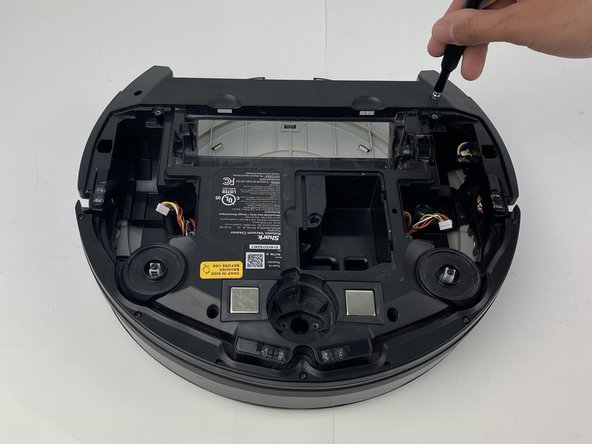
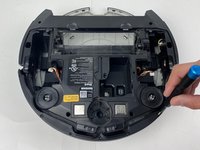
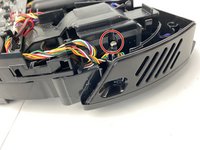
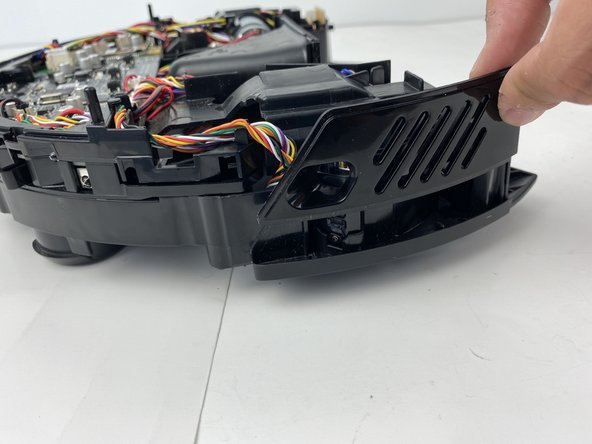
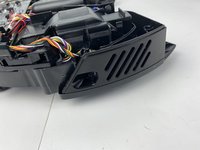
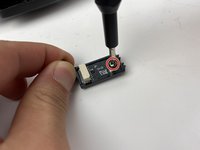
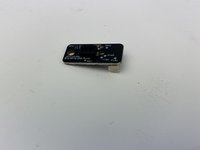
    • Using a Phillips #00 screwdriver, remove the screw holding down the diagonally vented side cover.

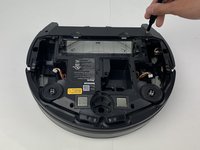
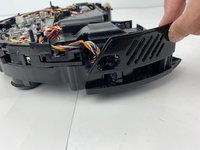
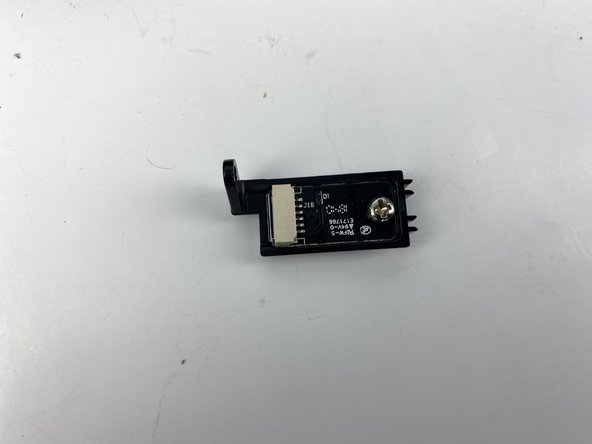
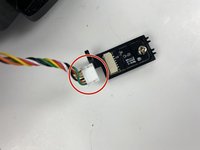
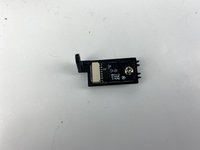
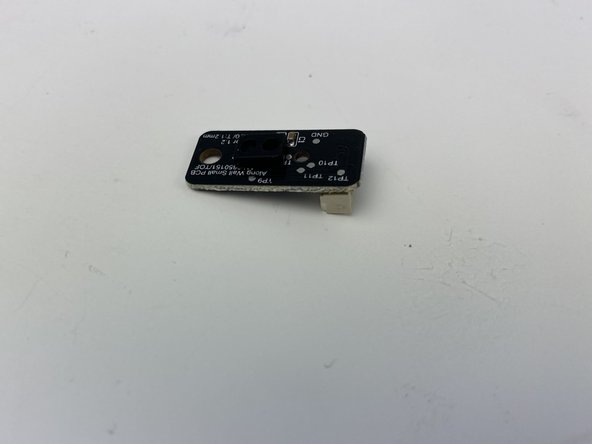
    • Slide the sensor out from the base of the robot

  19. Shark ION Robot R75 Side Brush Motor Replacement: passo 19, immagine 1 di 2 Shark ION Robot R75 Side Brush Motor Replacement: passo 19, immagine 2 di 2
    • Lift up the diagonally vented cover on the side of the robot containing the side sensor.

  20. Shark ION Robot R75 Side Brush Motor Replacement: passo 20, immagine 1 di 2 Shark ION Robot R75 Side Brush Motor Replacement: passo 20, immagine 2 di 2
    • Disconnect the white connector from the sensor.

  21. Shark ION Robot R75 Side Brush Motor Replacement: passo 21, immagine 1 di 2 Shark ION Robot R75 Side Brush Motor Replacement: passo 21, immagine 2 di 2
    • Using a Phillips #00 screwdriver, remove the screw on the sensor.

    • Remove the sensor from its mount.

  22. Shark ION Robot R75 Side Brush Motor Replacement, Side Brush Motor: passo 22, immagine 1 di 2 Shark ION Robot R75 Side Brush Motor Replacement, Side Brush Motor: passo 22, immagine 2 di 2
    • Make sure that both the left and right side sensors have been removed from their compartments.

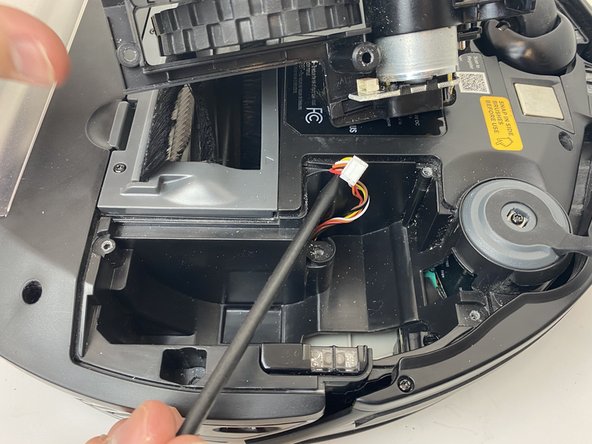
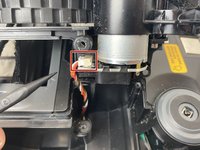
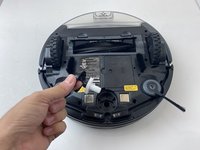
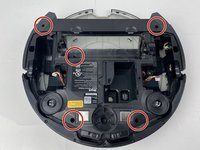
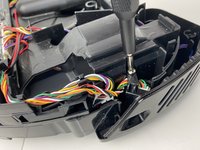
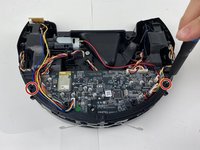
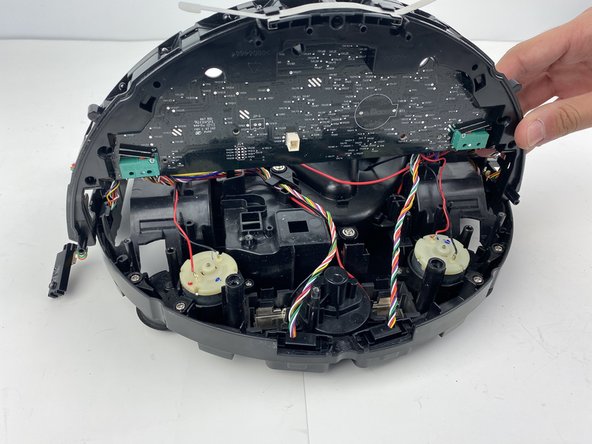
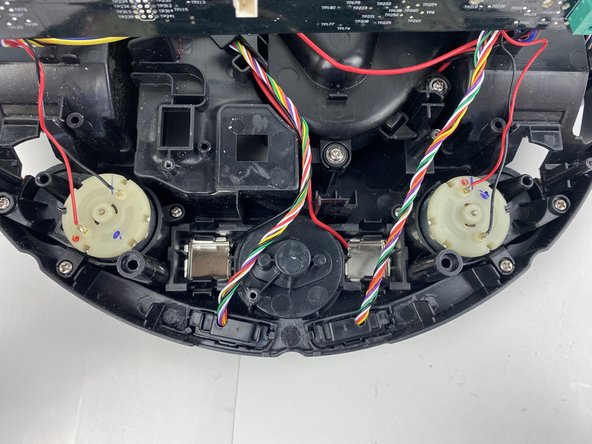
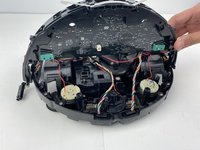
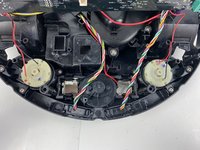
    • Using a Phillips #0 screwdriver, remove the two screws on either side of the motherboard.

  23. Shark ION Robot R75 Side Brush Motor Replacement: passo 23, immagine 1 di 3 Shark ION Robot R75 Side Brush Motor Replacement: passo 23, immagine 2 di 3 Shark ION Robot R75 Side Brush Motor Replacement: passo 23, immagine 3 di 3
    • Place your fingers in the groove right above the bump sensor.

    • Carefully lift the motherboard and plastic assembly up to expose the motors and charging contacts.

  24. Shark ION Robot R75 Side Brush Motor Replacement: passo 24, immagine 1 di 1
    • Lift the malfunctioning motor from its slot in the device.

    • Desolder the two connections on the faulty motor.

    • If you're unfamiliar with soldering techniques and best practices, check out our How to Solder and Desolder Connections guide!

Conclusione

To reassemble your device, follow these instructions in reverse order.

Altre 4 persone hanno completato questa guida.

5 Commenti

What is the motor part that is being replaced?

Cheryl Bobo - Replica

I have a different question.

My ion 75 will clean for three minutes, and then it returns to dock. I have cleaned everything underneath but have not unscrewed anything. Popped the wheels and brushes and used Qtip on the side sensors. I charged directly from the wall (bypassing the charger) and had the same result….. three minutes cleaning and returns to dock.

Am I being premature to suspect a battery replacement is needed? This detailed article of yours has me wondering.

flea

Gail Burgess - Replica

My ion RV870 series just stopped working flashes blue max. I have checked all components and cleaned. It has a good charge. I see no dysfunction what so ever. How do I get it working again?? I'm out of ideas because everything seems to be functional and clean.

Gina Madore - Replica

These were awesome instructions for me. Mine had hair wrapped around the brush motor spindle. Before fix it would come off the dock and stop after like 1 foot. After tear down and full clean, it went over an hour. Thank you!

Naz Lazar - Replica

I have the Shark IQ, this was very similar and absolutely awesome. Thanks so much

Lance Plummer - Replica

Aggiungi Commento

Visualizza Statistiche:

Ultime 24 Ore: 3

Ultimi 7 Giorni: 26

Ultimi 30 Giorni: 69

Tutti i Tempi: 7,799