Salta al contenuto principale

Samsung SGH-E317 Camera Replacement

Cosa ti serve

  1. Samsung SGH-E317 Camera Replacement, Battery: passo 1, immagine 1 di 1
    • Remove the back panel by pressing up on switch, located at the top on the back of the phone.

    • You may want to use a plastic opening tool to help pry the back panel off.

  2. Samsung SGH-E317 Camera Replacement, Motherboard: passo 2, immagine 1 di 1
    • Unscrew the four 4.5mm screws located on the back plate.

  3. Samsung SGH-E317 Camera Replacement: passo 3, immagine 1 di 1
    • Remove the rubber screw cover using your fingernail.

  4. Samsung SGH-E317 Camera Replacement: passo 4, immagine 1 di 1
    • Unscrew the 4.5mm screw located underneath the rubber cover.

  5. Samsung SGH-E317 Camera Replacement: passo 5, immagine 1 di 1
    • Wedge the end of a plastic opening tool into the crack between the back panel and the phone.

    • The panel should come off without much effort.

  6. Samsung SGH-E317 Camera Replacement: passo 6, immagine 1 di 1
    • With the back panel removed, the motherboard should be fully exposed.

  7. Samsung SGH-E317 Camera Replacement: passo 7, immagine 1 di 2 Samsung SGH-E317 Camera Replacement: passo 7, immagine 2 di 2
    • Remove the camera and volume buttons and place them in a safe spot until reassembly.

  8. Samsung SGH-E317 Camera Replacement: passo 8, immagine 1 di 2 Samsung SGH-E317 Camera Replacement: passo 8, immagine 2 di 2
    • Using a plastic opening tool, unplug the ribbon cable connecting the front LCDs to the motherboard.

  9. Samsung SGH-E317 Camera Replacement: passo 9, immagine 1 di 2 Samsung SGH-E317 Camera Replacement: passo 9, immagine 2 di 2
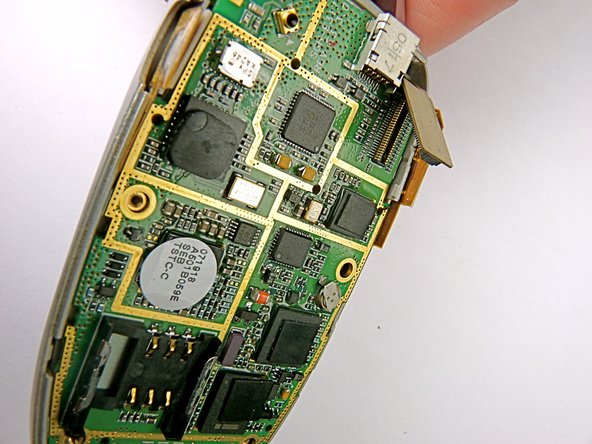
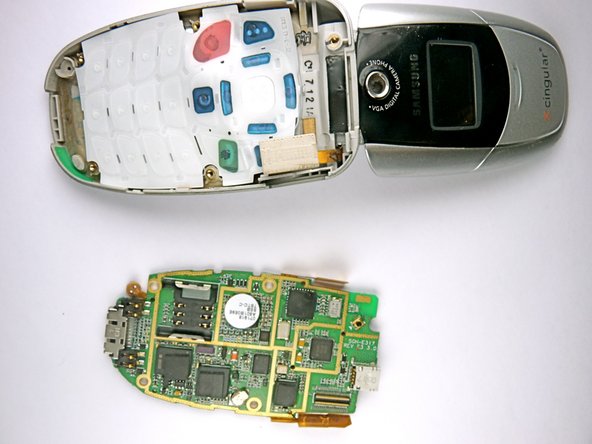
    • Detach the motherboard by grabbing the edges of it and lifting it straight out of the phone.

  10. Samsung SGH-E317 Camera Replacement, Camera: passo 10, immagine 1 di 2 Samsung SGH-E317 Camera Replacement, Camera: passo 10, immagine 2 di 2
    • Use a spudger to remove the plastic screw coverings at the base of the LCD screen.

  11. Samsung SGH-E317 Camera Replacement: passo 11, immagine 1 di 1
    Attrezzo utilizzato in questo passaggio:
    Tweezers
    $4.99
    Compra
    • Use the screwdriver to remove the two 4.5mm screws located underneath the plastic coverings.

    • You may want to use tweezers to remove the loosened screws.

  12. Samsung SGH-E317 Camera Replacement: passo 12, immagine 1 di 1
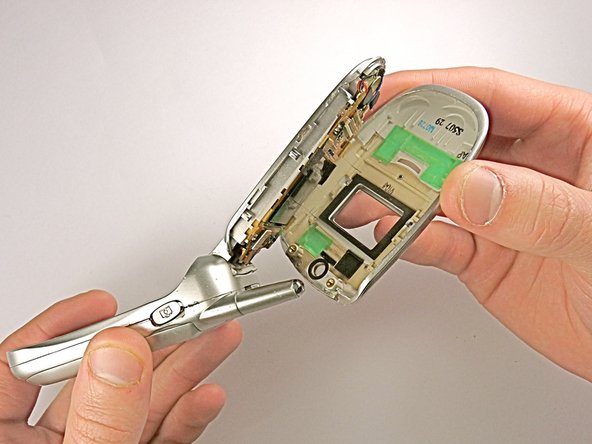
    • Wedge the plastic opening tool under the crevice on the inner surface of the phone screen.

    • Gently pry the top panel off around the entire frame.

  13. Samsung SGH-E317 Camera Replacement: passo 13, immagine 1 di 2 Samsung SGH-E317 Camera Replacement: passo 13, immagine 2 di 2
    • Make sure that the top panel is completely separated from the LCD display around the entire perimeter.

  14. Samsung SGH-E317 Camera Replacement: passo 14, immagine 1 di 1
    • Take the top panel off of the phone.

  15. Samsung SGH-E317 Camera Replacement: passo 15, immagine 1 di 2 Samsung SGH-E317 Camera Replacement: passo 15, immagine 2 di 2
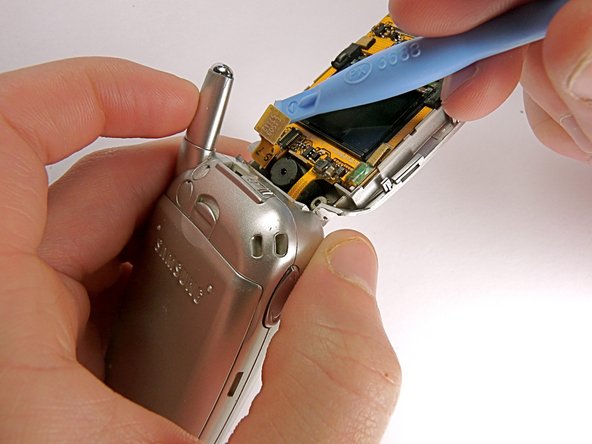
    • Use the wedge to detach the connecting wire panel from the LCD display system.

    • Be gentle when detatching this wire to prevent damaging surrounding components.

  16. Samsung SGH-E317 Camera Replacement: passo 16, immagine 1 di 2 Samsung SGH-E317 Camera Replacement: passo 16, immagine 2 di 2
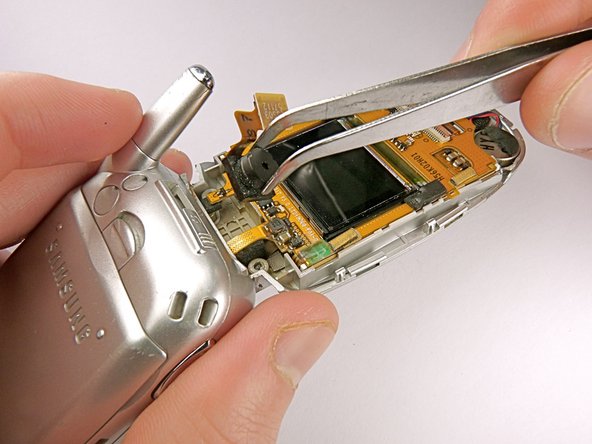
    • Use the tweezers to remove the camera from the cellphone casing.

Conclusione

To reassemble your device, follow these instructions in reverse order.Take your e-waste to an R2 or e-Stewards certified recycler.

Michael Strange

Membro da: 01/30/11

101 Reputazione

1 Guida realizzata

Team

Cal Poly, Team 11-23, Maness Winter 2011 Membro di Cal Poly, Team 11-23, Maness Winter 2011

CPSU-MANESS-W11S11G23

4 Membri

10 Guide realizzate

0 Commenti

Aggiungi Commento

Visualizza Statistiche:

Ultime 24 Ore: 0

Ultimi 7 Giorni: 0

Ultimi 30 Giorni: 6

Tutti i Tempi: 1,535