Questa versione può contenere modifiche errate. Passa all'ultima istantanea verificata.
Cosa ti serve
-
Questo passaggio è privo di traduzione. Aiuta a tradurlo
-
Using a plastic opening tool, wedge in the seam between the screen and the case.
-
Rock the tool by moving it towards and away from the middle of the screen, trying to separate the tape holding the screen and case together.
-
-
Questo passaggio è privo di traduzione. Aiuta a tradurlo
-
After separating the latches holding the screen and case together, slowly take the screen off the case.
-
-
Questo passaggio è privo di traduzione. Aiuta a tradurlo
-
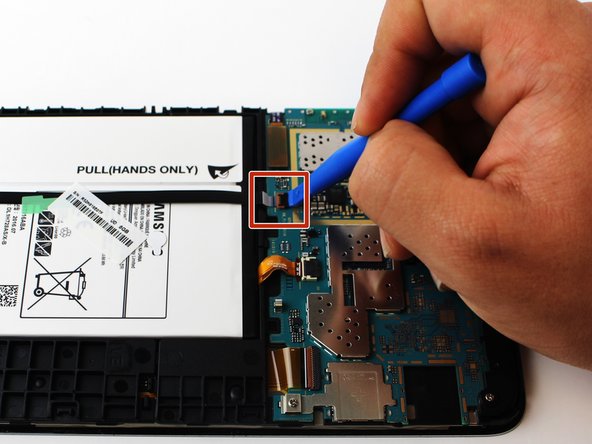
Use the plastic opening tool to lift up the black ZIF (zero insertion force) connector.
-
Use your hands to pull the black cable out of its slot.
-
-
-
Questo passaggio è privo di traduzione. Aiuta a tradurlo
-
Use the plastic opening tool to lift the ZIF (zero insertion force) connector holding the ribbon cable.
-
Pull out the battery's ribbon cable.
-
-
Questo passaggio è privo di traduzione. Aiuta a tradurlo
-
Use the plastic opening tool to lift up the latch to the ribbon cable.
-
Remove the ribbon cable from the connector.
-
-
Questo passaggio è privo di traduzione. Aiuta a tradurlo
-
Remove the seven 4mm PH000 screws holding the motherboard in place.
-
-
Questo passaggio è privo di traduzione. Aiuta a tradurlo
-
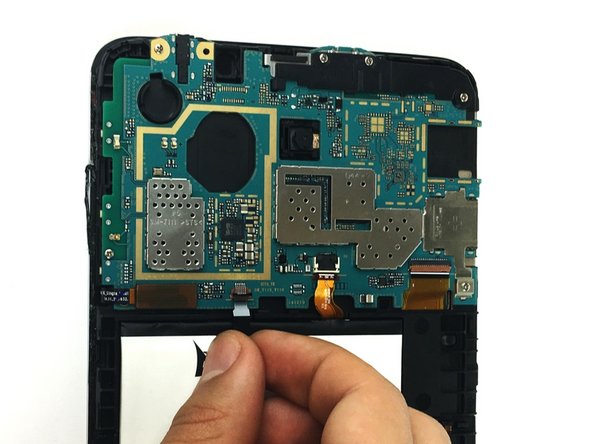
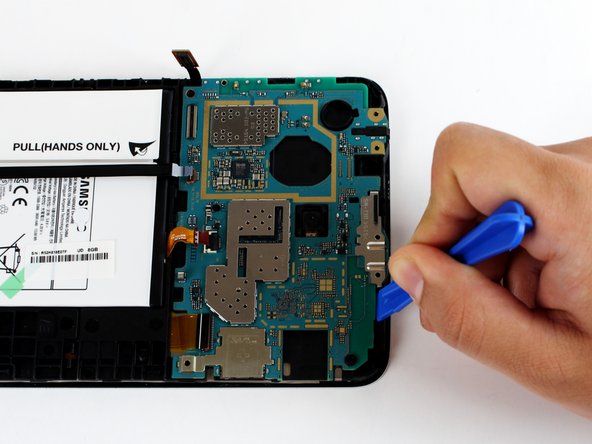
Use the plastic opening tool to pry up the tab holding the motherboard in place.
-
-
Questo passaggio è privo di traduzione. Aiuta a tradurlo
-
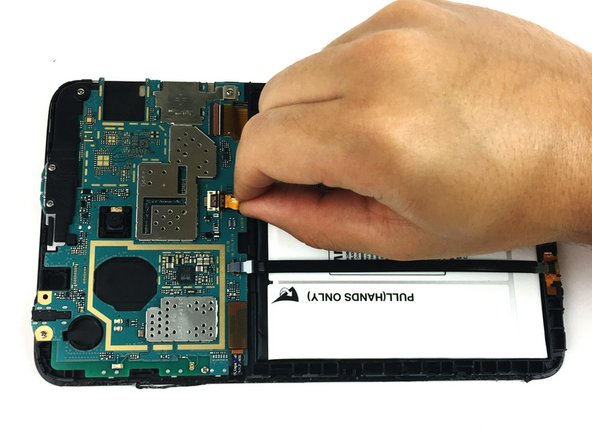
Use the precision tweezers to remove the black plastic corner on top of the motherboard.
-
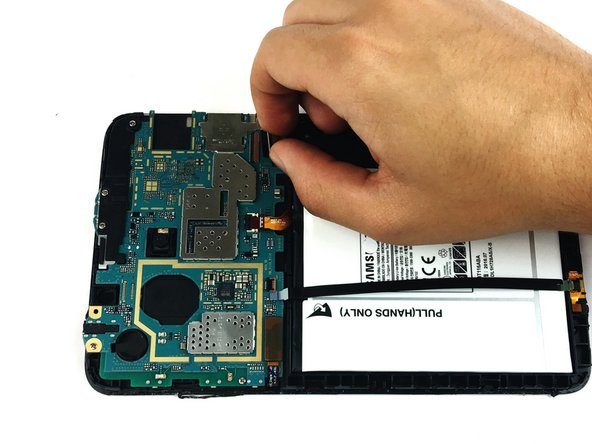
Use the plastic opening tool to pull the motherboard out of the case.
-
-
Questo passaggio è privo di traduzione. Aiuta a tradurlo
-
Use a soldering iron to heat 4 spots of solder from the motherboard.
-
Use precision tweezers to remove the charging port.
-


Annulla: non ho completato questa guida.
Un'altra persona ha completato questa guida.

Team

USF Tampa, Team S19-G2, Hoffman Spring 2017 Membro di USF Tampa, Team S19-G2, Hoffman Spring 2017
USFT-HOFFMAN-S17S19G2
4 Membri
7 Guide realizzate