Questa versione può contenere modifiche errate. Passa all'ultima istantanea verificata.
Cosa ti serve
-
Questo passaggio è privo di traduzione. Aiuta a tradurlo
-
Insert a fingernail or the flat end of a spudger into the divot to the left of the rear-facing camera.
-
Gently pry the rear cover away from the phone until all the plastic clips holding the cover are released.
-
-
Questo passaggio è privo di traduzione. Aiuta a tradurlo
-
Insert a fingernail or the flat end of a spudger into the divot below the battery pack.
-
Pry the battery pack out of its recess.
-
Remove the battery pack.
-
-
Questo passaggio è privo di traduzione. Aiuta a tradurlo
-
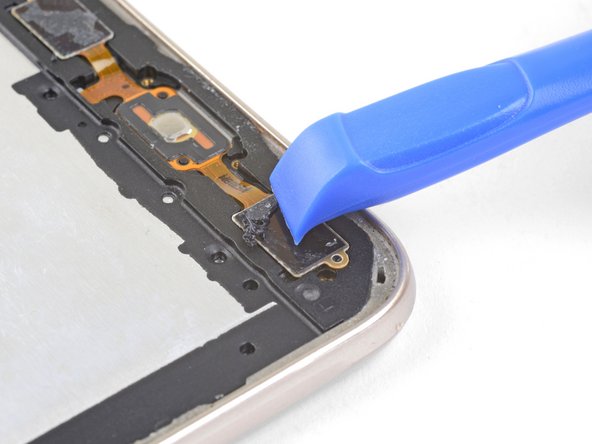
Insert the edge of an opening tool into the divot on the display connector cover. The cover is located on the left edge above the battery recess.
-
Pry the display connector cover out of its recess.
-
Remove the display connector cover.
-
-
Questo passaggio è privo di traduzione. Aiuta a tradurlo
-
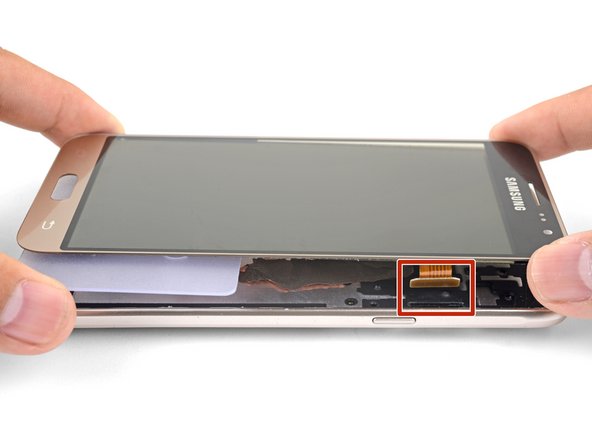
Insert the flat end of a spudger underneath the display connector.
-
Pry up to disconnect the display connector.
-
-
Questo passaggio è privo di traduzione. Aiuta a tradurlo
-
Flip the phone over.
-
Heat an iOpener and apply it to the right edge of the phone for a minute.
-
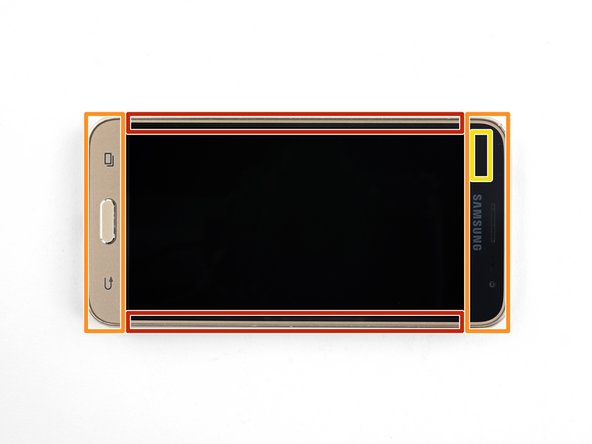
Thin adhesive bordering the display panel
-
Thick adhesive holding the top and bottom bezels
-
The digitizer cable, which will hinder slicing if hit
-
-
-
Questo passaggio è privo di traduzione. Aiuta a tradurlo
-
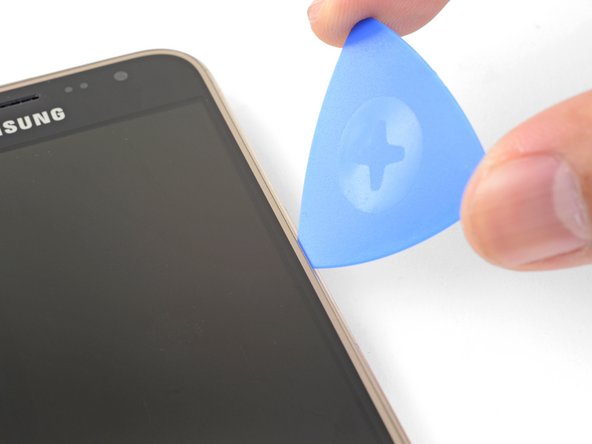
Firmly press an opening pick into the right edge seam of the phone, until the point slides in between the frame and the display glass.
-
-
Questo passaggio è privo di traduzione. Aiuta a tradurlo
-
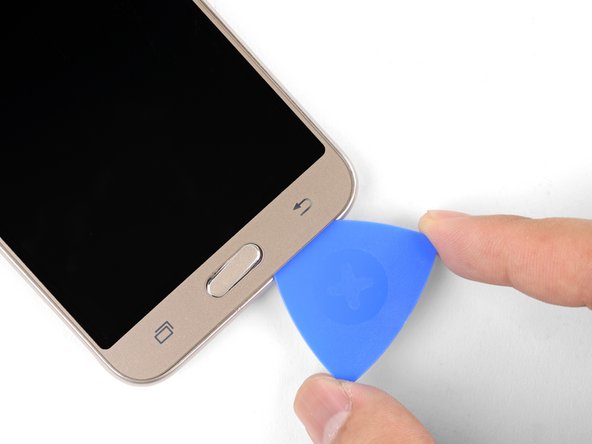
Once the pick's point is in the seam, slowly slide the opening pick along the right edge to separate the adhesive.
-
-
Questo passaggio è privo di traduzione. Aiuta a tradurlo
-
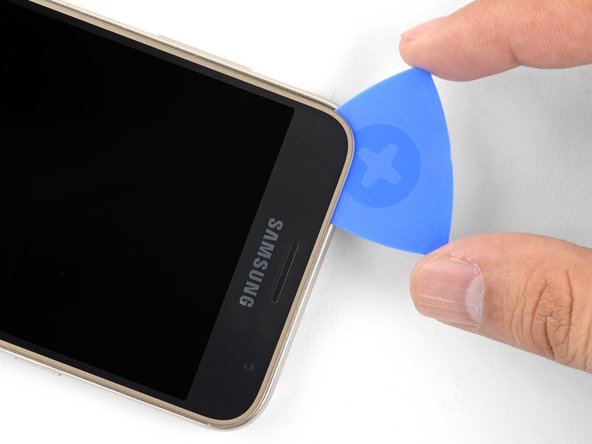
Continue cutting the adhesive with the opening pick, rounding the bottom right corner and slicing through the bottom bezel area.
-
-
Questo passaggio è privo di traduzione. Aiuta a tradurlo
-
Repeat the heating and slicing procedure for the left and top edges of the phone.
-
-
Questo passaggio è privo di traduzione. Aiuta a tradurlo
-
Grasp the top panel by the corners and slowly swing the bottom edge up slightly.
-
Gently wiggle the top panel and use an opening pick to slice any remaining adhesive.
-
The Home button will most likely fall out. Remove it and keep it in a safe location for re-assembly.
-
-
Questo passaggio è privo di traduzione. Aiuta a tradurlo
-
Heat an iOpener and apply it to the front of the phone for a minute, covering as much of the screen as possible.
-
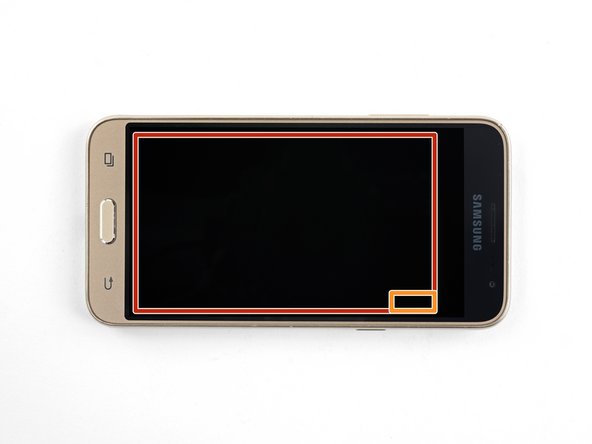
Take note of the following areas when prying the AMOLED panel:
-
Strong adhesive holding the AMOLED panel to the frame
-
Display flex cable, which will hinder slicing if hit
-
-
Questo passaggio è privo di traduzione. Aiuta a tradurlo
-
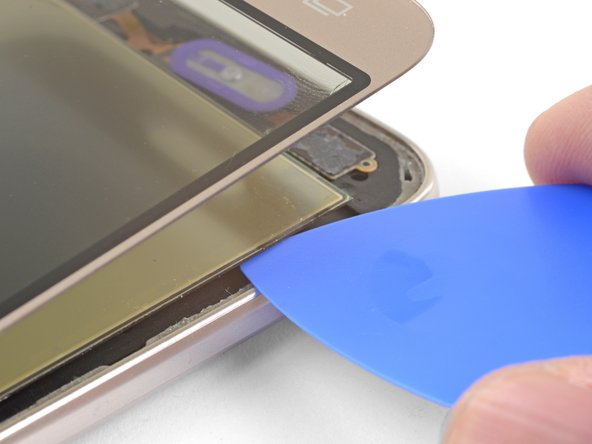
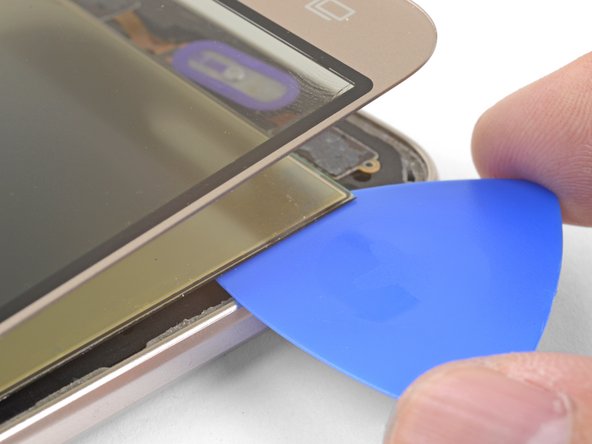
Insert the point of an opening pick under the bottom left corner of the AMOLED panel.
-
Slowly and firmly push the pick in to slice the adhesive underneath the AMOLED panel.
-
-
Questo passaggio è privo di traduzione. Aiuta a tradurlo
-
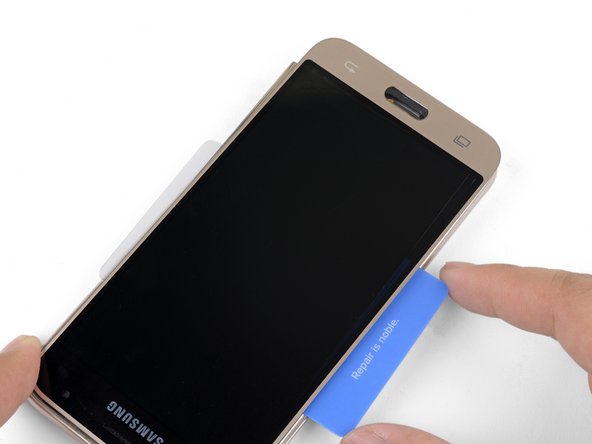
Insert a plastic opening card under the AMOLED panel, using the gap created by the opening pick to get the card started.
-
Slowly and firmly press the card inwards, wiggling it as needed, until it slices through the other side.
-
-
Questo passaggio è privo di traduzione. Aiuta a tradurlo
-
Once the plastic card cuts through the width of the phone, slowly and firmly push it towards the top, wiggling it as needed.
-
Continue until you release the AMOLED panel from the frame.
-
Apply a heated iOpener to help loosen stubborn adhesive.
-
Use opening picks to slice through stray adhesive areas.
-
-
Questo passaggio è privo di traduzione. Aiuta a tradurlo
-
Slowly lift the AMOLED panel and digitizer together up from the frame. Use the plastic card to support the AMOLED panel.
-
As you lift the screen, thread the display flex cable out of its cutout.
-
Remove the screen.
-
-
Questo passaggio è privo di traduzione. Aiuta a tradurlo
-
Scrape all adhesive residue from the frame surface. Use high concentration (over 90%) isopropyl alcohol to help. A replacement screen attached to an uneven surface will crack.
-
Use an opening tool to carefully scrape the adhesive off the capacitive button surfaces.
-
Connect your new screen by threading the display cable through the cutout and connecting it to the phone. Power on your phone and test it before re-adhering the screen.
-
Do not forget to replace the Home button during reinstallation.
-
Keep the replacement screen connected to the phone during the re-adhering process to help align the screen properly.
-
Be sure to peel all adhesive plastic liners on the replacement screen when re-adhering the screen.
-


Annulla: non ho completato questa guida.
Altre 46 persone hanno completato questa guida.


7 Commenti
Ist es möglich nur das Glas ohne LCD zu wechseln?
Yes! The LCD is not glued to the display.
Ja! Das LCD ist nicht mit dem Display verklebt.
What kinds of adhesives can I use to put the new screen on? Double sided scotch ok?
Hi William,
Double-sided Scotch tape probably will not hold the display on for long. You will have to use something like Tesa tape along the perimeter. If you bought the part we sell in our store, it already has all the necessary adhesive pre-installed on the screen.
-1-How does one remove the glass top , which is what is cracked in my cell, from the display digitizer without rendering the display unusable?
-2- do you have the LCD screen available for purchase? if not can you recommend a seller?