Salta al contenuto principale

Ring Video Doorbell 3 Camera Sensor Replacement

Cosa ti serve

  1. Ring Video Doorbell 3 Camera Sensor Replacement, Faceplate: passo 1, immagine 1 di 2 Ring Video Doorbell 3 Camera Sensor Replacement, Faceplate: passo 1, immagine 2 di 2
    • Look at the bottom of the device and locate the arrow.

    • Use your fingers to push the silver faceplate in the direction of the arrow.

  2. Ring Video Doorbell 3 Camera Sensor Replacement: passo 2, immagine 1 di 1
    • Push up to take the face plate off.

  3. Ring Video Doorbell 3 Camera Sensor Replacement, Battery: passo 3, immagine 1 di 2 Ring Video Doorbell 3 Camera Sensor Replacement, Battery: passo 3, immagine 2 di 2
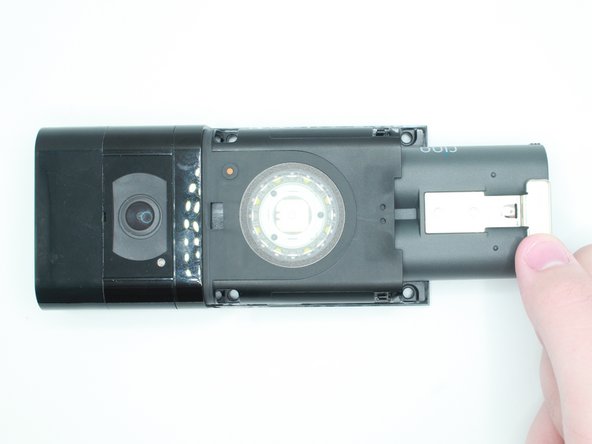
    • Push in the silver tab and slide the battery out.

  4. Ring Video Doorbell 3 Camera Sensor Replacement, Motherboard: passo 4, immagine 1 di 3 Ring Video Doorbell 3 Camera Sensor Replacement, Motherboard: passo 4, immagine 2 di 3 Ring Video Doorbell 3 Camera Sensor Replacement, Motherboard: passo 4, immagine 3 di 3
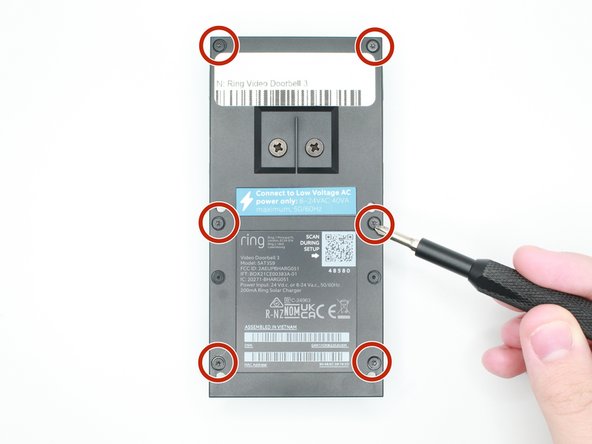
    • Remove the 6 screws with a Torx T6 screwdriver.

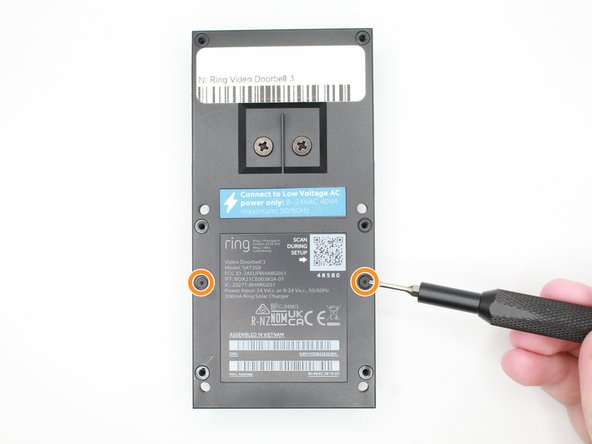
    • Remove the 2 screws with a Torx T5 screwdriver.

  5. Ring Video Doorbell 3 Camera Sensor Replacement: passo 5, immagine 1 di 2 Ring Video Doorbell 3 Camera Sensor Replacement: passo 5, immagine 2 di 2
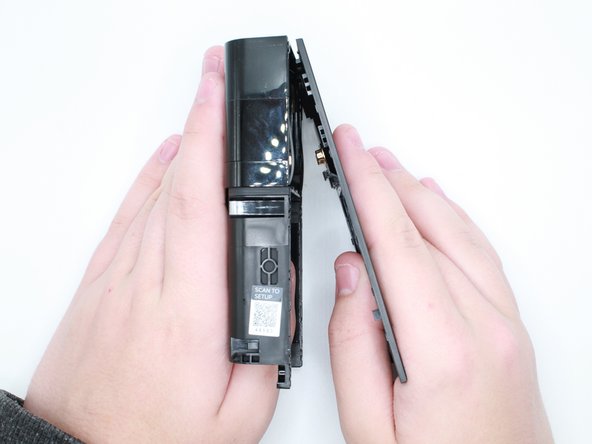
    • Put your thumb where the battery was and push outwards to remove the back case.

  6. Ring Video Doorbell 3 Camera Sensor Replacement: passo 6, immagine 1 di 3 Ring Video Doorbell 3 Camera Sensor Replacement: passo 6, immagine 2 di 3 Ring Video Doorbell 3 Camera Sensor Replacement: passo 6, immagine 3 di 3
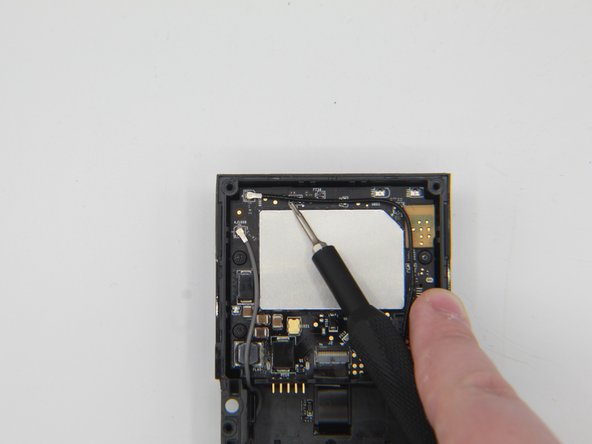
    • Get a tweezer, and remove the black and grey antenna wires.

  7. Ring Video Doorbell 3 Camera Sensor Replacement: passo 7, immagine 1 di 2 Ring Video Doorbell 3 Camera Sensor Replacement: passo 7, immagine 2 di 2
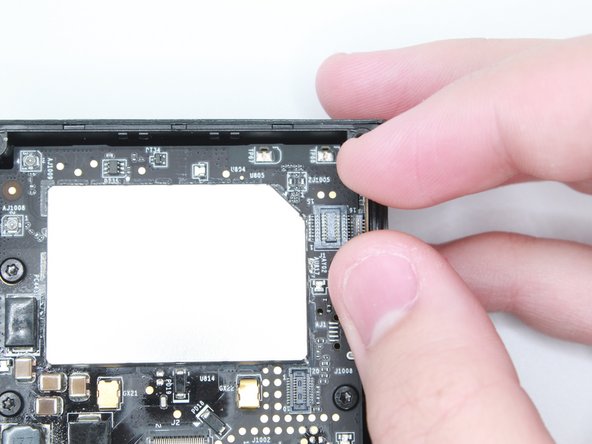
    • Disconnect the camera sensor.

  8. Ring Video Doorbell 3 Camera Sensor Replacement: passo 8, immagine 1 di 2 Ring Video Doorbell 3 Camera Sensor Replacement: passo 8, immagine 2 di 2
    Attrezzo utilizzato in questo passaggio:
    Tweezers
    $4.99
    Compra
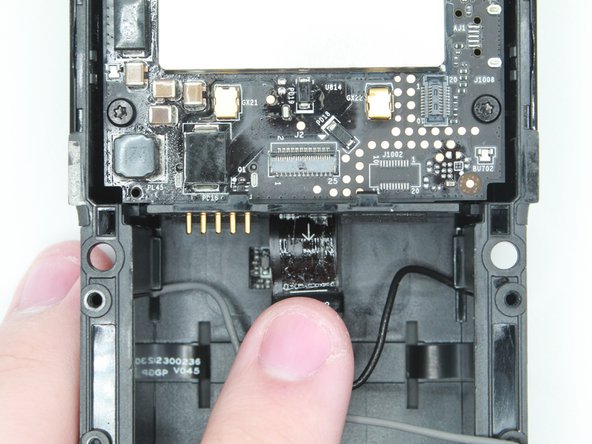
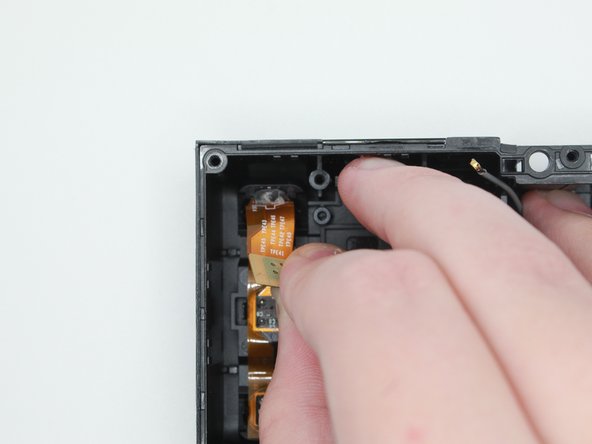
    • Be cautious to not rip the ribbon cable.

    • Lift the black tab above the ribbon to unlock it.

    • Use the tweezers to pull out the ribbon.

  9. Ring Video Doorbell 3 Camera Sensor Replacement: passo 9, immagine 1 di 2 Ring Video Doorbell 3 Camera Sensor Replacement: passo 9, immagine 2 di 2
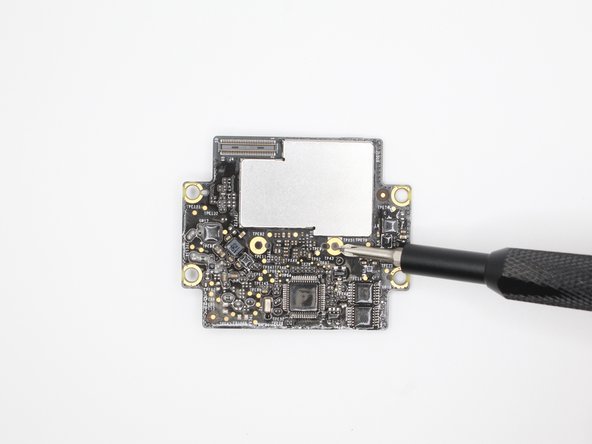
    • Use a Torx T6 but to take out the four screws on the first motherboard.

  10. Ring Video Doorbell 3 Camera Sensor Replacement: passo 10, immagine 1 di 2 Ring Video Doorbell 3 Camera Sensor Replacement: passo 10, immagine 2 di 2
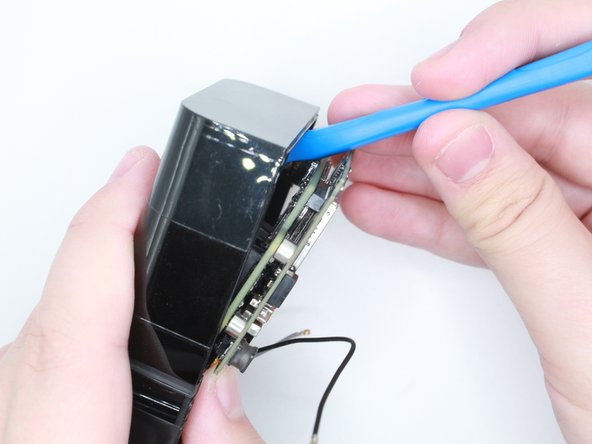
    • Use an opening tool to take out the motherboard.

    • Make sure to push in the 5 pins while taking out the motherboards to ensure that they do not break.

  11. Ring Video Doorbell 3 Camera Sensor Replacement: passo 11, immagine 1 di 1
    • The motherboard has been taken out, and now it is free to be replaced or worked on.

  12. Ring Video Doorbell 3 Camera Sensor Replacement: passo 12, immagine 1 di 2 Ring Video Doorbell 3 Camera Sensor Replacement: passo 12, immagine 2 di 2
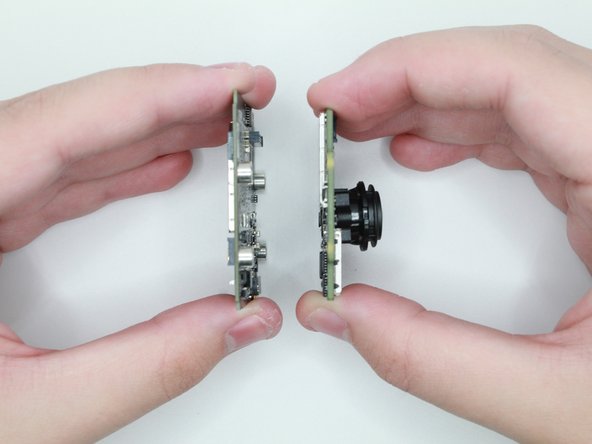
    • Flip the two boards on the side.

    • Gently pull the motherboard and the camera board apart.

  13. Ring Video Doorbell 3 Camera Sensor Replacement: passo 13, immagine 1 di 2 Ring Video Doorbell 3 Camera Sensor Replacement: passo 13, immagine 2 di 2
    • Use the Phillips #00 screwdriver to remove the two screws.

  14. Ring Video Doorbell 3 Camera Sensor Replacement: passo 14, immagine 1 di 2 Ring Video Doorbell 3 Camera Sensor Replacement: passo 14, immagine 2 di 2
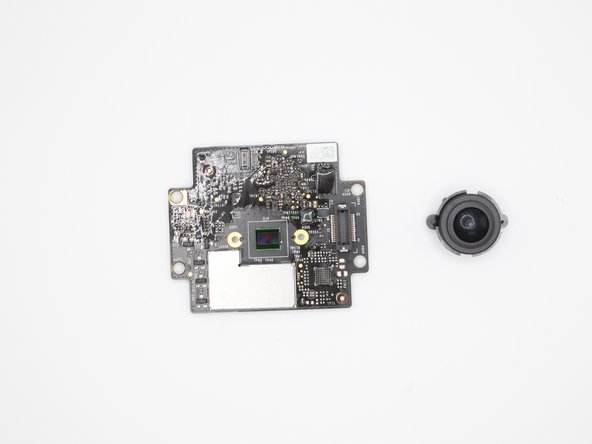
    • Carefully remove the camera lens from the board.

    • Replace Motherboard(s) if needed.

    • Replace Camera if needed.

  15. Ring Video Doorbell 3 Camera Sensor Replacement, Camera Sensor: passo 15, immagine 1 di 1
    • After setting the motherboard aside, grab the case.

  16. Ring Video Doorbell 3 Camera Sensor Replacement: passo 16, immagine 1 di 2 Ring Video Doorbell 3 Camera Sensor Replacement: passo 16, immagine 2 di 2
    • Desolder these three spots with 4 points and remove the solder.

    • Carefully peel off the camera sensor to remove it

Conclusione

To reassemble your device, follow these instructions in reverse order.

0 Commenti

Aggiungi Commento

Visualizza Statistiche:

Ultime 24 Ore: 0

Ultimi 7 Giorni: 1

Ultimi 30 Giorni: 16

Tutti i Tempi: 113