Salta al contenuto principale

Rexing V1P Plus Battery Replacement

Cosa ti serve

  1. Rexing V1P Plus Battery Replacement, Battery: passo 1, immagine 1 di 3 Rexing V1P Plus Battery Replacement, Battery: passo 1, immagine 2 di 3 Rexing V1P Plus Battery Replacement, Battery: passo 1, immagine 3 di 3
    • Orient the device with the LCD screen facing down.

    • Remove the four 6 mm screws, located on the backside of the device, using the Phillips #00 screwdriver.

  2. Rexing V1P Plus Battery Replacement: passo 2, immagine 1 di 3 Rexing V1P Plus Battery Replacement: passo 2, immagine 2 di 3 Rexing V1P Plus Battery Replacement: passo 2, immagine 3 di 3
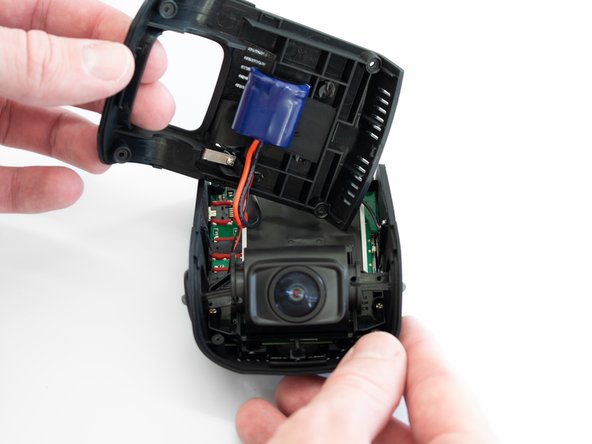
    • Remove the back cover of the device and place it to the side, with care not to strain the connected battery cable.

    • Rotate the device 180 degrees to where the camera is facing you.

  3. Rexing V1P Plus Battery Replacement: passo 3, immagine 1 di 3 Rexing V1P Plus Battery Replacement: passo 3, immagine 2 di 3 Rexing V1P Plus Battery Replacement: passo 3, immagine 3 di 3
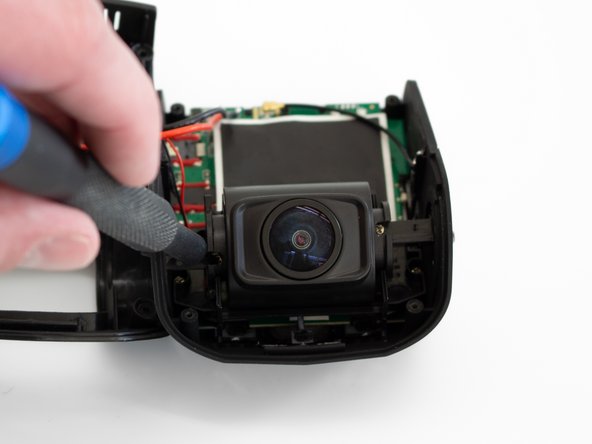
    • Remove the two 5 mm screws on either side of the lens using the Phillips #00 screwdriver.

  4. Rexing V1P Plus Battery Replacement: passo 4, immagine 1 di 3 Rexing V1P Plus Battery Replacement: passo 4, immagine 2 di 3 Rexing V1P Plus Battery Replacement: passo 4, immagine 3 di 3
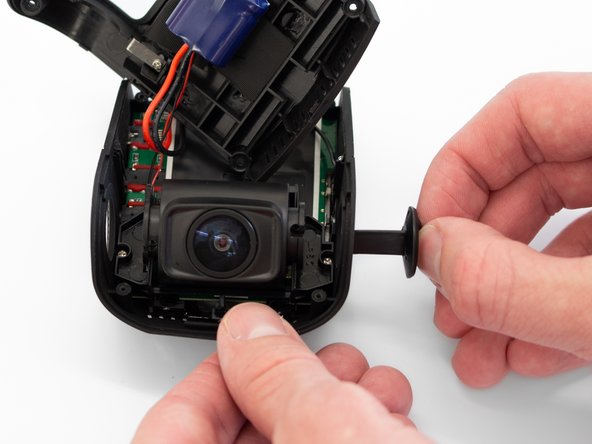
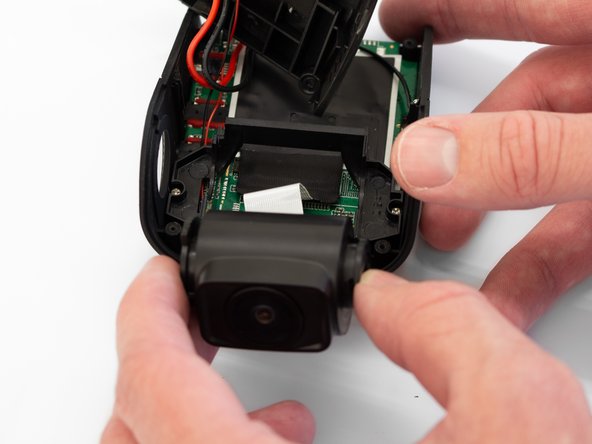
    • Remove the two camera angle adjusters from the side of the device and carefully pull out the lens.

  5. Rexing V1P Plus Battery Replacement: passo 5, immagine 1 di 3 Rexing V1P Plus Battery Replacement: passo 5, immagine 2 di 3 Rexing V1P Plus Battery Replacement: passo 5, immagine 3 di 3
    • Remove the two 5 mm screws securing the camera support bracket using the Phillips #00 screwdriver.

  6. Rexing V1P Plus Battery Replacement: passo 6, immagine 1 di 3 Rexing V1P Plus Battery Replacement: passo 6, immagine 2 di 3 Rexing V1P Plus Battery Replacement: passo 6, immagine 3 di 3
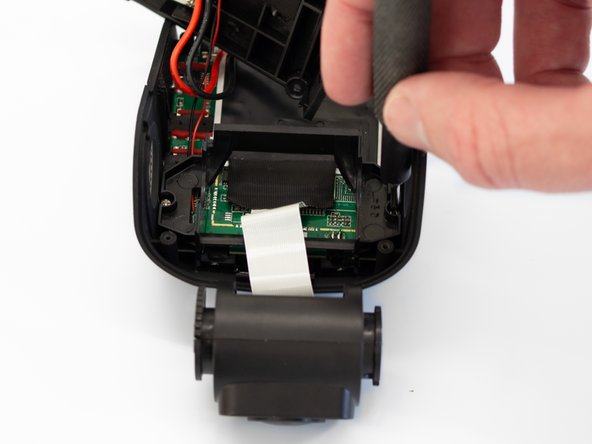
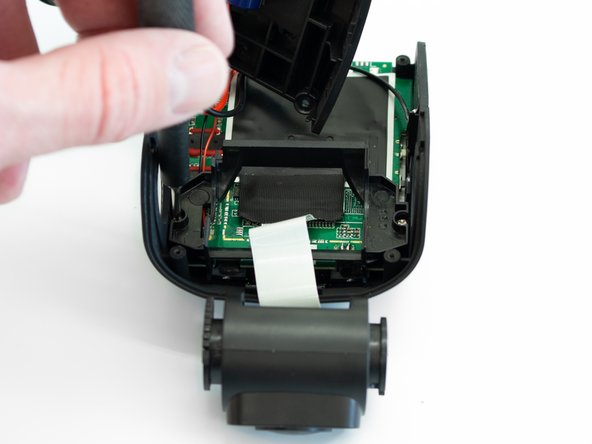
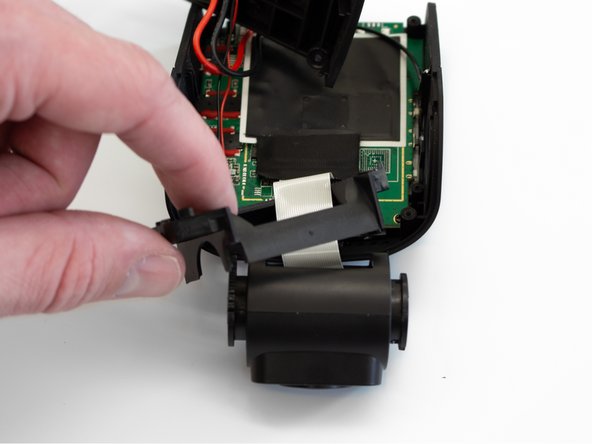
    • Carefully remove the plastic frame from its previously secured position on the motherboard.

    • It will rest loosely around the white camera ribbon.

    • Rotate the device 180 degrees to where the camera is facing away from you.

  7. Rexing V1P Plus Battery Replacement: passo 7, immagine 1 di 3 Rexing V1P Plus Battery Replacement: passo 7, immagine 2 di 3 Rexing V1P Plus Battery Replacement: passo 7, immagine 3 di 3
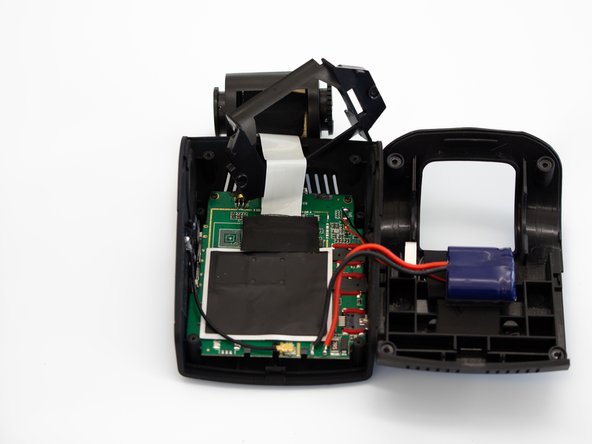
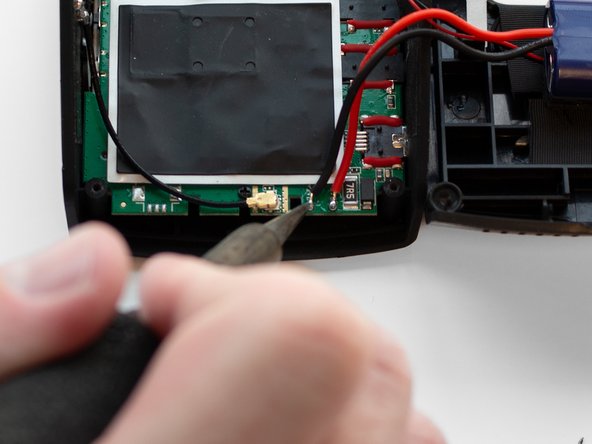
    • Using a soldering iron, remove the two wires connecting the battery to the motherboard.

    • Soldering has the potential to burn you or damage your device. Check out this guide before beginning, take appropriate precautions, and always solder in a well-ventilated area.

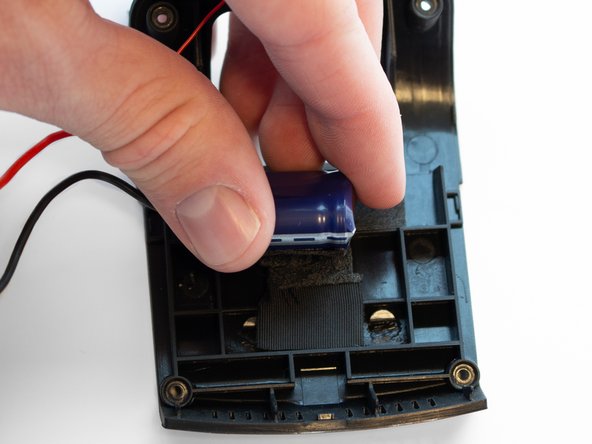
    • Once the wires are removed, peel the battery off of the case adhesive.

Conclusione

To reassemble your device, follow these instructions in reverse order.

Un'altra persona ha completato questa guida.

2 Commenti

Where is it possible to get the replacement battery? Searching on ebay reveals nothing for the information given.

Derek Piper - Replica

Just realized this appears to be what is known as a 'super capacitor' rather than a battery so it's possible any 5.5V 3.5Farad capacitor will work. The form factor may be an issue though.

Derek Piper - Replica

Aggiungi Commento

Visualizza Statistiche:

Ultime 24 Ore: 0

Ultimi 7 Giorni: 27

Ultimi 30 Giorni: 92

Tutti i Tempi: 1,181