Salta al contenuto principale
Unisciti alla Community delle riparazioni - Crea un account
Protocol Videodrone AP Camera Replacement

Protocol Videodrone AP Camera Replacement

Karan Paranganat

Karan Paranganat e 4 altri collaboratori

Ultimo aggiornamento il 17 gen 2025

25 - 40 minuti
Moderato
Necessarie Immagini Migliori

Introduzione

Vai al passo 1

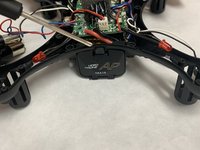
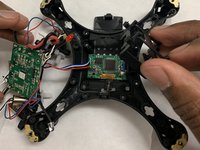
This guide shows how to replace the camera module for the Protocol Videodrone AP Drone. This is a slightly lengthy process as you will have to disassemble most of your drone. The camera module itself is both the sensor housing + the circuit board connected it it. You will only have to replace the circuit board, as the sensor housing is attached to it.

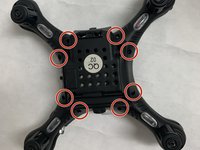
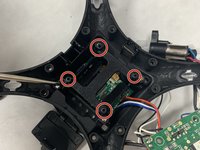
Remember to use the included #0 Phillips screwdriver that came with your drone.

A soldering iron is required, so keep one ready. If you're not experienced with soldering, take a look at this guide for How to Solder and Desolder Connections.

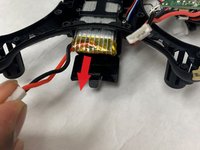
Before you begin, make sure that your drone is turned off and it's unplugged from the charger. You should also remove the battery before you begin.

Cosa ti serve

Strumenti

Mostra di più…

  1. Protocol Videodrone AP Camera Replacement, Camera: passo 1, immagine 1 di 1
    • Power off the drone before proceeding with this repair.

  2. Protocol Videodrone AP Camera Replacement: passo 2, immagine 1 di 1
    • Remove the propeller screws (1 per propeller).

    • You can use the Phillips #0 screwdriver if you don't own the one included with drone.

  3. Protocol Videodrone AP Camera Replacement: passo 3, immagine 1 di 2 Protocol Videodrone AP Camera Replacement: passo 3, immagine 2 di 2
    • Remove the screws holding on the propeller guards using the Phillips #0 screwdriver (2 per propeller guard).

  4. Protocol Videodrone AP Camera Replacement: passo 4, immagine 1 di 2 Protocol Videodrone AP Camera Replacement: passo 4, immagine 2 di 2
    • Using the Phillips #0 screwdriver to remove the eight screws securing the body of the drone.

  5. Protocol Videodrone AP Camera Replacement: passo 5, immagine 1 di 1
    • Remove the case.

  6. Protocol Videodrone AP Camera Replacement: passo 6, immagine 1 di 1
    • Remove the propeller motor screws (3 per motor).

    • The plastic screw housing is attached to the motor.

  7. Protocol Videodrone AP Camera Replacement: passo 7, immagine 1 di 3 Protocol Videodrone AP Camera Replacement: passo 7, immagine 2 di 3 Protocol Videodrone AP Camera Replacement: passo 7, immagine 3 di 3
    • Depress the tab to open the battery housing.

    • Disconnect the battery connectors

    • Remove the battery.

  8. Protocol Videodrone AP Camera Replacement: passo 8, immagine 1 di 1
    • Using the Phillips #0 screwdriver, remove the four circuit board screws.

    • Remove circuit board.

  9. Protocol Videodrone AP Camera Replacement: passo 9, immagine 1 di 2 Protocol Videodrone AP Camera Replacement: passo 9, immagine 2 di 2
    • Remove the four battery housing screws with the Phillips #0 screwdriver.

    • Remove the battery housing to reveal the camera circuit board underneath.

  10. Protocol Videodrone AP Camera Replacement: passo 10, immagine 1 di 1
    • Pull upwards on the strip to remove the camera out of its slot.

  11. Protocol Videodrone AP Camera Replacement: passo 11, immagine 1 di 1
    • Remove camera circuit board from housing.

    • On the main circuit board, desolder the the connection points connecting to camera circuit board.

    • Four wires need to be desoldered. Colours include: Red, white, black and blue.

    • For more information on soldering connections, please visit the How to Solder and Desolder Connections guide.

Conclusione

To reassemble your device, follow these instructions in reverse order.

Team

IUPUI, Team S2-G2, Harley Fall 2019 Membro di IUPUI, Team S2-G2, Harley Fall 2019

IUPUI-HARLEY-F19S2G2

3 Membri

2 Guide realizzate

0Commenti sulla guida

Aggiungi Commento

Visualizza Statistiche:

Ultime 24 Ore: 1

Ultimi 7 Giorni: 2

Ultimi 30 Giorni: 9

Tutti i Tempi: 321