Questa versione può contenere modifiche errate. Passa all'ultima istantanea verificata.
Cosa ti serve
-
Questo passaggio è privo di traduzione. Aiuta a tradurlo
-
Remove the (9) nine 9.2mm screws with a JIS #1 screwdriver.
-
Lift off the two bottom grip covers of the controller.
-
-
Questo passaggio è privo di traduzione. Aiuta a tradurlo
-
Remove the remaining (2) two 9.2mm screws holding the back cover with a JIS #1 screwdriver.
-
Carefully lift and remove the back cover of the controller.
-
-
-
Questo passaggio è privo di traduzione. Aiuta a tradurlo
-
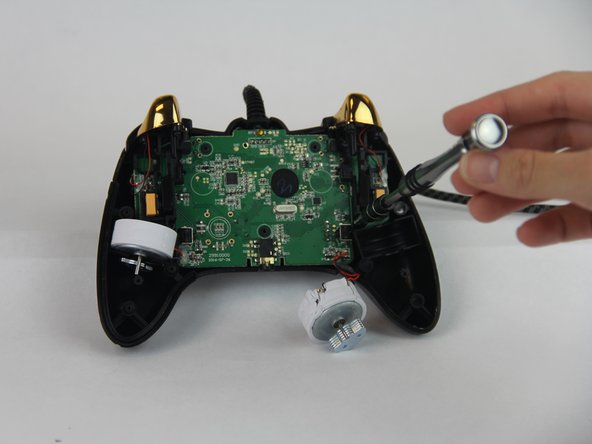
Carefully remove the (5) five 9.2mm screws holding the motherboard with a JIS #1 screwdriver.
-
Lift the motherboard and rest it face up to the right of the controller front plate.
-
-
Questo passaggio è privo di traduzione. Aiuta a tradurlo
-
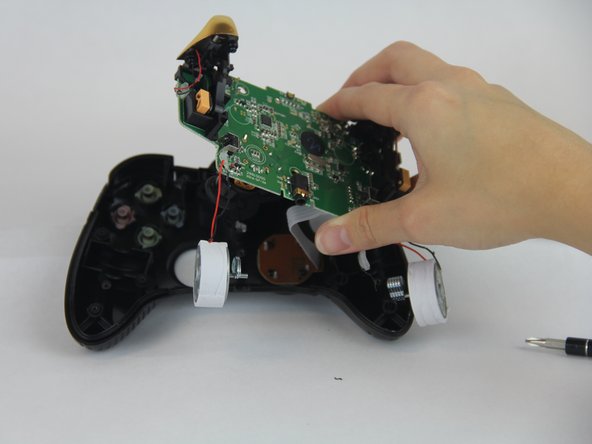
Remove the (4) four 9.2mm screws that are holding the motherboard to the controller.
-
Remove the motherboard from the face plate of the controller.
-
-
Questo passaggio è privo di traduzione. Aiuta a tradurlo
-
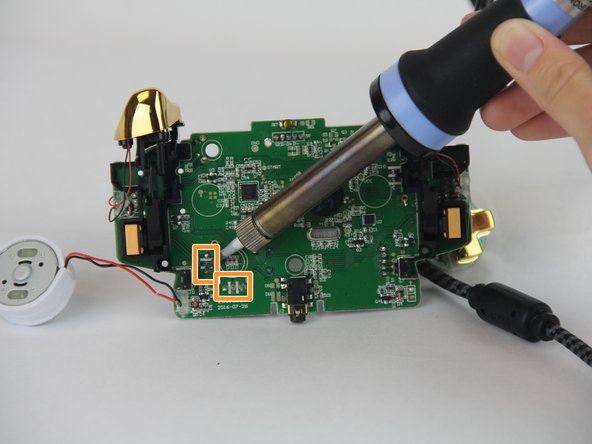
Use the tweezers to unclip the (4) four metal teeth of the analog stick.
-
Use the soldering iron and desoldering braid to desolder the analog stick sensor module from the back of the motherboard.
-
Place the new analog stick sensor module and solder it back.
-


Annulla: non ho completato questa guida.
Altre 7 persone hanno completato questa guida.
Team

USF Tampa, Team S14-G4, Boczar Fall 2017 Membro di USF Tampa, Team S14-G4, Boczar Fall 2017
USFT-BOCZAR-F17S14G4
4 Membri
5 Guide realizzate
3 Commenti
Hi I’m looking those analog stick but I’m only finding the plastic and they are to big they are called different or something ?
Have you found a replacement yet? I ran into the same problem a couple of months ago, the potenciometers that I ordered did not fit into the motherboard. I even tried some other ones from a generic USB controler to no avail. Manufacturers do not report the sizes of the potenciometers, so it’s a bet everytime. I yet have to find a potentiometer that fits…
Any joy on purchasing these