Salta al contenuto principale

Questa versione può contenere modifiche errate. Passa all'ultima istantanea verificata.

Cosa ti serve

  1. Questo passaggio è privo di traduzione. Aiuta a tradurlo

    : passo 1, immagine 1 di 3 : passo 1, immagine 2 di 3 : passo 1, immagine 3 di 3
    • Remove the rubber feet on two of the screw covers on the bottom of the console.

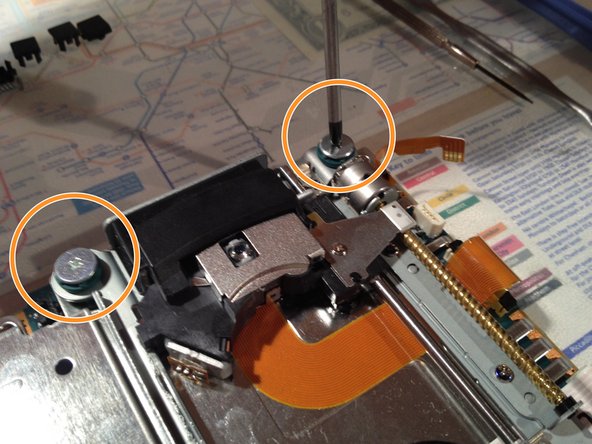
    • Remove the screw covers and the screws themselves.

    • Caution: One of the screws is underneath the "Do not void" seal

  2. Questo passaggio è privo di traduzione. Aiuta a tradurlo

    : passo 2, immagine 1 di 2 : passo 2, immagine 2 di 2
    • If all screws are removed.

    • Use a metal spunger to open the chassis

  3. Questo passaggio è privo di traduzione. Aiuta a tradurlo

    : passo 3, immagine 1 di 3 : passo 3, immagine 2 di 3 : passo 3, immagine 3 di 3
    • Slip the three cables out of the sockets.

    • Use a PH01 screwdriver to remove the four screws securing the optical drive

    • Lift up the optical drive and remove the duct tape under the flex cable.

    • Now the optical drive is free and ready for replacement

Linea Traguardo

Altre 16 persone hanno completato questa guida.

tlroesner

Membro da: 05/13/12

1.864 Reputazione

4 Guide realizzate

3 Commenti

How is it that this guide says difficult and the other PS2 drive replacement on here says easy?

Mark - Replica

it really depends on your level of skill/experience.

Damien Simons -

How many different versions of drive is there for the slim model? When you go to replace it, do you just compare the model number on the laser?

Trevor V - Replica

Aggiungi Commento

Visualizza Statistiche:

Ultime 24 Ore: 3

Ultimi 7 Giorni: 24

Ultimi 30 Giorni: 95

Tutti i Tempi: 22,100