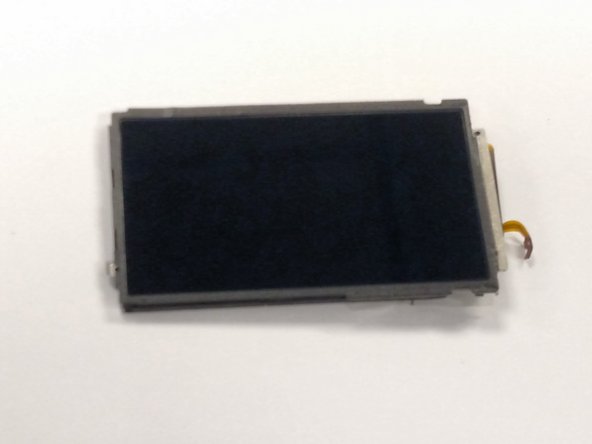
Salta al contenuto principale

Pentax Optio WG-2 LCD Screen Replacement

Cosa ti serve

  1. Attenzione: i passaggi 1-6 provengono da una guida contrassegnata come in corso.

    Pentax Optio WG-2 LCD Screen Replacement, Back Case: passo 1, immagine 1 di 2 Pentax Optio WG-2 LCD Screen Replacement, Back Case: passo 1, immagine 2 di 2
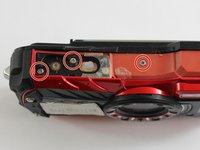
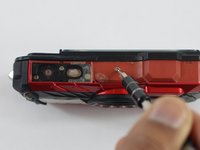
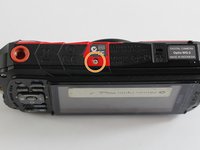
    • Remove all four 1 mm JIS #00 screws from the back of the camera.

  2. Pentax Optio WG-2 LCD Screen Replacement: passo 2, immagine 1 di 1
    • Use your finger to peel the grip off the top of the camera.

    • For best results, start from the right side of the camera, opposite the buttons.

    • Once the grip is removed, you will most likely lose the water-tight seal.

  3. Pentax Optio WG-2 LCD Screen Replacement: passo 3, immagine 1 di 1
    • Use the tweezers to remove the two buttons from the top of the camera.

    • The buttons may fall out while removing the grip.

  4. Pentax Optio WG-2 LCD Screen Replacement: passo 4, immagine 1 di 3 Pentax Optio WG-2 LCD Screen Replacement: passo 4, immagine 2 di 3 Pentax Optio WG-2 LCD Screen Replacement: passo 4, immagine 3 di 3
    • Remove the three 1 mm JIS #000 screws from the top.

    • Remove the 1 mm JIS #000 screw from the bottom.

  5. Pentax Optio WG-2 LCD Screen Replacement: passo 5, immagine 1 di 1
    • Carefully separate the back and the front of the camera.

    • There are three ribbon cables connecting the two boards. Be careful not to tear them.

  6. Pentax Optio WG-2 LCD Screen Replacement: passo 6, immagine 1 di 1
    • Use the tip of a spudger to flip up the small retaining flaps on the ribbon cable ZIF connectors.

    • Carefully pull the ribbon cables out of their sockets.

  7. Pentax Optio WG-2 LCD Screen Replacement, LCD Screen: passo 7, immagine 1 di 2 Pentax Optio WG-2 LCD Screen Replacement, LCD Screen: passo 7, immagine 2 di 2
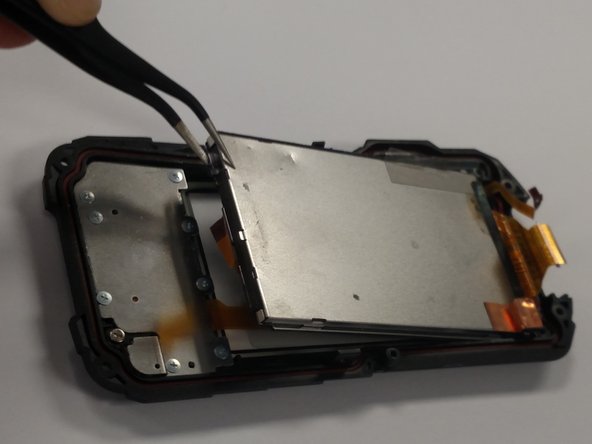
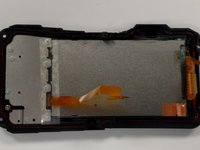
    • Carefully remove the clear tape covering the screws and the ribbon cable.

    • Be careful not to tear the ribbon cable when removing the tape.

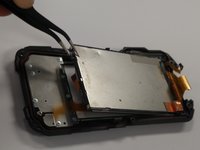
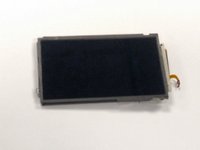
    • We want to remove the larger silver panel (right). The best way to do this is to slightly bend the cover backwards and use the tweezers to grab a corner and slowly lift the screen up and out.

  8. Pentax Optio WG-2 LCD Screen Replacement: passo 8, immagine 1 di 2 Pentax Optio WG-2 LCD Screen Replacement: passo 8, immagine 2 di 2
    • Once the screen is removed you should have two pieces as seen in the picture.

    • The screen is the silver rectangle in the top of the picture or the component seen in picture two.

Conclusione

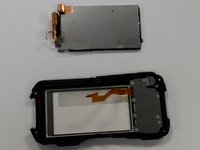
To reassemble your device, follow these instructions in reverse order.

Altre 2 persone hanno completato questa guida.

2 Commenti

Dónde puedo comprar el Display?

Where I can buy the dispaly?

Sebastian Mesa - Replica

opération réussie ça marche nickel la plus grosse difficultée est de remettre correctement les 3 connecteurs

impératif: utiliser les bons outils comme indiqué attention aux vis il y a un petit joint et les longueurs différentes ne pas mélanger !!!

merci pour ce super tuto ….

walchkorn - Replica

Aggiungi Commento

Visualizza Statistiche:

Ultime 24 Ore: 0

Ultimi 7 Giorni: 3

Ultimi 30 Giorni: 11

Tutti i Tempi: 766