Questa versione può contenere modifiche errate. Passa all'ultima istantanea verificata.
Introduzione
Utilizza questa guida per rimuovere il pulsante del pad direzionale della PSP Go.
Cosa ti serve
-
-
Svita le quattro viti a croce Phillips sul retro della PSP Go.
-
Ruota la PSP così che puoi vedere la parte superiore del dispositivo.
-
Svita le due viti a croce Phillips accanto al bottone del volume.
-
-
-
Tira la copertura superiore dolcemente verso l'alto dalla sua custodia.
-
-
Questo passaggio è privo di traduzione. Aiuta a tradurlo
-
Use a plastic opening tool to gently flip up the left trigger connector.
-
-
Questo passaggio è privo di traduzione. Aiuta a tradurlo
-
Unscrew the lone Phillips screw holding the trigger in place. Remove both trigger and retaining plate from the PSP Go.
-
-
Questo passaggio è privo di traduzione. Aiuta a tradurlo
-
Use the plastic opening tool to gently peel away at the "Warranty Void" sticker. Start on one edge, as shown, and slide the tool from side to side until the sticker is removed from just the battery.
-
-
-
Questo passaggio è privo di traduzione. Aiuta a tradurlo
-
Gently pull the sticker away from the battery connector, just enough so that the connector is visible.
-
Wedge a plastic opening tool in between the connector and logic board, and gently pull the connector upwards.
-
-
Questo passaggio è privo di traduzione. Aiuta a tradurlo
-
Use a plastic opening tool to pop out the battery, being careful not to snag the "Warranty Void" sticker in the process.
-
-
Questo passaggio è privo di traduzione. Aiuta a tradurlo
-
Remove the single Phillips screw securing the logic board to the inner case.
-
-
Questo passaggio è privo di traduzione. Aiuta a tradurlo
-
Use a plastic opening tool to gently flip up the right trigger connector.
-
Unscrew the lone Phillips screw holding the trigger in place. Remove both trigger and retaining plate from the PSP Go.
-
-
Questo passaggio è privo di traduzione. Aiuta a tradurlo
-
Use a #00 Phillips screwdriver to unscrew both bottom plate screws.
-
Remove the bottom plate by lifting it away from the device.
-
-
Questo passaggio è privo di traduzione. Aiuta a tradurlo
-
Remove both headphone jack and analog joystick screws using your #00 Phillips screwdriver.
-
-
Questo passaggio è privo di traduzione. Aiuta a tradurlo
-
Unplug the volume button cable using a pair of tweezers. Be careful not to damage the cable.
-
Unplug the Start/Select button cable the same way. Make sure to grasp the black plastic pull tab of the cable.
-
-
Questo passaggio è privo di traduzione. Aiuta a tradurlo
-
Use a pair of tweezers to pull out the battery's clear plastic cover.
-
-
Questo passaggio è privo di traduzione. Aiuta a tradurlo
-
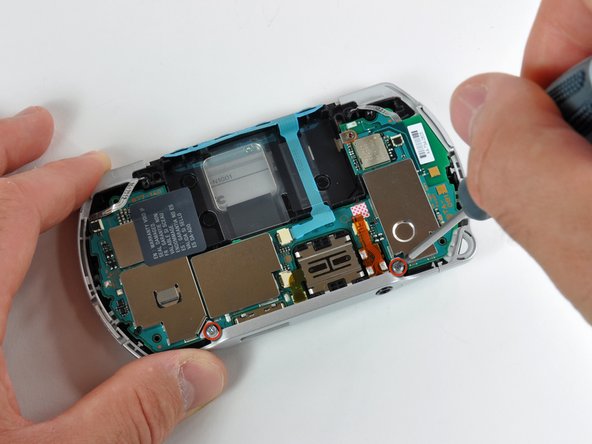
Gently lift the logic board slightly out of its housing.
-
-
Questo passaggio è privo di traduzione. Aiuta a tradurlo
-
Use a plastic opening tool to disconnect the display cable from the logic board.
-
The logic board should now be free from the rest of the device.
-
-
-
Usa uno strumento di apertura in plastica per togliere i pulsanti del pad direzionale.
-


Per riassemblare il tuo dispositivo, segui queste istruzioni in ordine inverso.
Per riassemblare il tuo dispositivo, segui queste istruzioni in ordine inverso.
Annulla: non ho completato questa guida.
Altre 3 persone hanno completato questa guida.
Un ringraziamento speciale a questi traduttori:
100%

Questi traduttori ci stanno aiutando ad aggiustare il mondo! Vuoi partecipare?
Inizia a tradurre ›
