Introduzione
Hai fatto cadere la tua PSP? Se il tuo display LCD si è rotto per qualunque ragione, sei fortunato! Questa guida ti mostrerà come sostituire quel display con uno nuovo di zecca.
Cosa ti serve
-
-
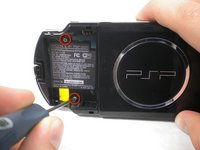
Clicca il pulsante che fissa lo sportello della batteria alla PSP 300xc, e alza lo sportello della batteria.
-
Solleva la batteria dalla PSP.
-
-
-
Usa uno spudger o le tue unghie per rimuovere l'adesivo di garanzia bloccato all'interno dello scomparto della batteria.
-
-
-
-
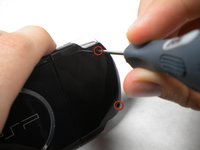
Svita una singola vite a croce Phillips che fissa la barra home alla PSP 300xc.
-
-
-
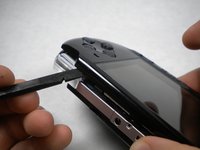
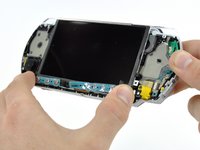
Allontana il display LCD dalla PSP per mettere in vista i cavi a nastro del display e della barra home.
-
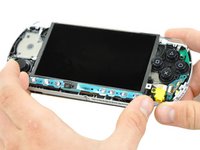
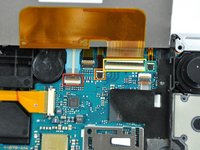
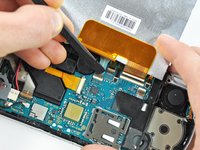
Utilizza un'unghia o l'estremità di uno strumento di apertura in plastica per sollevare l'aletta di fissaggio sui seguenti quattro connettori ZIF:
-
Il cavo della barra Home
-
Il cavo del microfono
-
Il cavo dati del display LCD
-
Il cavo del Touchscreen
-
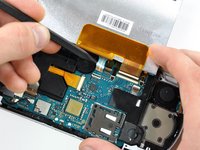
Dopo aver sollevato le linguette di bloccaggio su tutti e quattro i connettori, usa un dito o uno spudger per estrarre delicatamente i cavi dai connettori.
-


Per riassemblare il tuo dispositivo, segui queste istruzioni nell'ordine inverso.
Annulla: non ho completato questa guida.
Altre 11 persone hanno completato questa guida.
Un ringraziamento speciale a questi traduttori:
100%

Questi traduttori ci stanno aiutando ad aggiustare il mondo! Vuoi partecipare?
Inizia a tradurre ›
