Introduzione
If the back camera is not working on your OnePlus 6, use this guide to replace the broken camera.
The rear-facing camera allows you to take pictures and videos from the back of the phone and send them into the phone’s memory. A broken or disconnected camera will not permit you to so.
The back camera not being available for use may be from the camera lens being cracked, the connector to the camera being disconnected or loose, or the phone is simply using the camera in another app.
Before deciding to replace the camera in your OnePlus 6, inspect the lenses for any cracks as the phone will show a distorted image as a result or no image due to hardware damage. Make sure to check out the troubleshooting page for this device to see if you can fix this problem without a replacement. If nothing seems to be working for you, we’ve got you covered on how to replace your broken camera with a new one in this replacement guide to get you back to snapping some photos at ease.
The first step of this replacement guide is to remove the back panel of the phone. The back panel is made out of glass, so be careful when removing not to shatter it.
Before performing this replacement, back up your phone to prevent any loss of photos or videos. Also, take the time to ensure that the phone is powered off and disconnected from outside sources before continuing.
Cosa ti serve
-
-
Turn on the heat gun to a low heat and and gently heat the curved edges on the back of the phone.
-
Wedge the opening picks between the front and back panel and slide them around the perimeter to break the adhesive securing the back cover.
-
Repeat until the back panel is fully released.
 Chiedi a FixBot
-
-
-
Gently lift up the back panel, with care not to damage the fingerprint sensor ribbon cable.
-
-
Strumento utilizzato in questo passaggio:Tweezers$4.99
-
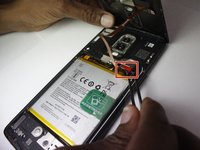
Use a pair of tweezers to gently pull up on the red tab and disconnect the cable from the device.
-
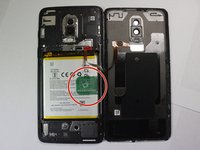
Completely remove the back panel from the device.
-
-
-
-
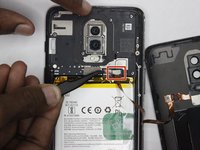
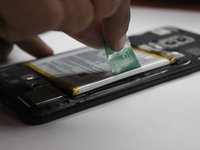
Grip the green tab connected to the battery and pull the battery directly up and out.
-
-
-
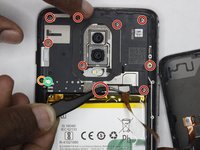
Using the Phillips #00 screwdriver, remove the ten 3 mm screws from the midframe.
-
ATTENTION - Be aware that the 10th screw is actually underneath the round white sticker marked with the green circle at the bottom left. Do not remove the screw next to it marked with the orange circle or you will damage your midframe board.
-
Lift the bottom of the mid frame directly up and remove it from the device.
-
-
-
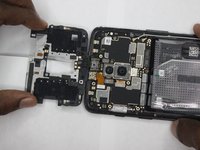
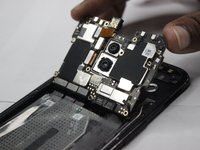
Remove the ten screws holding the motherboard using a Phillips #00 screwdriver.
-
-
-
Disconnect the small metal tabs near the battery compartment that are holding the motherboard down.
-
Using a fingernail, carefully work under the edge and pry the motherboard up from the phone.
-
-
-
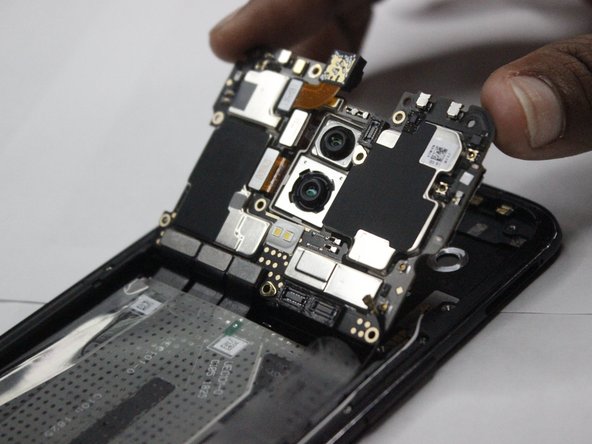
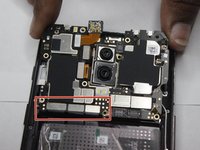
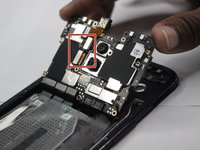
Lift up on the small tabs connecting the cameras to the motherboard to disconnect them.
-
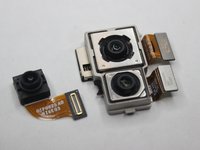
Push on the lens side of the cameras and remove them from the motherboard.
-


To reassemble your device, follow these instructions in reverse order.

Team

Clemson, Team 4-3, Hunter Fall 2021 Membro di Clemson, Team 4-3, Hunter Fall 2021
CLEM-HUNTER-F21S4G3
5 Membri
28 guide realizzate