Questa versione può contenere modifiche errate. Passa all'ultima istantanea verificata.
Cosa ti serve
-
-
Infila uno strumento o una punta per l'eiezione della scheda SIM, o una graffetta raddrizzata nel piccolo foro sotto il vassoio della scheda SIM, posizionato vicino alle fotocamere posteriori sul bordo del telefono.
-
Premi con decisione per espellere il vassoio.
-
-
-
Svita le due viti Torx T2 da 2,6 mm accanto alla porta USB-C sul bordo inferiore del telefono.
-
-
-
Fessura del pannello dello schermo: Questa fessura fa parte del gruppo dello schermo. Non fare leva in questa fessura, o separerai e danneggerai il pannello dello schermo.
-
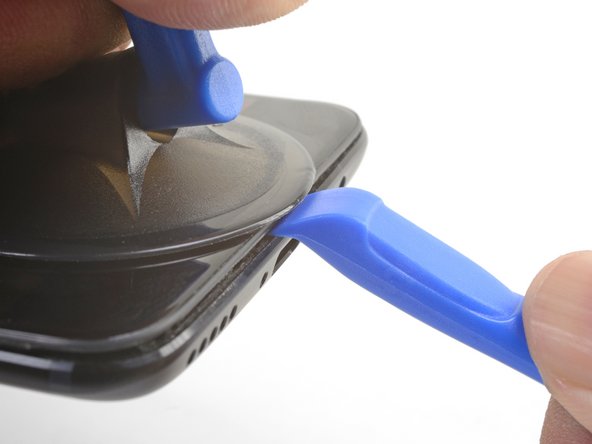
Fessura della cornice: Questa è dove la cornice in plastica incontra la copertura posteriore. Fai leva solo in questa fessura.
-
Ci sono dodici ganci che fissano la cornice contro la copertura posteriore. Ricordati la loro posizione mentre rimuovi la copertura posteriore nei prossimi passaggi.
-
-
-
Dopo aver liberato i bordi inferiore e sinistro del telefono, fai ondeggiare delicatamente la cornice per rilasciare i ganci dei bordi superiore e destro.
-
Allinea il bordo superiore della cornice alla copertura posteriore ed assicurati che i ganci superiori si infilino in posizione.
-
Schiaccia i bordi lunghi del telefono per far scattare i ganci restanti.
-
-
-
-
Usa la punta di uno spudger per sollevare e scollegare il connettore della batteria dalla sua presa.
-
-
-
Svita le sei viti a croce Phillips da 2,6 mm che fissano lo speaker principale alla cornice.
-
-
-
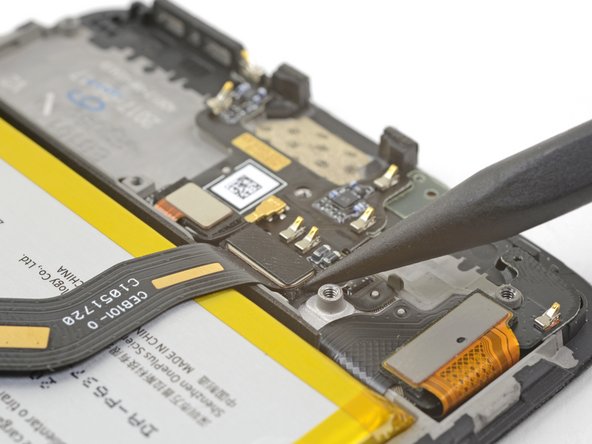
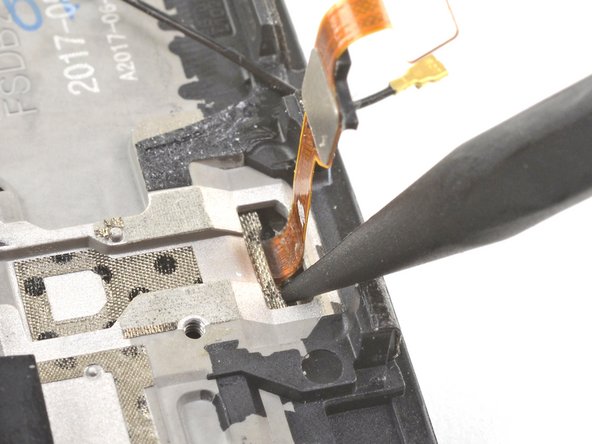
Usa la punta di uno spudger per sollevare e scollegare il cavo a nastro di interconnessione dalla presa.
-
-
Questo passaggio è privo di traduzione. Aiuta a tradurlo
-
Use the point of a spudger the pry up and disconnect the fingerprint scanner connector from its socket on the daughterboard.
-
-
Questo passaggio è privo di traduzione. Aiuta a tradurlo
-
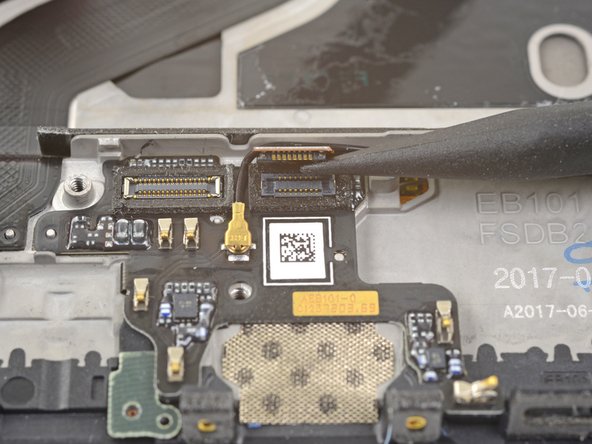
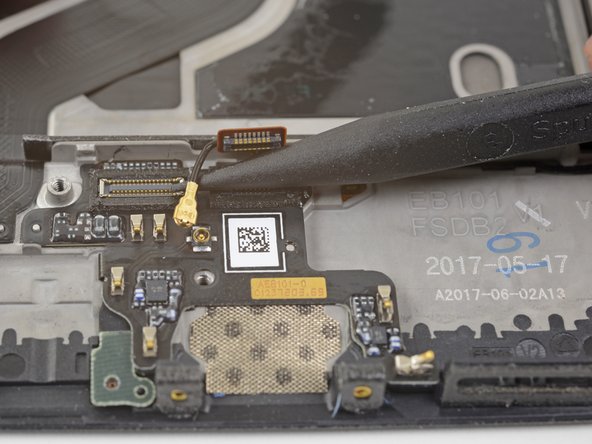
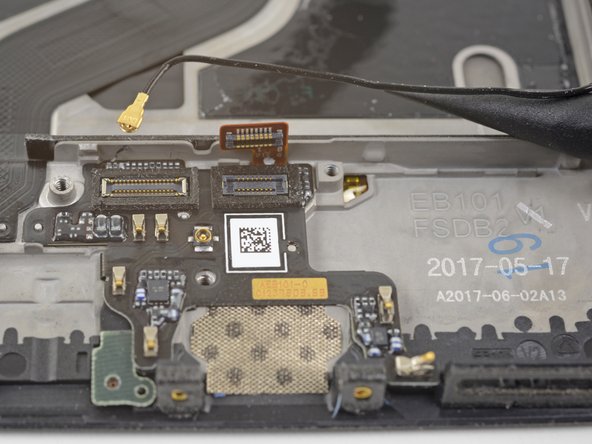
Slip the point of a spudger underneath the antenna interconnect cable and pry up to disconnect it from its socket on the daughterboard.
-
De-route the antenna interconnect cable out of the way of the daughterboard.
-
-
Questo passaggio è privo di traduzione. Aiuta a tradurlo
-
Insert the edge of a flat end of the spudger underneath the microphone board and twist slightly to release the board's adhesive.
-
-
Questo passaggio è privo di traduzione. Aiuta a tradurlo
-
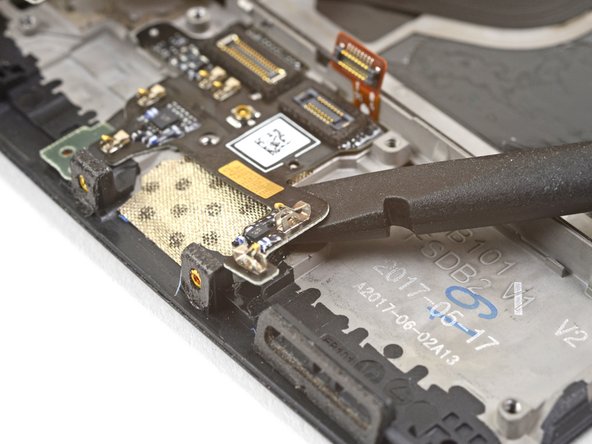
Slide the flat end of a spudger or the point of an opening pick underneath the daughterboard near its right edge.
-
Gently pry to loosen the daughterboard from its recess.
-
-
Questo passaggio è privo di traduzione. Aiuta a tradurlo
-
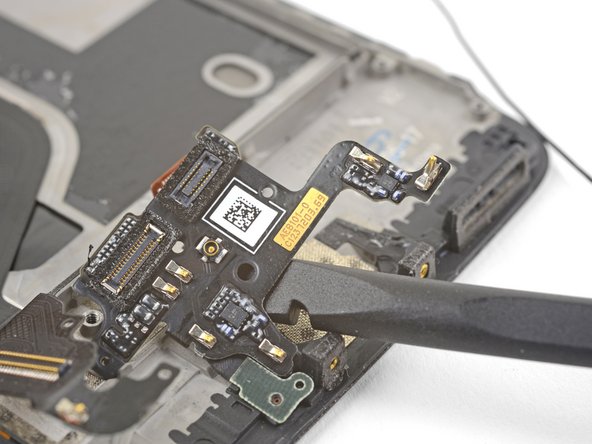
Insert the flat end of a spudger underneath the daughterboard, this time approaching it from the bottom.
-
Twist and slide the spudger slightly to release the daughterboard from its recess.
-
-
Questo passaggio è privo di traduzione. Aiuta a tradurlo
-
Slide the flat end of a spudger underneath the tape covering the fingerprint scanner.
-
Lift up to pry and remove the tape.
-
-
Questo passaggio è privo di traduzione. Aiuta a tradurlo
-
Use your finger to gently lift up the connector end of the fingerprint scanner. Pull upwards slowly. Do not pull directly away from the fingerprint scanner.
-
Keep pulling upwards until the fingerprint scanner cable is freed from its recess.
-
-
Questo passaggio è privo di traduzione. Aiuta a tradurlo
-
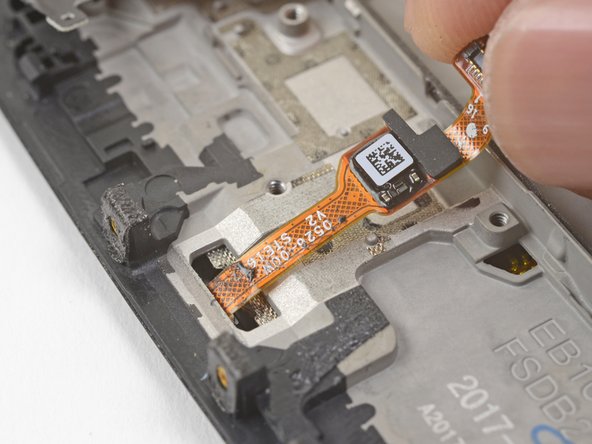
Insert the point of a spudger into the marked areas on either side of the flex cable, and push until the fingerprint scanner is loosened from its recess.
-
-
Questo passaggio è privo di traduzione. Aiuta a tradurlo
-
Once the fingerprint scanner is loosened from its recess, carefully thread its flex cable through the cutout, out of the front of the display.
-
Remove the fingerprint scanner.
-


Annulla: non ho completato questa guida.
Un'altra persona ha completato questa guida.


8 Commenti
Is there an extra step involved so that the button stays countersunk in the new display? Mine seems to be slightly proud of the screen
Hi John,
If you may need to apply some new adhesive to the underside of the fingerprint sensor to hold it in place.
Hi,
I change the fingerprint but only works if don’t close the back cover, when I close the back cover the OS don’t detect the fingerprint sensor. Any idea?
Hey César,
It may be that something is shorting the fingerprint sensor. Did you replace the tape in step 24 with electrical tape?
Great news, finally I found the problem, the connector from daughter board to motherboard was disconnected but a lot of pins maked contact and the micro, and other electronics works but not the fingerprint sensor. I dissasembled the motherboard and pushed the connector from the flex cable to the socket, now all is working ok. Thanks for the response Arthur!