Salta al contenuto principale

Ninja Mega Kitchen System BL770 Power Cord Replacement

Cosa ti serve

  1. Ninja Mega Kitchen System BL770 Power Cord Replacement, Circuit Base: passo 1, immagine 1 di 2 Ninja Mega Kitchen System BL770 Power Cord Replacement, Circuit Base: passo 1, immagine 2 di 2
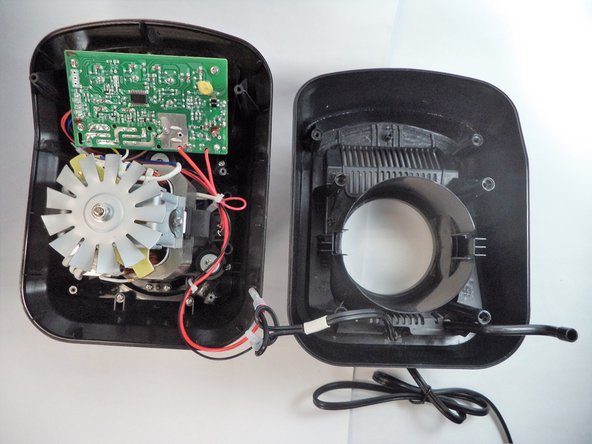
    • Remove the five screws (13mm long, 6mm head) attaching the Base Cover using a Phillips screwdriver (Ph2).

    • Remove the two screws (13 mm long, 6mm head) attaching the Base Cover using a T10 screwdriver.

  2. Ninja Mega Kitchen System BL770 Power Cord Replacement: passo 2, immagine 1 di 1
    • Carefully remove the second layer from the base. You will not need a screwdriver for this step.

  3. Ninja Mega Kitchen System BL770 Power Cord Replacement: passo 3, immagine 1 di 3 Ninja Mega Kitchen System BL770 Power Cord Replacement: passo 3, immagine 2 di 3 Ninja Mega Kitchen System BL770 Power Cord Replacement: passo 3, immagine 3 di 3
    • Remove the 2 screws (13mm, 6mm head) connected to the plastic piece holding down the power cord.

    • Then remove the additional 4 screws (13mm, 6mm head) and 2 screws (11mm, 5mm head) securing the base.

    • Carefully lift the base up from the rest of the blender.

  4. Ninja Mega Kitchen System BL770 Power Cord Replacement: passo 4, immagine 1 di 1
    • Remove 4 screws (11mm, 4mm head) connecting the circuit board to the base.

  5. Ninja Mega Kitchen System BL770 Power Cord Replacement, Power Cord: passo 5, immagine 1 di 2 Ninja Mega Kitchen System BL770 Power Cord Replacement, Power Cord: passo 5, immagine 2 di 2
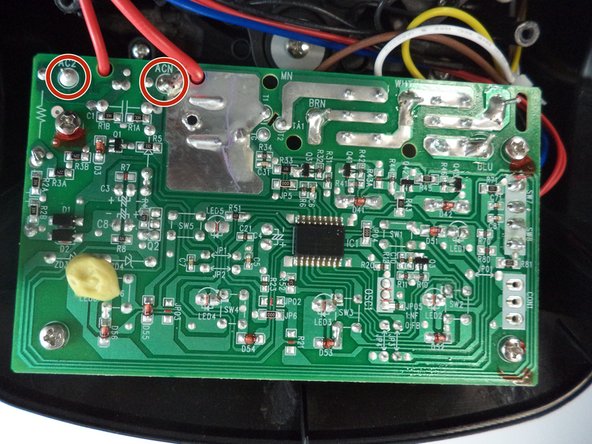
    • Check that the two red wires shown in the photos are properly soldered to the circuit board.

    • If they seem damaged, resolder the wires to the board.

    • If this doesn't solve the issue, proceed to step 6.

  6. Ninja Mega Kitchen System BL770 Power Cord Replacement: passo 6, immagine 1 di 1
    • If the 2 wires in the previous step are connected, it's time to check the 2nd area.

    • Remove the plastic covers and check that the wires are soldered correctly.

Conclusione

To reassemble your device, follow these instructions in reverse order.

Un'altra persona ha completato questa guida.

0 Commenti

Aggiungi Commento

Visualizza Statistiche:

Ultime 24 Ore: 2

Ultimi 7 Giorni: 5

Ultimi 30 Giorni: 19

Tutti i Tempi: 972