Questa versione può contenere modifiche errate. Passa all'ultima istantanea verificata.
Cosa ti serve
-
Questo passaggio è privo di traduzione. Aiuta a tradurlo
-
Turn the device so that the bottom is facing up.
-
-
Questo passaggio è privo di traduzione. Aiuta a tradurlo
-
Use the plastic opening tool to carefully lift the rubber stops in each corner.
-
-
Questo passaggio è privo di traduzione. Aiuta a tradurlo
-
Unscrew the 4 11.8 mm T-8 Torx screws from each corner of the device.
-
-
Questo passaggio è privo di traduzione. Aiuta a tradurlo
-
Lift the lower case straight up from the rest of the router.
-
-
Questo passaggio è privo di traduzione. Aiuta a tradurlo
-
Remove the clear plastic casing by lifting it straight up from the router.
-
-
-
Questo passaggio è privo di traduzione. Aiuta a tradurlo
-
Separate the motherboard from the top shell by lifting it straight up from the router.
-
-
Questo passaggio è privo di traduzione. Aiuta a tradurlo
-
Place the motherboard on a clean flat surface.
-
-
Questo passaggio è privo di traduzione. Aiuta a tradurlo
-
Remove the yellow tape that holds the wire.
-
-
Questo passaggio è privo di traduzione. Aiuta a tradurlo
-
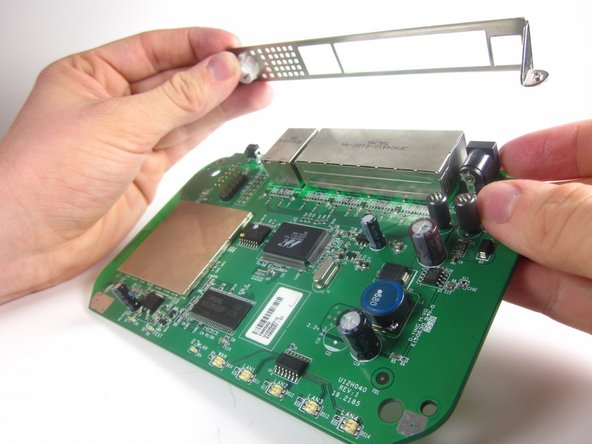
Use tweezers to gently pull the metal bracket that connects the antenna to the motherboard.
-
-
Questo passaggio è privo di traduzione. Aiuta a tradurlo
-
Extend the antenna away from the device, so that it becomes straight.
-
-
Questo passaggio è privo di traduzione. Aiuta a tradurlo
-
Find the clips that hold the antenna onto the router.
-
Use one hand to push the clips in, while using your other hand to pull out the antenna. You may need to gently twist the antenna so it can separate from the hole.
-
The antenna may take considerable force to remove.
-
-
Questo passaggio è privo di traduzione. Aiuta a tradurlo
-
Completely separate the antenna and wire from the rest of the device.
-
-
Questo passaggio è privo di traduzione. Aiuta a tradurlo
-
Desolder the four connections between the reset button and the motherboard
-
Pull the reset button from the other side of the mother board once the solder is liquid.
-


Annulla: non ho completato questa guida.
Un'altra persona ha completato questa guida.

Team

Cal Poly, Team 3-31, Amido Winter 2013 Membro di Cal Poly, Team 3-31, Amido Winter 2013
CPSU-AMIDO-W13S3G31
3 Membri
12 Guide realizzate