Introduzione
This guide will teach you how to remove and replace the battery in the Moto G, in the event that your current battery is no longer holding charge. Fortunately, all you'll need is a Torx T5 screwdriver, a plastic opening tool, and some spare time.
Before you begin, download the Rescue and Smart Assistant app to backup your device and diagnose whether your problem is software or hardware related.
If your battery is swollen, take appropriate precautions.
Cosa ti serve
-
-
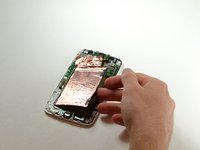
Starting at the USB port on the bottom, remove the rear cover by prying it off with your finger.
-
Work your way down the sides to avoid cracking the rear cover.
-
-
-
Attrezzo utilizzato in questo passaggio:Tweezers$4.99
-
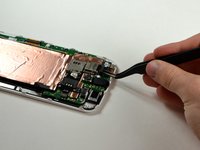
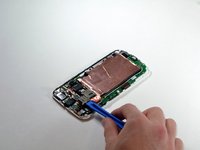
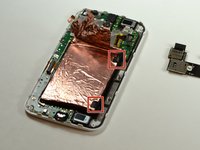
Using a plastic opening tool or tweezers, disconnect the SIM/SD card reader at the top of the phone.
-
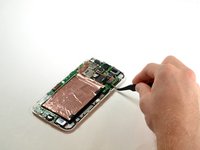
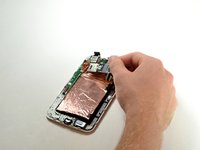
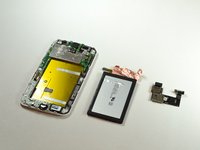
Disconnect the battery connector by prying it off of the motherboard.
-
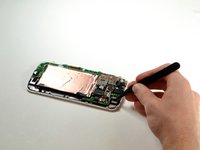
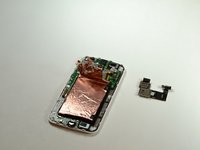
Disconnect the vibration motor by prying its connector off of the motherboard.
-


To reassemble your device, follow these instructions in reverse order.
To reassemble your device, follow these instructions in reverse order.
Annulla: non ho completato questa guida.
Altre 50 persone hanno completato questa guida.
Team

Cal Poly, Team 1-19, Maness Fall 2015 Membro di Cal Poly, Team 1-19, Maness Fall 2015
CPSU-MANESS-F15S1G19
4 Membri
15 Guide realizzate
14 Commenti
It might be worth mentioning that when you remove the 'next layer' of the phone, the power and volume buttons are likely to fall out (I maybe panicked a little when the power button first fell out and I didn't immediately know what part of the phone it was). Especially since they're a pain to put back into place afterwards.
Good guide and pictures, thank you, helped me complete the task. Worth reiterating comments above re power and volume buttons, be careful not to lose them and take note of which way up they go. Also note two different screw lengths, when reassembling be sure to put the correct length screws in the holes.
Should also mention that when reassembling, the 3.2mm screws down the sides need to be tightened very gently, otherwise the screw tips will press on the back of the LCD. If you're lucky this will cause a spot on the LCD and loosening the screw slightly will fix it. If you're unlucky the LCD will be destroyed.
The instructions were just fine and I was able to replace the battery. HOWEVER, when I plugged the phone in to charge the replacement battery, the notification light came on steady and the phone didn't do anything else. I then replaced the purchased battery with the old one and the phone works again. I did buy the battery about 6 months ago and just installed it today. I'm not sure if the battery was bad from the start, if it deteriorates over time without being installed in a phone or what happened. All I know is the replacement battery didn't work and the old one does.
After this exercise, I certainly know how to replace the battery in a Moto G2!