Questa versione può contenere modifiche errate. Passa all'ultima istantanea verificata.
Cosa ti serve
-
Questo passaggio è privo di traduzione. Aiuta a tradurlo
-
Remove the plastic cover by gently prying it up from the notch at the bottom right corner of the phone.
-
With the phone face down, lift the battery up by the labeled tab and remove it from the device.
-
-
Questo passaggio è privo di traduzione. Aiuta a tradurlo
-
Remove all nine 4 mm Phillips screws from the top plastic cover.
-
-
Questo passaggio è privo di traduzione. Aiuta a tradurlo
-
Gently pry up the plastic cover using a plastic opening tool.
-
Start by inserting the tool under the cover's right edge, as indicated by the first picture.
-
Pry up, and continue prying around the rest of the cover in a counter clockwise path.
-
Once loose, remove the plastic cover from the phone.
-
-
Questo passaggio è privo di traduzione. Aiuta a tradurlo
-
Disconnect the rear-facing camera by prying straight up on the connector on its right side.
-
Remove the rear-facing camera from the Moto E4.
-
-
Questo passaggio è privo di traduzione. Aiuta a tradurlo
-
Disconnect the display cable by prying it straight up from the motherboard.
-
-
Questo passaggio è privo di traduzione. Aiuta a tradurlo
-
Unlock the ZIF connector for the side buttons by prying up the black locking flap opposite the cable.
-
Pull the cable carefully toward the edge of the phone to slide it from its socket.
-
-
Questo passaggio è privo di traduzione. Aiuta a tradurlo
-
Disconnect the antenna cable by sliding a plastic pry tool or fine tweezers under the wire close to its socket, and then prying straight up.
-
-
-
Questo passaggio è privo di traduzione. Aiuta a tradurlo
-
Remove the two 3.1 mm long Phillips screws securing the motherboard.
-
-
Questo passaggio è privo di traduzione. Aiuta a tradurlo
-
Grab the top edge of the motherboard and lift to hinge it upward (but don't try to fully remove it). While doing so, keep all other cables clear of the motherboard.
-
Use a spudger or other fine-tip pry tool to pry off and disconnect the last remaining ribbon cable on the underside of the motherboard.
-
Remove the Moto E4 motherboard.
-
-
Questo passaggio è privo di traduzione. Aiuta a tradurlo
-
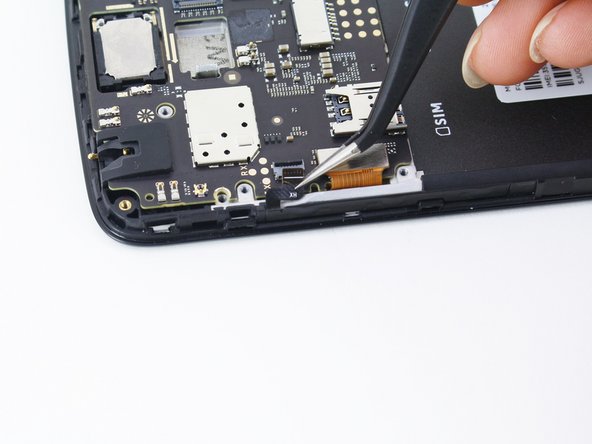
Use a plastic opening tool to carefully separate the cable until it detaches.
-
-
Questo passaggio è privo di traduzione. Aiuta a tradurlo
-
Heat an iOpener and apply it to the left edge of the screen for one minute to help soften the adhesive securing the screen.
-
-
Questo passaggio è privo di traduzione. Aiuta a tradurlo
-
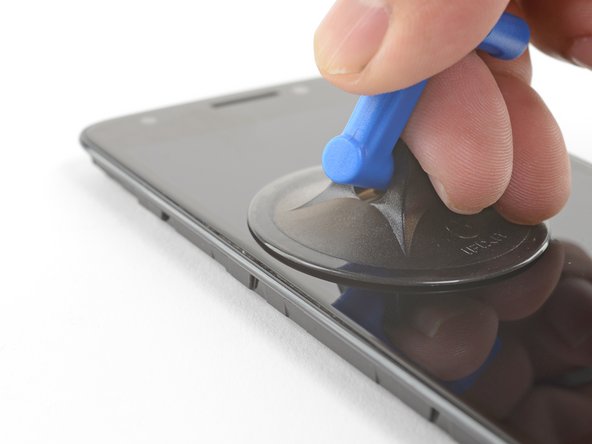
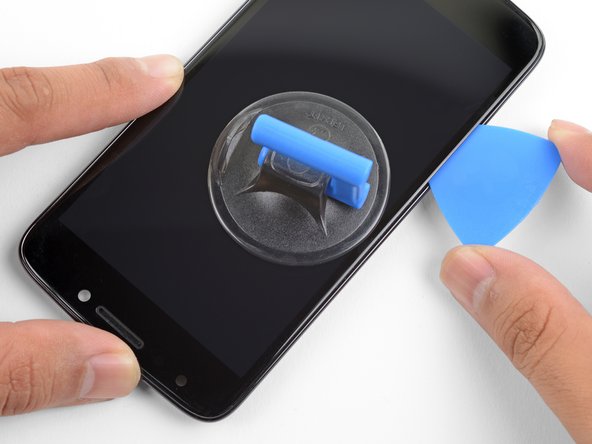
Apply a suction cup to the screen, near the heated edge of the phone.
-
Pull on the suction cup with strong, steady force to create a gap between the screen and frame.
-
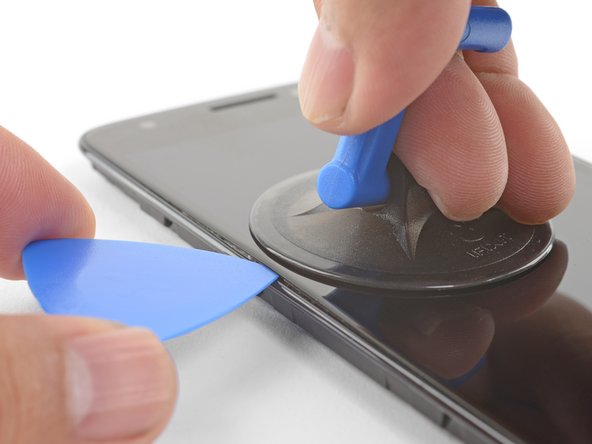
Insert the point of an opening pick into the gap.
-
-
Questo passaggio è privo di traduzione. Aiuta a tradurlo
-
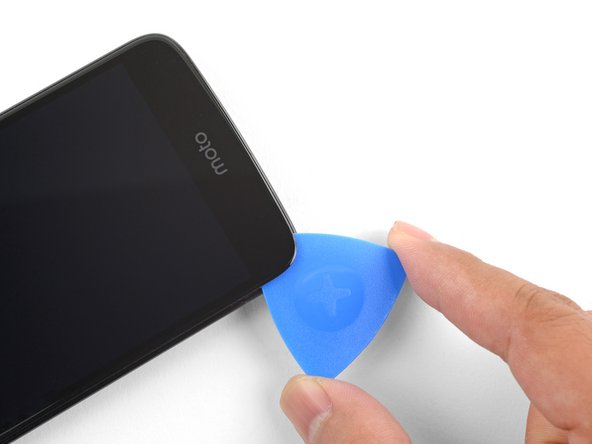
Slide the opening pick along the left edge to slice through the adhesive.
-
-
Questo passaggio è privo di traduzione. Aiuta a tradurlo
-
Apply a heated iOpener to the bottom edge of the phone for a minute to soften the adhesive.
-
Use an opening pick to slice through the adhesive at the bottom edge of the phone.
-
-
Questo passaggio è privo di traduzione. Aiuta a tradurlo
-
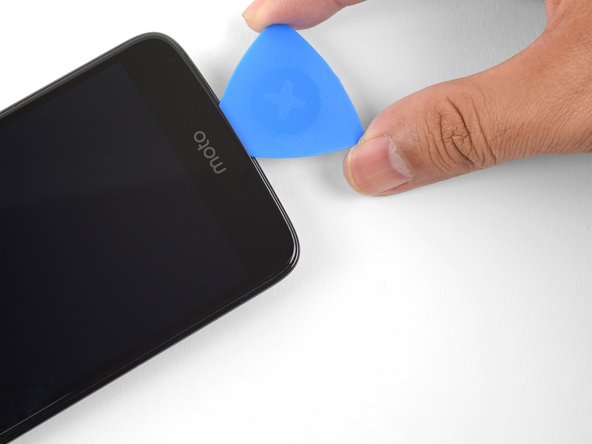
Continue heating and slicing along the right and top edges of the phone.
-
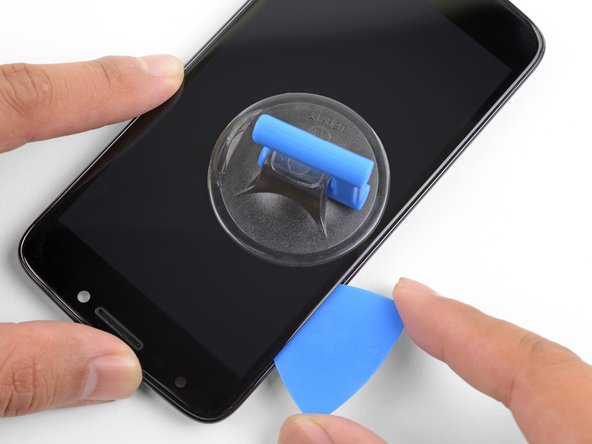
Leave an opening pick in the seam to prevent the adhesive from resealing.
-
-
Questo passaggio è privo di traduzione. Aiuta a tradurlo
-
Lift up the bottom edge of the screen by a few degrees and slice any remaining adhesive.
-
-
Questo passaggio è privo di traduzione. Aiuta a tradurlo
-
Grasp the phone near the top edge and slowly separate the screen and the display cable from the frame.
-
As you lift the screen away, thread the grounding cable and the screen cable through their respective cutouts.
-
-
Questo passaggio è privo di traduzione. Aiuta a tradurlo
-
Remove the screen.
-
Compare your screen with the replacement part. You may need to transfer certain components such as the earpiece bezel to your replacement part.
-
-
Questo passaggio è privo di traduzione. Aiuta a tradurlo
-
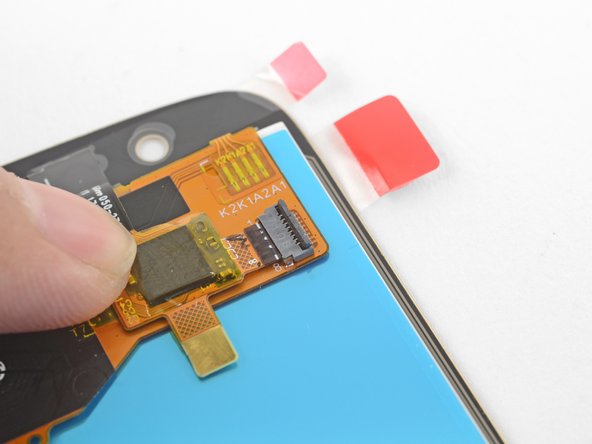
If your replacement screen came with the digitizer cable disconnected, be sure to connect it before installation:
-
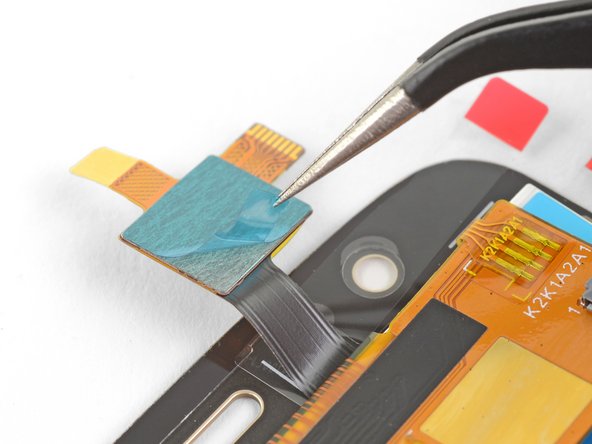
Use a spudger to flip up the digitizer cable ZIF socket's locking bar, located on the back of the screen near the top right corner.
-
Peel off the small square plastic liner under the digitizer cable to expose the adhesive.
-
Press the cable down against the back of the screen.
-
Carefully feed the cable into the digitizer cable socket until the white bar printed on the cable is barely visible.
-
Flip the socket's locking bar down to secure the cable in place.
-
Peel all plastic liners from the replacement screen.
-


Annulla: non ho completato questa guida.
Un'altra persona ha completato questa guida.

