Introduzione
Use this guide to remove and replace the heatsink in a Microsoft Surface Book.
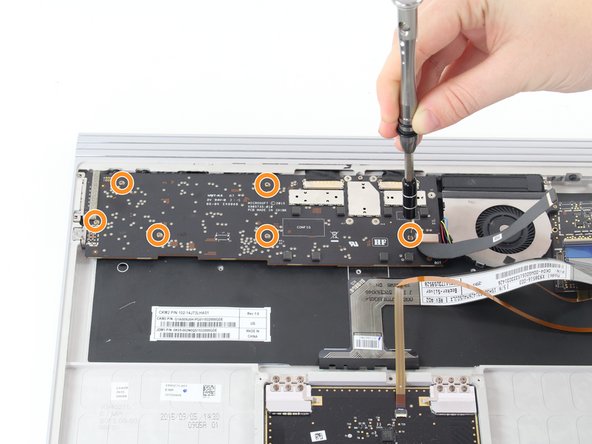
This will require an extensive teardown of the keyboard's internals. You will be removing the motherboard, SD card slot, USB ports, and other internals. Make sure you have a secure place to store the tiny screws you will be removing.
The heat sink transfers heat from the graphics card and motherboard to the fan, ensuring that your computer doesn't overheat. If this heat sink is damaged and not replaced, you run the risk of permanent damage to your motherboard and graphics card by overheating.
Cosa ti serve
-
-
Press and hold the Detach button on the keyboard.
-
Alternatively, click the Detach icon on the right-hand side of the Windows 10 taskbar.
-
Remove the display.
-
-
-
Flip open the display as far as it will go.
-
Lift the device up and place it on its side, with the display facing away from you and the SurfaceConnect port facing up.
-
-
-
Insert the straight end of the paper clip at a 45 degree angle into the sixth hole from the left.
-
-
-
Firmly push the paper clip into the hole.
-
Pull the base away from the display to detach it.
-
-
-
With one side detached, pull firmly to pivot the display out to disconnect the second side.
-
-
-
-
Orient your keyboard with the internals facing up and the USB ports on the right.
-
-
-
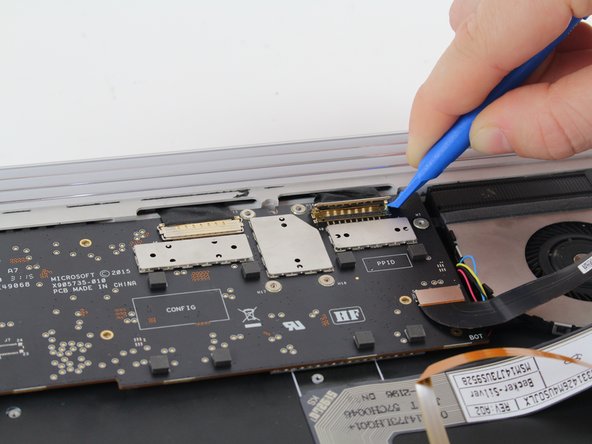
Remove the larger, black ribbon cable located on the USB card with a plastic opening tool by lifting the tab away from its connector. Again, place the tool underneath the tab and pry it off.
-


Compare your new replacement part to the original part—you may need to transfer remaining components or remove adhesive backings from the new part before installing.
To reassemble your device, follow the above steps in reverse order.
Take your e-waste to an R2 or e-Stewards certified recycler.
Repair didn’t go as planned? Check out our Answers community for troubleshooting help.
Team

Cal Poly, Team 20-3, Livingston Fall 2016 Membro di Cal Poly, Team 20-3, Livingston Fall 2016
CPSU-LIVINGSTON-F16S20G3
4 Membri
12 Guide realizzate