Salta al contenuto principale

Mad Catz Dual Force 2 Pro Vibration Motors Replacement

Cosa ti serve

  1. Mad Catz Dual Force 2 Pro Vibration Motors Replacement, Remove Cover: passo 1, immagine 1 di 1
    • Remove the six 7 mm Phillips screws from the rear cover.

  2. Mad Catz Dual Force 2 Pro Vibration Motors Replacement: passo 2, immagine 1 di 1
    • Remove the back of the controller.

    • There are no loose items in the controller that can fall out, so you can open it, generally, however you want.

  3. Mad Catz Dual Force 2 Pro Vibration Motors Replacement: passo 3, immagine 1 di 1
    • Remove the two 7 mm screws on the closest circuit board.

  4. Mad Catz Dual Force 2 Pro Vibration Motors Replacement: passo 4, immagine 1 di 2 Mad Catz Dual Force 2 Pro Vibration Motors Replacement: passo 4, immagine 2 di 2
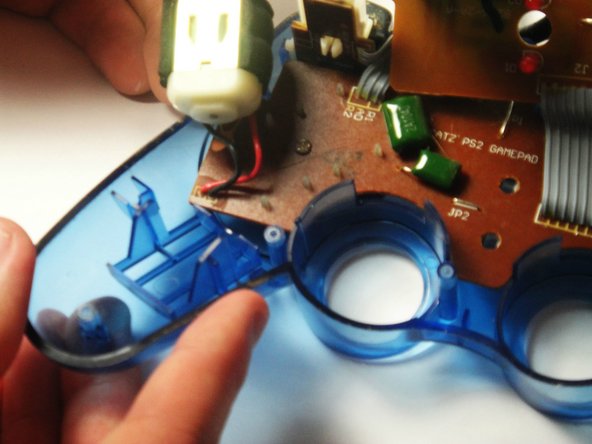
    • Grip the sides of the motor you wish to replace and lift up.

    • Be careful not to tear the wires that connect the motors to the motherboard.

  5. Mad Catz Dual Force 2 Pro Vibration Motors Replacement, Remove the Screw: passo 5, immagine 1 di 1
    • Use a soldering iron to de-solder both vibration motor wires from the motherboard.

    • If you do not know how to solder, see the soldering guide for instructions.

    • The positive (red) wire connects nearest the edge of the motherboard.

    • When soldering on circuit boards, be sure not to overheat the connection as permanent damage may result.

  6. Mad Catz Dual Force 2 Pro Vibration Motors Replacement: passo 6, immagine 1 di 1
    • If needed, repeat the last two steps for the other vibration motors.

Conclusione

To reassemble your device, follow these instructions in reverse order.

Team

USF Tampa, Team 7-2, Remmell Winter 2015 Membro di USF Tampa, Team 7-2, Remmell Winter 2015

USFT-REMMELL-W15S7G2

4 Membri

10 Guide realizzate

0 Commenti

Aggiungi Commento

Visualizza Statistiche:

Ultime 24 Ore: 0

Ultimi 7 Giorni: 0

Ultimi 30 Giorni: 5

Tutti i Tempi: 321