Questa versione può contenere modifiche errate. Passa all'ultima istantanea verificata.
Cosa ti serve
-
-
Rimuovi le dieci viti seguenti, che fissano il case inferiore a quello superiore:
-
Sette viti con testa a croce da 3 mm.
-
Tre viti con testa a croce da 13,5 mm.
-
-
CompraAttrezzo utilizzato in questo passaggio:P6 Pentalobe Screwdriver 2009 15" MacBook Pro Battery$5.49
-
La batteria è fissata al case superiore mediante tre viti Pentalobe a cinque punte. È possibile rimuoverle mediante questo apposito cacciavite.
-
-
-
Passo 8 Installazione del disco rigido nel MacBook Pro Unibody a 2,53 GHz da 15", versione metà 2009
-
Rimuovere le due viti con testa a croce che fissano la staffa del disco rigido al case superiore.
-
Sollevare la staffa di fissaggio fuori dal case superiore.
-
-
Questo passaggio è privo di traduzione. Aiuta a tradurlo
-
Remove the following four screws securing the hard drive and IR sensor cable to the upper case:
-
Two 1.5 mm Phillips screws.
-
Two 4 mm Phillips screws.
-
-
Questo passaggio è privo di traduzione. Aiuta a tradurlo
-
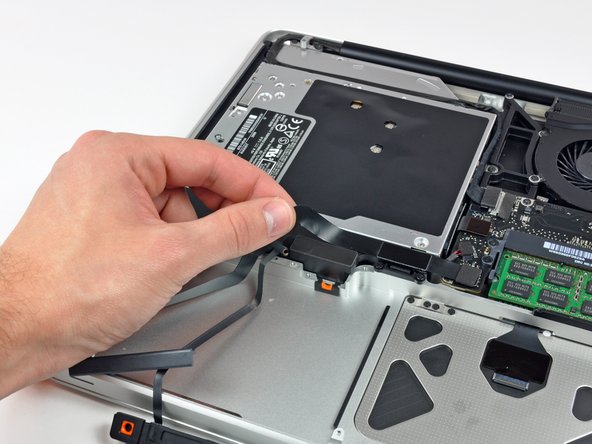
Slide the hard drive and IR sensor bracket away from the edge of the upper case.
-
Carefully peel the hard drive and IR sensor cable from the upper case.
-
-
Questo passaggio è privo di traduzione. Aiuta a tradurlo
-
Use the flat end of a spudger to pry the hard drive cable connector up off the logic board.
-
Lift the hard drive and IR sensor assembly out of the upper case.
-
-
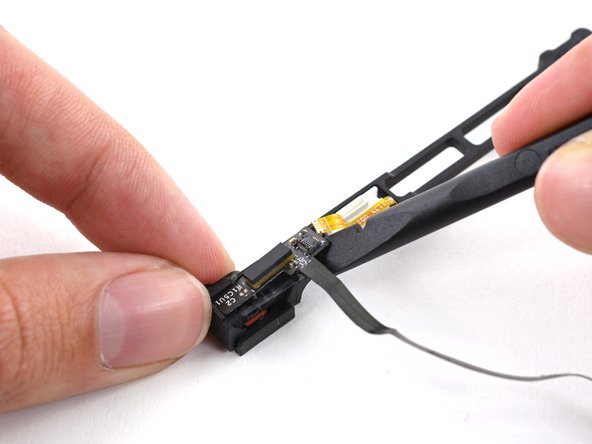
Questo passaggio è privo di traduzione. Aiuta a tradurlo
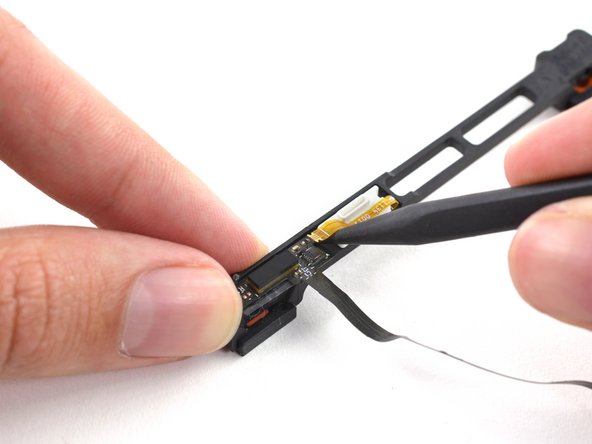
-
Use the tip of a spudger to flip the ZIF connector on the hard drive cable.
-
Gently pull the sensor bracket cable out of the ZIF connector.
-
Use the flat end of a spudger to pry the hard drive cable up off the sensor bracket.
-


Annulla: non ho completato questa guida.
Altre 54 persone hanno completato questa guida.
