Questa versione può contenere modifiche errate. Passa all'ultima istantanea verificata.
Cosa ti serve
-
-
Rimuovi le seguenti viti Pentalobe P5 che fissano il case inferiore del MacBook Pro:
-
Otto viti da 3,0 mm
-
Due viti da 2,3 mm
-
-
-
Usa uno spudger o delle pinzette per staccare i tre cavi dell'antenna AirPort dalle loro sedi sulla scheda AirPort.
-
Per ricollegarlo, allinea attentamente il connettore con la presa e premilo con decisione con la parte piatta della spudger.
-
-
-
Utilizza la parte piatta dello spudger per fare leva sulla copertura in gomma delle cerniere sinistra e destra.
-
-
-
Rimuovi le due viti T5 Torx da 3.1mm che fissano le cerniere del display sul case superiore.
-
Rimuovi le due cerniere di alluminio dal MacBook Pro.
-
-
-
Usando l'estremità piatta di uno spudger, solleva dal suo zoccolo sulla scheda logica il cavo della scheda I/O.
-
Con una procedura simile, rimuovi il connettore della scheda I/O dal suo zoccolo sulla scheda I/O.
-
Rimuovi il cavo della scheda I/O dal MacBook Pro.
-
-
-
Rimuovi la singola vite Torx T5 (T6 in alcune revisioni) da 2,9 mm che fissa la scheda AirPort alla scheda logica.
-
-
-
-
Usa l'estremità piatta di uno spudger per alzare la copertura in gomma del dissipatore dalla ventola sinistra.
-
-
-
Usa la punta di uno spudger per far scattare la linguetta di bloccaggio sullo zoccolo ZIF del cavo piatto della ventola sinistra.
-
Iniziando dalla cima del cavo, fai scorrere un attrezzo di apertura in plastica sotto il cavo della ventola destra per liberarlo dalla scheda logica.
-
Solleva dal dispositivo la ventola sinistra.
-
-
-
Usa la punta di uno spudger per alzare il blocco del cavo dati della scheda I/O e ruotalo verso il lato batteria del computer.
-
Usa l'estremità piatta di uno spudger per far scorrere il cavo dati della scheda I/O dal suo zoccolo sulla scheda logica.
-
-
-
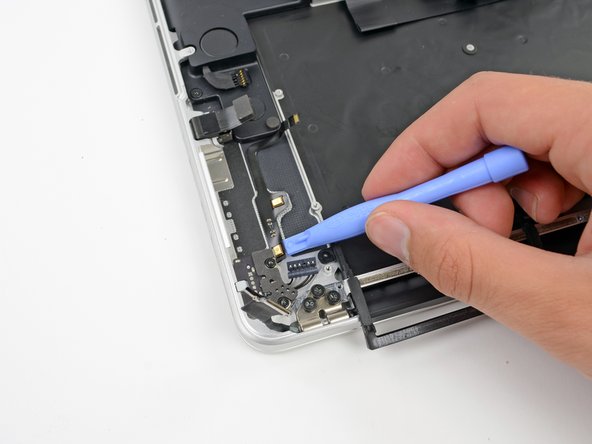
Usa l'estremità piatta di uno spudger per disconnettere il connettore del jack cuffie dal suo zoccolo sulla scheda logica.
-
-
-
Sollevandola dal lato più vicino alla batteria, ruota la scheda logica verso la parte superiore del MacBook Pro.
-
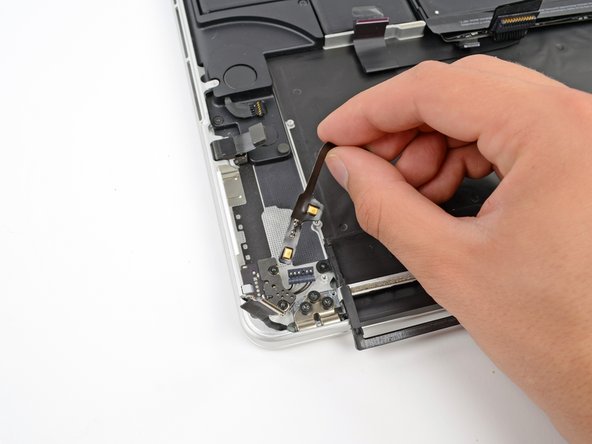
Usando l'estremità piatta di uno spudger, spingi delicatamente il connettore MagSafe2 fuori dal suo zoccolo nella parte inferiore della scheda logica.
-
In senso orario dall'alto: tastiera, trackpad, batteria, altoparlante destro, retroilluminazione tastiera, display, microfono, jack cuffie, altoparlante sinistro.
-
-
Questo passaggio è privo di traduzione. Aiuta a tradurlo
-
Remove the single 2.6 mm T5 Torx screw securing the left rubber hinge cover in place.
-
Slide the hinge cover out of its bezel, then lift it up and out of the device.
-
Slide the right cover out of its bezel, then lift it out of the device.
-
-
Questo passaggio è privo di traduzione. Aiuta a tradurlo
-
Insert the edge of a plastic opening tool underneath the upper microphone.
-
Slide the blade of a plastic opening tool along the bottom of the upper microphone, releasing the adhesive.
-
In a similar manner, release the adhesive underneath the lower microphone.
-
Lift the cable out of the device.
-
-
Questo passaggio è privo di traduzione. Aiuta a tradurlo
-
Remove the two 4.0 mm T5 Torx screws securing the MagSafe DC-In board to the upper case.
-
Slide the MagSafe DC-In board towards the right free it from its recess within the upper case.
-
Lift and remove the MagSafe DC-In board out of the upper case assembly.
-
-
Questo passaggio è privo di traduzione. Aiuta a tradurlo
-
Remove the two 3.6 mm T5 Torx screws securing the headphone jack to the upper case assembly.
-
Slide the headphone jack away from the upper case.
-
Lift and remove the headphone jack out from its recess in the upper case.
-
-
Questo passaggio è privo di traduzione. Aiuta a tradurlo
-
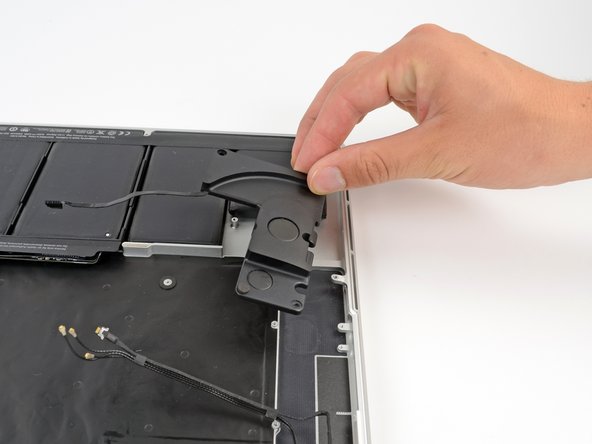
Remove the following three screws securing the left speaker to the upper case:
-
One 5.6 mm T5 Torx screw
-
One 6.9 mm T5 Torx screw
-
One 2.6 mm T5 Torx screw
-
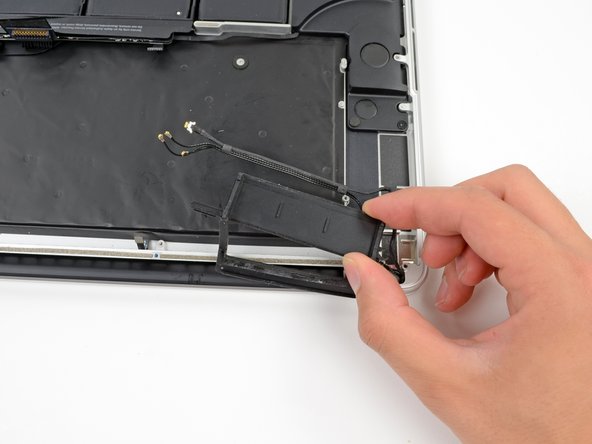
Lift the left speaker out of the upper case and set it aside.
-
-
Questo passaggio è privo di traduzione. Aiuta a tradurlo
-
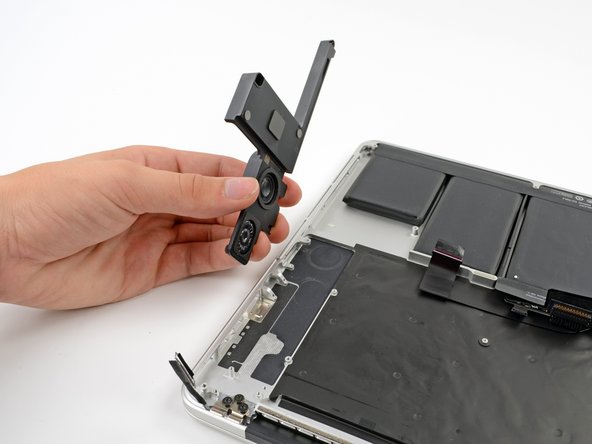
Remove the following three screws securing the right speaker to the upper case:
-
One 5.6 mm T5 Torx screw
-
One 6.9 mm T5 Torx screw
-
One 2.6 mm T5 Torx screw
-
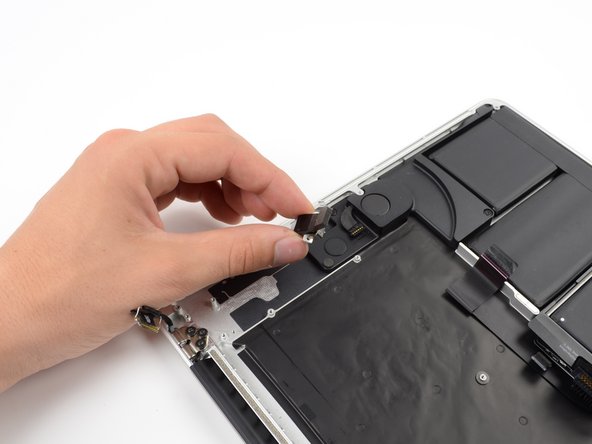
Remove the right speaker from the MacBook Pro.
-
-
Questo passaggio è privo di traduzione. Aiuta a tradurlo
-
Remove four out of the six 5.3 mm T8 Torx screws securing the display to the upper case.
-
-
Questo passaggio è privo di traduzione. Aiuta a tradurlo
-
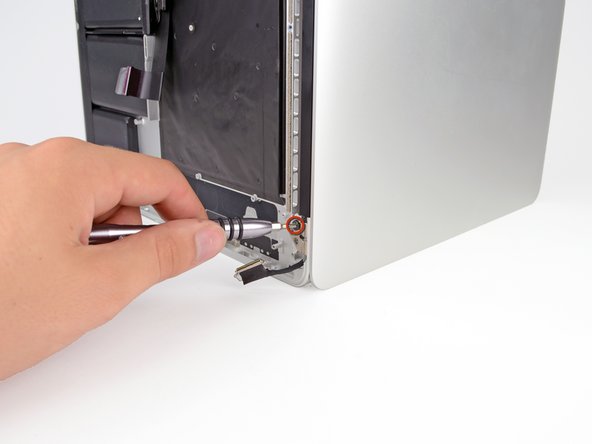
While supporting both halves of the device with one hand, unscrew the upper 5.3 mm T8 Torx screw.
-
-
Questo passaggio è privo di traduzione. Aiuta a tradurlo
-
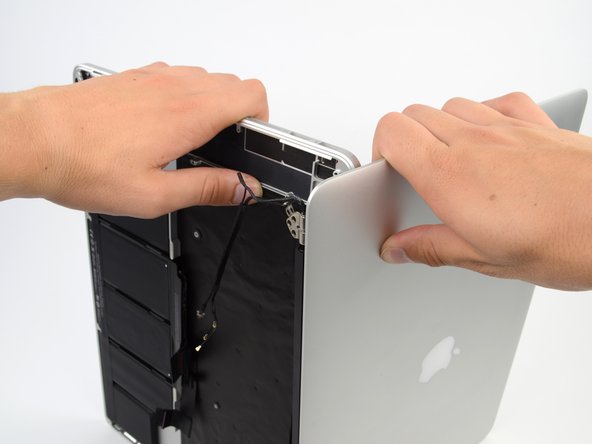
Grip both halves of the device. Firmly put one hand on the top center of the upper case (left) and one in the same place on the display assembly (right).
-
While holding the display assembly in place, slowly push forward on the upper case, releasing it from the display assembly.
-


Annulla: non ho completato questa guida.
Altre 24 persone hanno completato questa guida.


Un commento
Thanks for this guide, I now have working keyboard for this first time in years! Been bluetoothing a keyboard and finally had had enough. At first, i bought just the keyboard but after some research, realized I wan’t comfortable drilling out the 100+ rivets Apple put in there. Just transferred my trackpad (also an ifixit replacement from earlier), battery and all the internals with this step by step guide and it fired right back up. Extremely happy with this fix, almost like getting a new computer….. Almost. ;)