Introduzione
Usa questa guida per sostituire il Retina display, il pannello di vetro e il gruppo fotocamera iSight.
Cosa ti serve
-
Attrezzo utilizzato in questo passaggio:Magnetic Project Mat$19.95
-
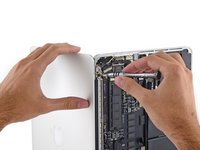
Rimuovi le 10 viti seguenti che fissano il coperchio inferiore al case superiore:
-
Due viti Pentalobe P5 da 2,3 mm
-
Otto viti Pentalobe P5 da 3,0 mm
-
-
-
-
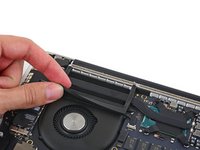
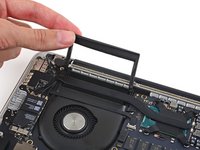
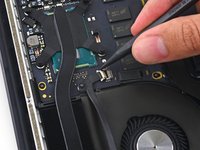
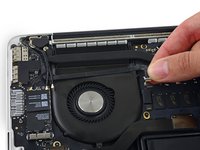
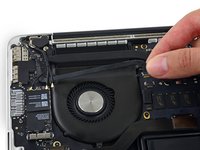
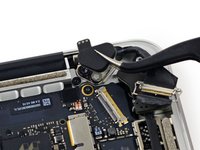
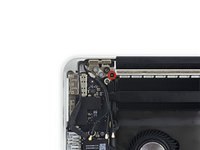
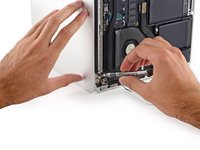
Stacca con attenzione l'ammortizzatore in gomma dal bordo del dissipatore di calore per scoprire il cavo della fotocamera iSight incollato alla ventola.
-
-
-
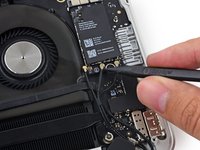
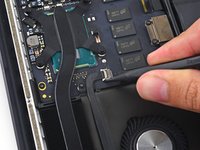
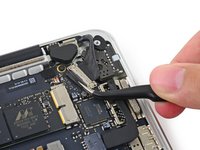
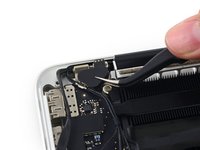
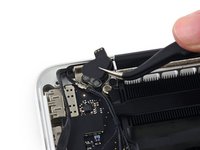
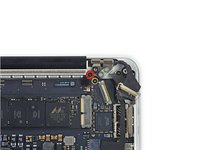
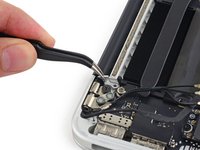
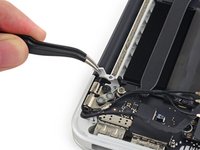
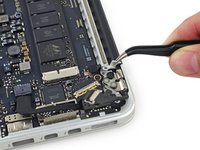
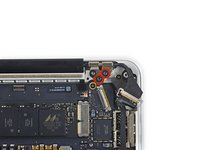
Inserisci la punta di uno spudger sotto ciascuno dei cavi dell'antenna vicino ai connettori e fai leva per scollegarli dalla scheda AirPort.
-
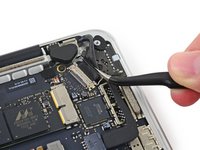
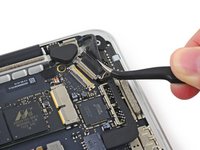
Collega il cavo con la guaina lunga alla presa centrale.
-
Il cavo con la guaima corta si collega vicino alla vite.
-
Il cavo rimanente non ha guaine e si collega nell'ultima presa vuota, accanto alla ventola.
-
-
-
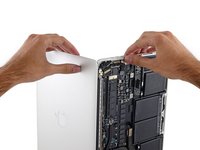
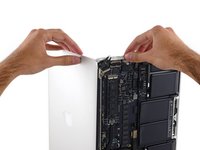
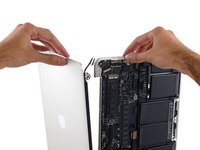
Afferra il case superiore con la mano destra e ruotalo leggermente in senso orario, verso la parte superiore del display, in modo che le staffe del display passino oltre il bordo del case superiore.
-
Ruota leggermente ilo schermo allontanandolo dal case superiore.
-
Allontana il display dal case superiore, facendo attenzione a eventuali staffe o cavi che potrebbero impigliarsi.
-


Per rimontare il tuo dispositivo, segui queste istruzioni in ordine inverso.
Per rimontare il tuo dispositivo, segui queste istruzioni in ordine inverso.
Annulla: non ho completato questa guida.
Altre 165 persone hanno completato questa guida.
Un ringraziamento speciale a questi traduttori:
100%


Questi traduttori ci stanno aiutando ad aggiustare il mondo! Vuoi partecipare?
Inizia a tradurre ›


35 Commenti
I've been browsing guides to this model and I don't get how in this one on Youtube the laptop looks completely different, although it also claims to be A1502. Either one of them is a different model or I'm really missing something?
Unfortunately the A1502 number isn't an exclusive model number, several devices share it, the internal differences between them vary. The more telling number is the EMC number, which tends to me more exclusive to unique devices.
After a closer look they actually seem to be the same, I just got confused by the video being a lot less detailed than this walkthrough. I just replaced the screen of my macbook following this guide (yay!) without any previous experience of fixing macbooks, though I must admit I assembled a few desktops at the dawn of the millennium. The only slight problem I encountered was that the main display cable wouldn't lie flat enough in that corner, it kept sticking out, and even after screwing the lid on the gap at that corner seems to be a tiny bit wider. But the laptop is working anyway.
Thank you Sam for posting this guide! It saved me a lot of time and money. Being in China I bought the display assembly on Taobao for $250US whereas the shop repair estimate that I got was around $400.
If anyone is still having doubts - you can do it!
Can you replace just the LCD without the clamshell bezel and cables?