Salta al contenuto principale
Logitech Harmony Smart Control Battery Contact  Replacement

Logitech Harmony Smart Control Battery Contact Replacement

Josh Hendricks

Josh Hendricks e 4 altri collaboratori

Ultimo aggiornamento il May 23, 2016

10 - 20 minuti
Difficile
Introduzione Migliore

Introduzione

Vai al passo 1

This guide requires soldering, for soldering guide click below.

Soldering Guide

Cosa ti serve

Ricambi

Strumenti

Mostra di più…

  1. Logitech Harmony Smart Control Battery Contact  Replacement, Battery Contact: passo 1, immagine 1 di 2 Logitech Harmony Smart Control Battery Contact  Replacement, Battery Contact: passo 1, immagine 2 di 2
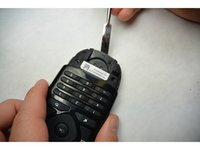
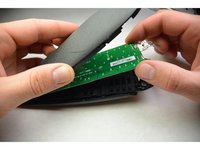
    • Use both thumbs to slide the grooved cover off of the remote

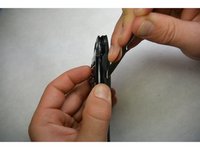
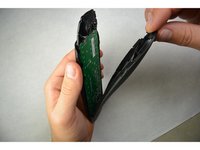
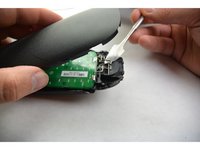
    • Once the cover is off, remove the battery.

  2. Logitech Harmony Smart Control Battery Contact  Replacement: passo 2, immagine 1 di 2 Logitech Harmony Smart Control Battery Contact  Replacement: passo 2, immagine 2 di 2
    • Locate both of the 4mm Phillips screws on the remote. Using the PH00 bit, remove the screws.

  3. Logitech Harmony Smart Control Battery Contact  Replacement: passo 3, immagine 1 di 3 Logitech Harmony Smart Control Battery Contact  Replacement: passo 3, immagine 2 di 3 Logitech Harmony Smart Control Battery Contact  Replacement: passo 3, immagine 3 di 3
    • Use a flat screwdriver or a prying tool to split the remote and separate the two pieces. Start from the bottom.

  4. Logitech Harmony Smart Control Battery Contact  Replacement: passo 4, immagine 1 di 2 Logitech Harmony Smart Control Battery Contact  Replacement: passo 4, immagine 2 di 2
    • Using the metal piece from the housing, pry the circuit board upwards. Do not disconnect it from the board.

    • Slide the circuit board out from the housing .

  5. Logitech Harmony Smart Control Battery Contact  Replacement: passo 5, immagine 1 di 1
    • Locate the battery contacts on the circuit board.

    • Using a soldering iron, remove the old solder and the battery contacts. Install new battery contacts and solder them.

Conclusione

To reassemble your device, follow these instructions in reverse order.

Team

IUPUI, Team 3-2, Harley Fall 2015 Membro di IUPUI, Team 3-2, Harley Fall 2015

IUPUI-HARLEY-F15S3G2

4 Membri

5 Guide realizzate

Un commento

do you know where can i buy the springs?

IOANNIS KARAKOGLOU - Replica

Aggiungi Commento

Visualizza Statistiche:

Ultime 24 Ore: 0

Ultimi 7 Giorni: 2

Ultimi 30 Giorni: 5

Tutti i Tempi: 5,034