Salta al contenuto principale

Questa guida ha delle modifiche più recenti. Passa all'ultima versione non verificata.

Lenovo Z70-80 Motherboard Replacement

Cosa ti serve

  1. Lenovo Z70-80 Motherboard Replacement, Battery: passo 1, immagine 1 di 2 Lenovo Z70-80 Motherboard Replacement, Battery: passo 1, immagine 2 di 2
    • Use your fingers two push both latches away from each other to release the battery.

    • Pull the battery out.

  2. Lenovo Z70-80 Motherboard Replacement, Back Panel: passo 2, immagine 1 di 3 Lenovo Z70-80 Motherboard Replacement, Back Panel: passo 2, immagine 2 di 3 Lenovo Z70-80 Motherboard Replacement, Back Panel: passo 2, immagine 3 di 3
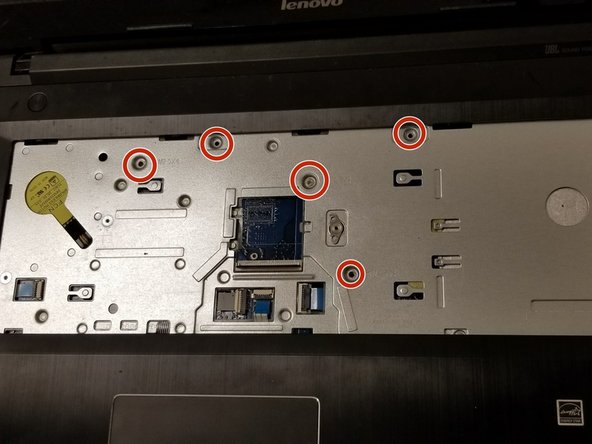
    • Remove the two Phillips #0 screws from the bottom panel.

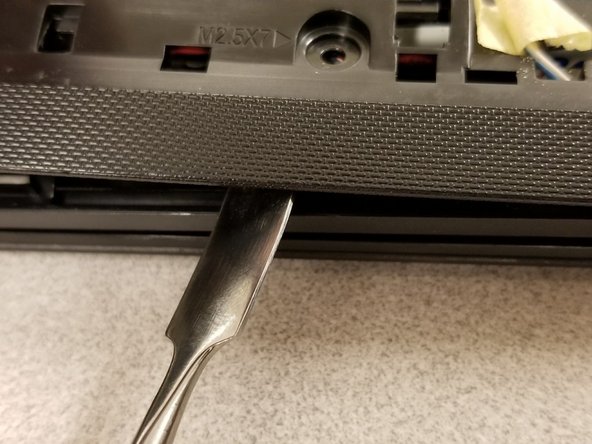
    • Slide the panel down slightly, and then lift to pull it off.

  3. Lenovo Z70-80 Motherboard Replacement, Optical Drive: passo 3, immagine 1 di 3 Lenovo Z70-80 Motherboard Replacement, Optical Drive: passo 3, immagine 2 di 3 Lenovo Z70-80 Motherboard Replacement, Optical Drive: passo 3, immagine 3 di 3
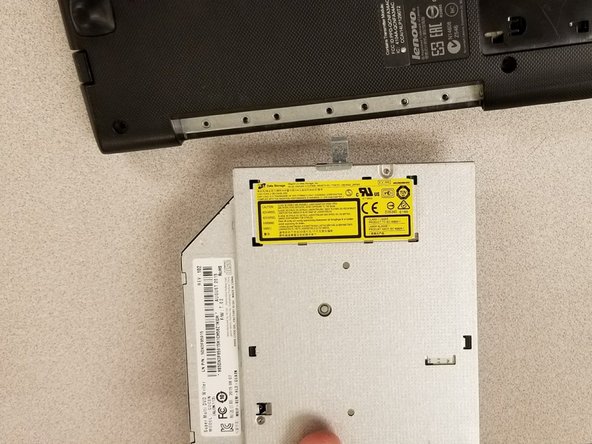
    • Remove the single 3mm Phillips #0 screw from the optical drive.

    • Pull the optical drive out of the side.

  4. Lenovo Z70-80 Motherboard Replacement, Electric Fan: passo 4, immagine 1 di 3 Lenovo Z70-80 Motherboard Replacement, Electric Fan: passo 4, immagine 2 di 3 Lenovo Z70-80 Motherboard Replacement, Electric Fan: passo 4, immagine 3 di 3
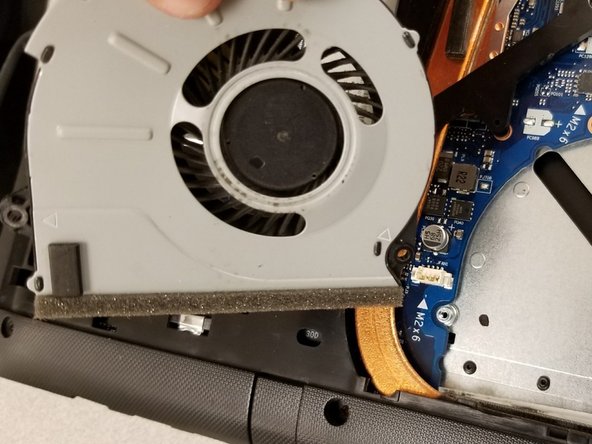
    • Remove the three 6mm Phillips #0 screws from the fan.

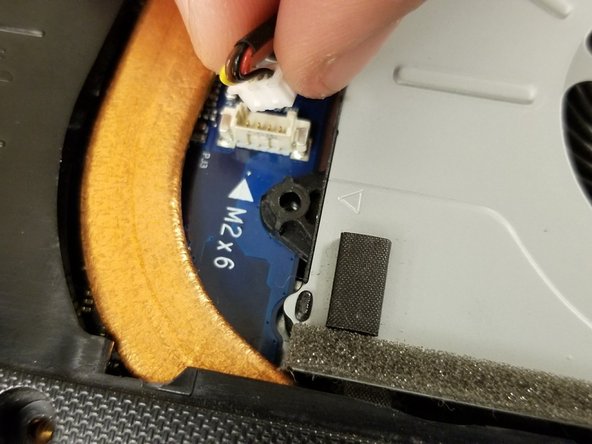
    • Disconnect the fan from the motherboard by pulling up on the plug.

  5. Lenovo Z70-80 Motherboard Replacement, Motherboard: passo 5, immagine 1 di 1
    • Remove all the 3-7mm Phillips #0 screws to remove the back cover.

    • There is a sticker covering the screw marked with a red arrow. This sticker will have to be removed in order to reach the screw.

  6. Lenovo Z70-80 Motherboard Replacement: passo 6, immagine 1 di 3 Lenovo Z70-80 Motherboard Replacement: passo 6, immagine 2 di 3 Lenovo Z70-80 Motherboard Replacement: passo 6, immagine 3 di 3
    • Carefully take out the keyboard and remove all of the 3mm Phillips screws.

    • There is a tiny black tab you have to flip up on the ZIF connector so it can open and safely be removed.

  7. Lenovo Z70-80 Motherboard Replacement: passo 7, immagine 1 di 3 Lenovo Z70-80 Motherboard Replacement: passo 7, immagine 2 di 3 Lenovo Z70-80 Motherboard Replacement: passo 7, immagine 3 di 3
    • Remove all ribbon cables and connectors from the front and back of the laptop.

    • Remember to open the tiny tabs on ZIF connectors to safely remove them.

  8. Lenovo Z70-80 Motherboard Replacement: passo 8, immagine 1 di 2 Lenovo Z70-80 Motherboard Replacement: passo 8, immagine 2 di 2
    • Remove the 3mm screw and safely pull out the cables from the hooks holding them in place.

  9. Lenovo Z70-80 Motherboard Replacement: passo 9, immagine 1 di 2 Lenovo Z70-80 Motherboard Replacement: passo 9, immagine 2 di 2
    • With care pry open the cover off the laptop using the regular or metal spudger.

  10. Lenovo Z70-80 Motherboard Replacement: passo 10, immagine 1 di 3 Lenovo Z70-80 Motherboard Replacement: passo 10, immagine 2 di 3 Lenovo Z70-80 Motherboard Replacement: passo 10, immagine 3 di 3
    • Unplug the two black cables from the motherboard which are marked by the red squares.

    • Remove all the 3mm screws from the motherboard. Then, carefully remove the motherboard from the laptop.

    • Always pick up the motherboard by the edges.

Conclusione

To reassemble your device, follow these instructions in reverse order.

Altre 3 persone hanno completato questa guida.

Team

Gateway, Team S1-G4, Johnson Spring 2018 Membro di Gateway, Team S1-G4, Johnson Spring 2018

GCC-JOHNSON-S18S1G4

2 Membri

12 Guide realizzate

0 Commenti

Aggiungi Commento

Visualizza Statistiche:

Ultime 24 Ore: 3

Ultimi 7 Giorni: 7

Ultimi 30 Giorni: 35

Tutti i Tempi: 4,009