Salta al contenuto principale

Lenovo YOGA 730-15IKB Heat Sink Replacement

Cosa ti serve

  1. Lenovo YOGA 730-15IKB Heat Sink Replacement, Bottom Cover: passo 1, immagine 1 di 2 Lenovo YOGA 730-15IKB Heat Sink Replacement, Bottom Cover: passo 1, immagine 2 di 2
    • Turn off the computer and unplug the charger before going any further.

    • Flip the laptop over so you can see the underside.

    • Remove the ten 7mm T5 Torx screws.

  2. Lenovo YOGA 730-15IKB Heat Sink Replacement: passo 2, immagine 1 di 2 Lenovo YOGA 730-15IKB Heat Sink Replacement: passo 2, immagine 2 di 2
    • Pry up the bottom cover with an opening tool.

    • Start at the front edge of the cover and make your way along the sides.

  3. Lenovo YOGA 730-15IKB Heat Sink Replacement: passo 3, immagine 1 di 1
    • Pull the bottom cover up and away from the back hinges.

  4. Lenovo YOGA 730-15IKB Heat Sink Replacement, Left Fan: passo 4, immagine 1 di 1
    • When the laptop is upside down, the left fan is on the right side of the laptop near the wireless card and the SSD.

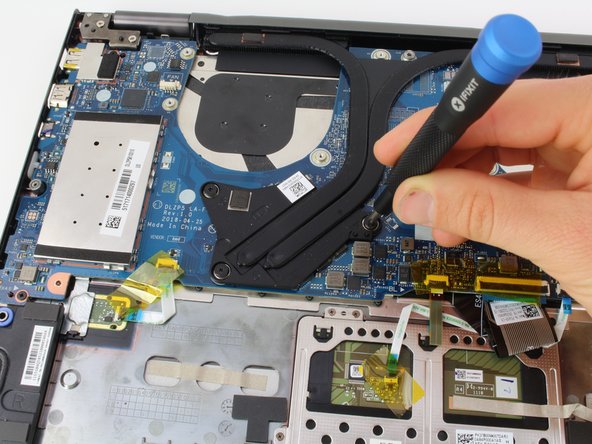
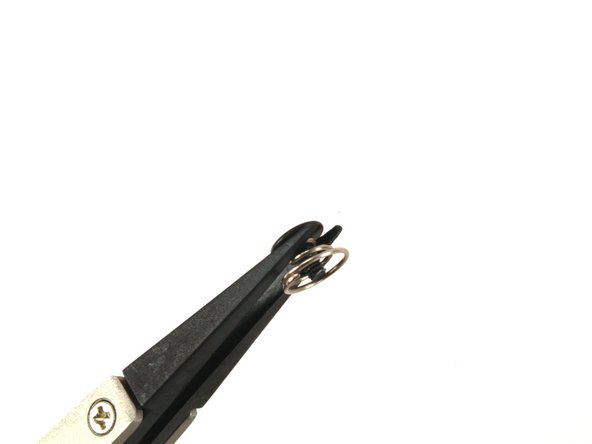
    • Remove the black and white antenna wires from the groove on the right side of the fan.

  5. Lenovo YOGA 730-15IKB Heat Sink Replacement: passo 5, immagine 1 di 2 Lenovo YOGA 730-15IKB Heat Sink Replacement: passo 5, immagine 2 di 2
    • Disconnect the fan cable. Pull the wire toward the right side of the laptop while wiggling to loosen the connection.

    • You can also use the white tabs on the connector to push the cable free.

  6. Lenovo YOGA 730-15IKB Heat Sink Replacement: passo 6, immagine 1 di 2 Lenovo YOGA 730-15IKB Heat Sink Replacement: passo 6, immagine 2 di 2
    • Remove two 4mm Phillips #1 screws.

  7. Lenovo YOGA 730-15IKB Heat Sink Replacement: passo 7, immagine 1 di 1
    • Pull the fan up and towards the front of the laptop.

  8. Lenovo YOGA 730-15IKB Heat Sink Replacement, Right Fan: passo 8, immagine 1 di 1
    • When the laptop is upside down, the right fan is on the left side of the laptop near the large metal RAM cover.

    • Disconnect the fan cable. Pull the wire toward the back of the laptop while wiggling to loosen the connection.

    • You can also use the white tabs on the connector to push the cable free.

  9. Lenovo YOGA 730-15IKB Heat Sink Replacement: passo 9, immagine 1 di 2 Lenovo YOGA 730-15IKB Heat Sink Replacement: passo 9, immagine 2 di 2
    • Remove two 4mm Phillips #1 screws.

  10. Lenovo YOGA 730-15IKB Heat Sink Replacement: passo 10, immagine 1 di 1
    • Pull the fan up and towards the front of the laptop.

  11. Lenovo YOGA 730-15IKB Heat Sink Replacement, Heat Sink: passo 11, immagine 1 di 3 Lenovo YOGA 730-15IKB Heat Sink Replacement, Heat Sink: passo 11, immagine 2 di 3 Lenovo YOGA 730-15IKB Heat Sink Replacement, Heat Sink: passo 11, immagine 3 di 3
    • Remove three 4mm Phillips #1 screws.

    • Do not remove the springs that are attached to the screws.

  12. Lenovo YOGA 730-15IKB Heat Sink Replacement: passo 12, immagine 1 di 2 Lenovo YOGA 730-15IKB Heat Sink Replacement: passo 12, immagine 2 di 2
    • Pull the heat sink up to remove it from the motherboard.

    • If the heat sink is not lifting up easily, try using an opening tool to gently pry the heat sink away from the motherboard. The thermal paste on the underside of the heat sink may be sticking to the motherboard.

    • It is good practice to always apply new thermal paste before reattaching the heat sink. See this guide for more instructions on using thermal paste.

Conclusione

To reassemble your device, follow these instructions in reverse order.

Un'altra persona ha completato questa guida.

Ellis Ruckman

Membro da: 01/23/20

2.545 Reputazione

6 Guide realizzate

Team

Cal Poly, Team S1-G6, White Winter 2020 Membro di Cal Poly, Team S1-G6, White Winter 2020

CPSU-WHITE-W20S1G6

3 Membri

27 Guide realizzate

0 Commenti

Aggiungi Commento

Visualizza Statistiche:

Ultime 24 Ore: 0

Ultimi 7 Giorni: 1

Ultimi 30 Giorni: 13

Tutti i Tempi: 1,343