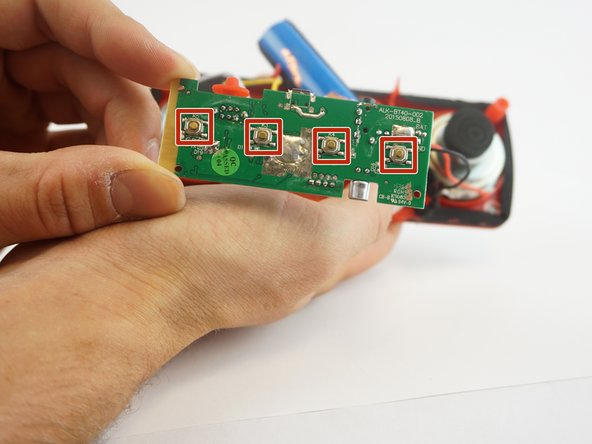
Salta al contenuto principale

Insignia NS-CSPBTHOL-R Buttons Replacement

Cosa ti serve

  1. Insignia NS-CSPBTHOL-R Buttons Replacement, Buttons: passo 1, immagine 1 di 2 Insignia NS-CSPBTHOL-R Buttons Replacement, Buttons: passo 1, immagine 2 di 2
    • Use the spudger to pry off the plastic grate covering the speakers, then gently pull it off with your fingers.

  2. Insignia NS-CSPBTHOL-R Buttons Replacement: passo 2, immagine 1 di 1
    • once the grate has been removed, Remove the six 3mm screws using the J00 JIS screw bit. This will require a long, narrow screwdriver.

  3. Insignia NS-CSPBTHOL-R Buttons Replacement: passo 3, immagine 1 di 1
    • Insert the Spudger between the corners of base and the face of the speaker to open the device. The screw on the upper right corner may be difficult to take out. If you cannot take it out with a screwdriver, using force to pull the face of the speaker apart may break the plastic that surrounds the screw.

  4. Insignia NS-CSPBTHOL-R Buttons Replacement: passo 4, immagine 1 di 3 Insignia NS-CSPBTHOL-R Buttons Replacement: passo 4, immagine 2 di 3 Insignia NS-CSPBTHOL-R Buttons Replacement: passo 4, immagine 3 di 3
    • Gently pull apart the speaker to separate the speakers from the battery and motherboard. Then pull out the motherboard with your fingers by grabbing the edges and pulling upwards.

  5. Insignia NS-CSPBTHOL-R Buttons Replacement: passo 5, immagine 1 di 2 Insignia NS-CSPBTHOL-R Buttons Replacement: passo 5, immagine 2 di 2
    • Desolder the four contact points from the button that is unresponsive.

    • Check out this helpful guide for soldering and desoldering tips.

Conclusione

To reassemble your device, follow these instructions in reverse order.

Team

USF Tampa, Team 12-6, Eyestone Spring 2017 Membro di USF Tampa, Team 12-6, Eyestone Spring 2017

USFT-EYESTONE-S17S12G6

3 Membri

4 Guide realizzate

0 Commenti

Aggiungi Commento

Visualizza Statistiche:

Ultime 24 Ore: 0

Ultimi 7 Giorni: 1

Ultimi 30 Giorni: 4

Tutti i Tempi: 328