Introduzione
This guide is used for internal purposes. Please don't delete this guide or remove its prereq flag.
This guide shows how to use the EESON wireless charger tester. This tester is a powerful tool that can give insight on Qi wireless charging setups. You can use it to figure out how efficient the wireless power transfer is, check how much max power the charging pad can output, etc.
The tester can test Qi-compliant charging pads. It won't work for custom chargers such as Xiaomi's 100W wireless charging pads.
The tester's labeling and settings are slightly counter-intuitive. This guide will clarify the tester's settings.
-
-
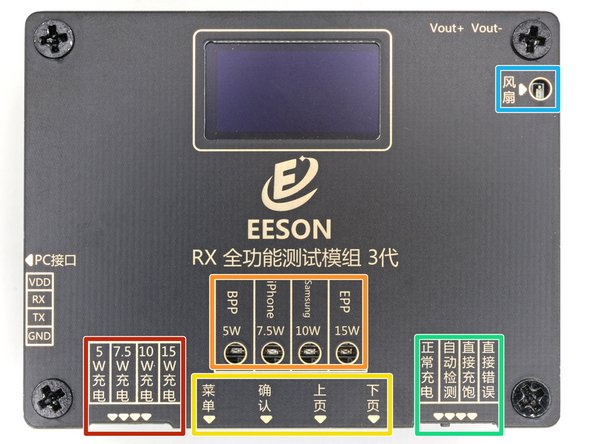
Test type selector
-
Test type indicator
-
Screen menu buttons
-
Test mode selector
-
Cooling fan indicator LED
-
Error indicator LED
-
-
-
Set the left "test type" switch to the right-most position. This sets the test type to 15W EPP.
-
Set the right "test mode" switch to the left-most position. This sets the tester in manual mode.
-
-
-
-
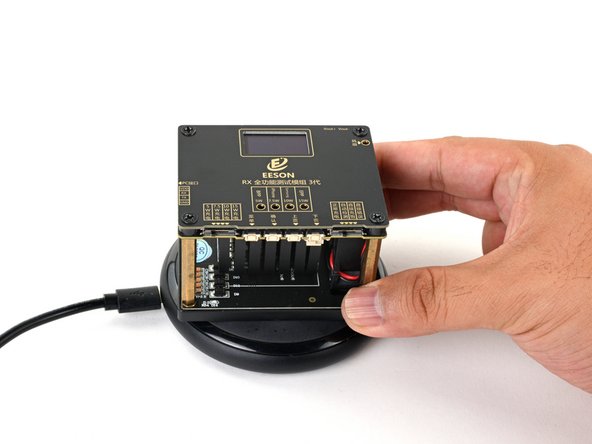
Place the tester on the wireless charging pad.
-
Test type—don't mind if it says "FAIL". This just means that the charging pad wasn't able to source up to 15W.
-
Voltage, current, and wattage received by the tester
-
Power feedback—deals with how the resonance field changes. This will change if you move the charging coils, but should stay at +0.
-
Elapsed test time
-
Transmission frequency
-
-
-
5W BPP test: BPP is a bare-bones, no-frills 5W wireless profile. It's the minimum requirement to meet Qi wireless charging.
-
15W EPP test: EPP is an advanced profile that allows the device and the wireless charging pad to communicate and negotiate the charging rate—from 5W up to 15W. Most modern phones and charging pads support EPP. You should use this mode to test most modern wireless pads.
-
7.5W iPhone test: Apple created a custom EPP and this mimics it. This will check if the charging pad will respond to the custom request and charge specifically at 7.5W.
-
10W Samsung test: Samsung created a custom EPP and this mimics it. This will check if the charging pad will respond to the custom request and charge specifically at 10W.
-
-
-
Manual test: This allows you to select which test type to run using the toggle switch in the bottom left of the device. This is the test you'll use most often.
-
Automatic test: This mode automatically sweeps through all the load tests one after another.
-
Fully charged test: This mimics a device that's fully charged to test if the wireless charging pad will stop sourcing power. During this test, the Wi-Fi tester shouldn't power on and the error indicator light should flash.
-
Error test: This sends out an error signal to the wireless charger to test if the charger shuts off if given an error signal. During this test, the Wi-Fi tester shouldn't power on and the charging pad should display some kind of warning.
-
-
-
Menu: short press to cycle through various stat views. Long press to enter the setup menu. This button acts as the "back" button in menus.
-
Select: Short press to toggle the tester into Foreign Object Detection (FOD) mode. This should quickly shut down the wireless charging pad. This button acts as the "select" button in menus.
-
Up: Navigate up in menus.
-
Down: Navigate down in menus.
-


Annulla: non ho completato questa guida.
Un'altra persona ha completato questa guida.

