Salta al contenuto principale

How to Replace the Back Panel Adhesive on Your Google Pixel 4

Cosa ti serve

  1. How to Replace the Back Panel Adhesive on Your Google Pixel 4, Scrape off the old adhesive: passo 1, immagine 1 di 3 How to Replace the Back Panel Adhesive on Your Google Pixel 4, Scrape off the old adhesive: passo 1, immagine 2 di 3 How to Replace the Back Panel Adhesive on Your Google Pixel 4, Scrape off the old adhesive: passo 1, immagine 3 di 3
    • When scraping the frame and back panel, take care not to damage the spring contacts and graphite film.

    • Use the flat end of a spudger or your fingernail to scrape off the old adhesive from the frame and back panel.

  2. How to Replace the Back Panel Adhesive on Your Google Pixel 4, Remove the remaining adhesive: passo 2, immagine 1 di 2 How to Replace the Back Panel Adhesive on Your Google Pixel 4, Remove the remaining adhesive: passo 2, immagine 2 di 2
    Attrezzo utilizzato in questo passaggio:
    Microfiber Cleaning Cloths
    $3.99
    Compra
    • Apply a few drops of high-concentration (90% or higher) isopropyl alcohol to any remaining adhesive.

    • Use a microfiber cloth to remove the remaining adhesive.

    • If you're still having trouble removing the adhesive, apply a few drops of alcohol to the adhesive and scrape it with a spudger.

  3. How to Replace the Back Panel Adhesive on Your Google Pixel 4, Orient the adhesive: passo 3, immagine 1 di 1
    • Before peeling off any liners, lay the new adhesive down on the back panel and use the camera cutout to find its proper orientation.

  4. How to Replace the Back Panel Adhesive on Your Google Pixel 4, Remove the adhesive liner: passo 4, immagine 1 di 1
    • Peel and remove the large rectangular liner.

    • This should expose the adhesive that will stick to the back panel.

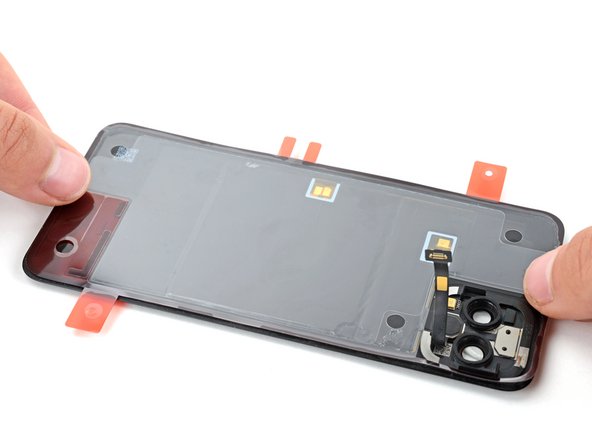
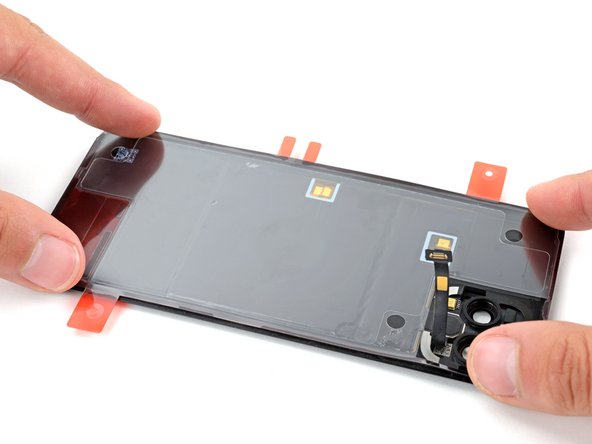
  5. How to Replace the Back Panel Adhesive on Your Google Pixel 4, Apply the adhesive: passo 5, immagine 1 di 3 How to Replace the Back Panel Adhesive on Your Google Pixel 4, Apply the adhesive: passo 5, immagine 2 di 3 How to Replace the Back Panel Adhesive on Your Google Pixel 4, Apply the adhesive: passo 5, immagine 3 di 3
    • Be very careful during this step! The adhesive is very sticky, and once it touches the back panel you won't be able to reposition it. Misaligned adhesive can lead to an improper seal.

    • When laying down the adhesive, make sure the back panel connector cable is threaded through the camera cutout. If the adhesive sticks to the cable, you'll have to restart the repair with new adhesive.

    • With the adhesive in its proper orientation, lay it sticky side down on the back panel.

    • Press down firmly around the perimeter of the back panel, ensuring all the adhesive is secured.

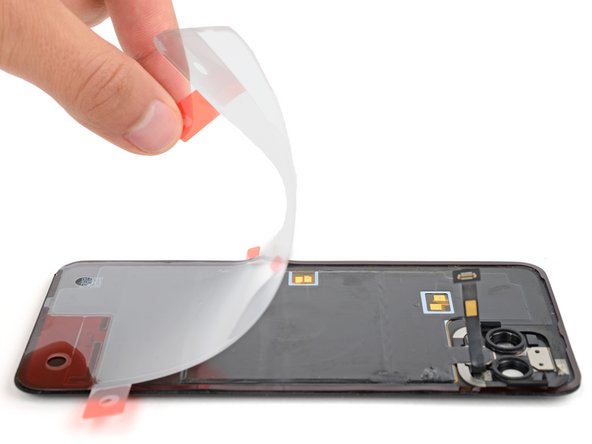
  6. How to Replace the Back Panel Adhesive on Your Google Pixel 4: passo 6, immagine 1 di 2 How to Replace the Back Panel Adhesive on Your Google Pixel 4: passo 6, immagine 2 di 2
    • Use the pull tabs to remove all remaining liners from the adhesive.

  7. How to Replace the Back Panel Adhesive on Your Google Pixel 4: passo 7, immagine 1 di 1
    • Return to your phone's repair guide and continue reassembly.

    • Be very careful when reassembling your device, as the adhesive is exposed and very sticky. Take special care to prevent the back panel cable from touching the adhesive.

    • Return to this guide before securing the back panel to the phone.

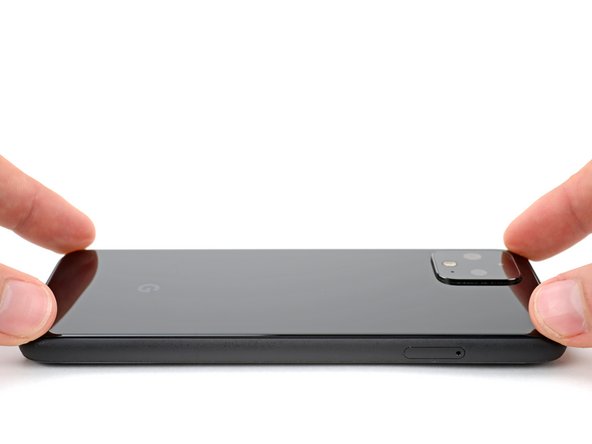
  8. How to Replace the Back Panel Adhesive on Your Google Pixel 4: passo 8, immagine 1 di 3 How to Replace the Back Panel Adhesive on Your Google Pixel 4: passo 8, immagine 2 di 3 How to Replace the Back Panel Adhesive on Your Google Pixel 4: passo 8, immagine 3 di 3
    • Align the back panel over the back of the phone and lay it down.

    • Secure the back panel by firmly pressing along its perimeter for one minute.

Linea Traguardo

Altre 6 persone hanno completato questa guida.

Spencer Day

Membro da: 09/14/22

53.145 Reputazione

389 Guide realizzate

Team

iFixit Membro di iFixit

Staff

135 Membri

16.817 Guide realizzate

Un commento

I used 70 % isopropyl alcohol instead of 90 %, I don't think it was as effective as it should have been though.

I did step 7 before step 6 as I was afraid that it wasn't going to stick as intended. When doing step 7, but the back panel connector did disconnect from the back panel and not from the phone's inside.

Luigi - Replica

Aggiungi Commento

Visualizza Statistiche:

Ultime 24 Ore: 12

Ultimi 7 Giorni: 35

Ultimi 30 Giorni: 103

Tutti i Tempi: 2,070