Salta al contenuto principale
How To Replace the Battery on a Conair Trimmer (GMT15NCS)

How To Replace the Battery on a Conair Trimmer (GMT15NCS)

Nicholas Ellis

Nicholas Ellis e un altro collaboratore

Ultimo aggiornamento il July 16, 2024

15 - 20 minuti
Moderato

Introduzione

Vai al passo 1

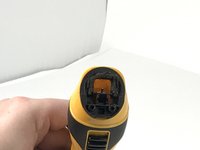
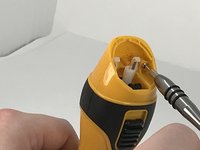
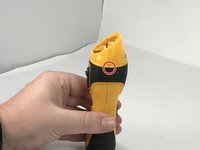
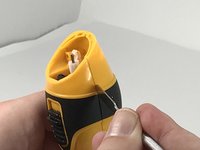
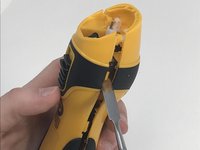
The battery in the Conair Trimmer (GMT15NCS) can stop working or not hold a charge as well. This guide will show how to replace this battery to give the trimmer longer life.

Cosa ti serve

Ricambi

Strumenti

Mostra di più…

iFixit guadagna commissioni quando acquisti tramite questi link.
  1. How To Replace the Battery on a Conair Trimmer (GMT15NCS), Conair Trimmer (GMT15NCS) Battery Replacement: passo 1, immagine 1 di 3 How To Replace the Battery on a Conair Trimmer (GMT15NCS), Conair Trimmer (GMT15NCS) Battery Replacement: passo 1, immagine 2 di 3 How To Replace the Battery on a Conair Trimmer (GMT15NCS), Conair Trimmer (GMT15NCS) Battery Replacement: passo 1, immagine 3 di 3
    • Using a Phillips #0 screwdriver, remove the two screws holding the trimmer blade in place.

    • Hold down the trimmer blades to make it easier to remove the screws.

  2. How To Replace the Battery on a Conair Trimmer (GMT15NCS): passo 2, immagine 1 di 2 How To Replace the Battery on a Conair Trimmer (GMT15NCS): passo 2, immagine 2 di 2
    • Lift both of the trimmer blades off of the plastic guard.

  3. How To Replace the Battery on a Conair Trimmer (GMT15NCS): passo 3, immagine 1 di 3 How To Replace the Battery on a Conair Trimmer (GMT15NCS): passo 3, immagine 2 di 3 How To Replace the Battery on a Conair Trimmer (GMT15NCS): passo 3, immagine 3 di 3
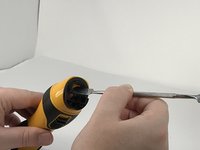
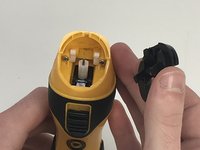
    • Separate the plastic guard from the casing by using the metal spudger tool.

    • Pry up at the top of the plastic guard, NOT the bottom.

  4. How To Replace the Battery on a Conair Trimmer (GMT15NCS): passo 4, immagine 1 di 2 How To Replace the Battery on a Conair Trimmer (GMT15NCS): passo 4, immagine 2 di 2
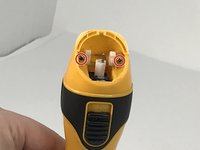
    • Using a Phillips #000 screwdriver, remove the two screws inside the casing.

    • Tilt the trimmer to prevent the screws from falling into the casing.

  5. How To Replace the Battery on a Conair Trimmer (GMT15NCS): passo 5, immagine 1 di 1
    • Using a Phillips #000 screwdriver, remove the casing screw at the bottom of the trimmer.

    • Tilt the trimmer so gravity helps the screw fall out.

  6. How To Replace the Battery on a Conair Trimmer (GMT15NCS): passo 6, immagine 1 di 3 How To Replace the Battery on a Conair Trimmer (GMT15NCS): passo 6, immagine 2 di 3 How To Replace the Battery on a Conair Trimmer (GMT15NCS): passo 6, immagine 3 di 3
    • Fire Hazard: Be careful not to stick the metal spudger too deep when prying to avoid puncturing the battery.

    • Separate the casing at the seam using the metal spudger to release the clips.

    • Use a twisting or prying motion, in any direction, to separate the casing.

    • The same process may be needed on the other side's seam to release clips.

  7. How To Replace the Battery on a Conair Trimmer (GMT15NCS): passo 7, immagine 1 di 3 How To Replace the Battery on a Conair Trimmer (GMT15NCS): passo 7, immagine 2 di 3 How To Replace the Battery on a Conair Trimmer (GMT15NCS): passo 7, immagine 3 di 3
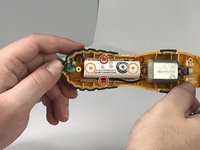
    • Remove the two screws holding the battery setup in place.

    • Take note of the position of the positive and negative terminals of the battery on the setup.

  8. How To Replace the Battery on a Conair Trimmer (GMT15NCS): passo 8, immagine 1 di 1
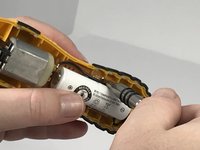
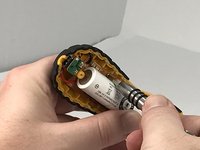
    • Lift the battery setup out of the casing.

    • Take note of how the battery setup lays in the casing.

  9. How To Replace the Battery on a Conair Trimmer (GMT15NCS): passo 9, immagine 1 di 3 How To Replace the Battery on a Conair Trimmer (GMT15NCS): passo 9, immagine 2 di 3 How To Replace the Battery on a Conair Trimmer (GMT15NCS): passo 9, immagine 3 di 3
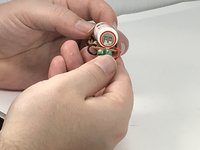
    • The soldering iron with be hot.

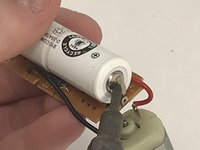
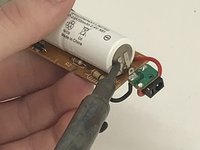
    • Using the soldering iron, desolder the battery at the connection to remove the battery from the setup.

    • Use iFixit's guide on Come saldare e dissaldare componenti elettrici if you are not familiar using a soldering tool.

Conclusione

To reassemble your device, solder the new 2.4 V battery into the setup, and follow the instructions in reverse.

Altre 2 persone hanno completato questa guida.

1Commento della guida

Where can I buy the batery

Wenceslao Hernandez - Replica

Aggiungi Commento

Visualizza Statistiche:

Ultime 24 Ore: 5

Ultimi 7 Giorni: 25

Ultimi 30 Giorni: 145

Tutti i Tempi: 11,423