Questa versione può contenere modifiche errate. Passa all'ultima istantanea verificata.
Cosa ti serve
-
Questo passaggio è privo di traduzione. Aiuta a tradurlo
-
Turn off your HP Stream 11-r020nr by holding the power button down for 10 seconds.
-
Turn the device top down so the rubber feet are facing up.
-
Use a metal spudger to remove all the rubber feet off of the bottom of the device, including the small ones. There will be a total of 11 screws to remove.
-
-
Questo passaggio è privo di traduzione. Aiuta a tradurlo
-
Using the Phillips #1 screwdriver, remove all 11 of the the 5mm screws.
-
-
Questo passaggio è privo di traduzione. Aiuta a tradurlo
-
Flip the laptop over and open the laptop.
-
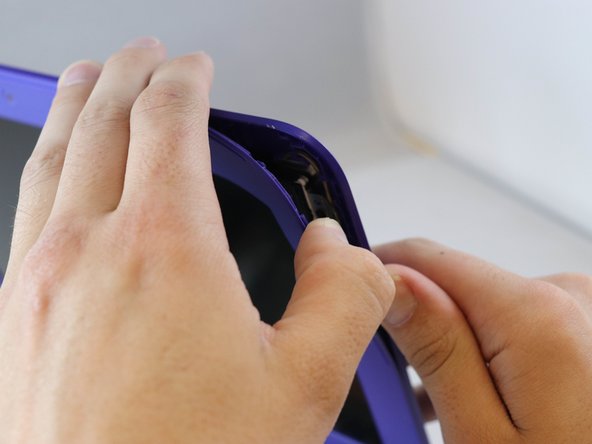
Using the blue plastic opening tool, separate the keyboard plate from the main body by prying up starting around the bottom corners, prying the bottom up first and the sides second all the way around the whole keyboard plate.
-
-
Questo passaggio è privo di traduzione. Aiuta a tradurlo
-
Use the black nylon spudger to flip the black tab up that holds the ribbon cable in place.
-
Lift the ribbon cable free.
-
-
Questo passaggio è privo di traduzione. Aiuta a tradurlo
-
Use the black nylon spudger to flip the black tab up that holds the large ribbon cable in place.
-
Pull the ribbon cable free from the base of the keyboard.
-
-
-
Questo passaggio è privo di traduzione. Aiuta a tradurlo
-
Remove the tape covering the ribbon cable.
-
Use the black nylon spudger to flip the black tab up that holds the ribbon cable in place.
-
Pull the ribbon cable away from the base of the laptop.
-
-
Questo passaggio è privo di traduzione. Aiuta a tradurlo
-
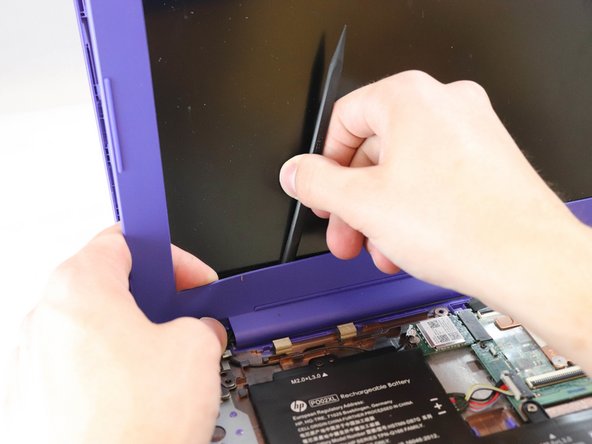
After detaching the two large ribbon cables, carefully lean the keyboard against the screen.
-
-
Questo passaggio è privo di traduzione. Aiuta a tradurlo
-
Pull the power cable away with your fingers.
-
-
Questo passaggio è privo di traduzione. Aiuta a tradurlo
-
Using the Phillips #1 screwdriver, remove the 4 mm screw.
-
-
Questo passaggio è privo di traduzione. Aiuta a tradurlo
-
Lift and remove the charging port from the device.
-
-
Questo passaggio è privo di traduzione. Aiuta a tradurlo
-
Remove the power port 4 mm screw.
-
Using the Phillips #1 screwdriver, remove a total four 5 mm hinge screws.
-
Lift the screen up and away from the device.
-
-
Questo passaggio è privo di traduzione. Aiuta a tradurlo
-
Using the black nylon spudger, lift the top right corner of the frame from the screen.
-
From there, you can make your way around the screen. You will feel the frame pop off one at a time.
-
When you get to the bottom of the screen, place the plastic spudger between the screen and the frame and drag along the bottom to separate the adhesive.
-
-
Questo passaggio è privo di traduzione. Aiuta a tradurlo
-
Flip the laptop to separate the frames using the small plastic opening tool.
-
-
Questo passaggio è privo di traduzione. Aiuta a tradurlo
-
Using the plastic spudger, separate the cosmetic stickers from the bottom left and right of the frame.
-
Using the Phillips #0 screwdriver, remove two 2mm screws, one on each side. Then remove the plastic covering the edge of the screen.
-
Continuing with the Phillips #0 screwdriver, remove four 2mm screws that hold the screen in place.
-
-
Questo passaggio è privo di traduzione. Aiuta a tradurlo
-
Lift and flip the screen up to reveal the video cable.
-
Gently pull the tape connected to the video cable.
-
Disconnect the video cable and remove the screen from the device.
-


Annulla: non ho completato questa guida.
Un'altra persona ha completato questa guida.

Team

Eastern Washington University, Team S1-G1, Carnegie Spring 2018 Membro di Eastern Washington University, Team S1-G1, Carnegie Spring 2018
EWU-CARNEGIE-S18S1G1
4 Membri
8 Guide realizzate