Salta al contenuto principale

Questa guida ha delle modifiche più recenti. Passa all'ultima versione non verificata.

HP Pavilion N3350 Screen Assembly Replacement

Cosa ti serve

  1. HP Pavilion N3350 Screen Assembly Replacement, Screen Assembly: passo 1, immagine 1 di 2 HP Pavilion N3350 Screen Assembly Replacement, Screen Assembly: passo 1, immagine 2 di 2
    • Open your laptop. Beneath the screen, there is a large plastic piece that contains slots for a speaker, the power button, and numerous indicator lights.

    • To remove this, pry it open with a spudger tool gently. It should pop out of place.

  2. HP Pavilion N3350 Screen Assembly Replacement: passo 2, immagine 1 di 2 HP Pavilion N3350 Screen Assembly Replacement: passo 2, immagine 2 di 2
    • Gently use a spudger tool or your fingers to disconnect the LCD cable from the screen.

    • This is one of three connectors that needs to be undone to disconnect the screen from the laptop.

  3. HP Pavilion N3350 Screen Assembly Replacement: passo 3, immagine 1 di 3 HP Pavilion N3350 Screen Assembly Replacement: passo 3, immagine 2 di 3 HP Pavilion N3350 Screen Assembly Replacement: passo 3, immagine 3 di 3
    • Remove the 1 cm screw with a Phillips #1 screwdriver to allow the screen and top of the laptop to be separated from the keyboard and bottom.

    • Lift the entire top away from the bottom, and set bottom half of the laptop aside.

  4. HP Pavilion N3350 Screen Assembly Replacement: passo 4, immagine 1 di 3 HP Pavilion N3350 Screen Assembly Replacement: passo 4, immagine 2 di 3 HP Pavilion N3350 Screen Assembly Replacement: passo 4, immagine 3 di 3
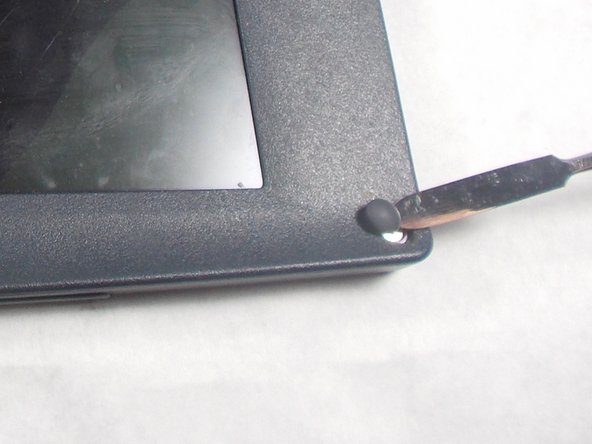
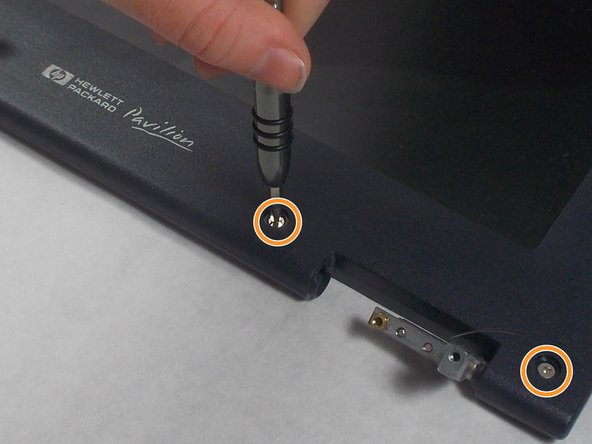
    • Remove the 6 rubber screw caps with a metal spudger.

    • After removing the 6 rubber screw caps, use a Phillips #1 screwdriver to unscrew the six 6mm screws.

  5. HP Pavilion N3350 Screen Assembly Replacement: passo 5, immagine 1 di 2 HP Pavilion N3350 Screen Assembly Replacement: passo 5, immagine 2 di 2
    • To separate the plastic cover, use a plastic opening tool to undo each plastic connecting clip between the two.

    • You can find the plastic connecting clips by sliding the plastic opening tool along the seam between the two plastic covers.

    • Remove the top plastic cover once all connections have been released.

  6. HP Pavilion N3350 Screen Assembly Replacement: passo 6, immagine 1 di 3 HP Pavilion N3350 Screen Assembly Replacement: passo 6, immagine 2 di 3 HP Pavilion N3350 Screen Assembly Replacement: passo 6, immagine 3 di 3
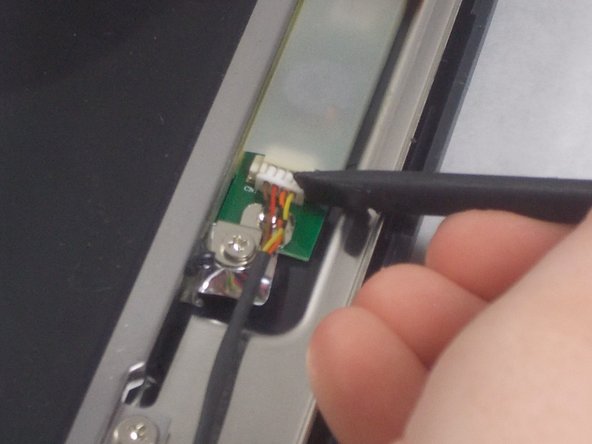
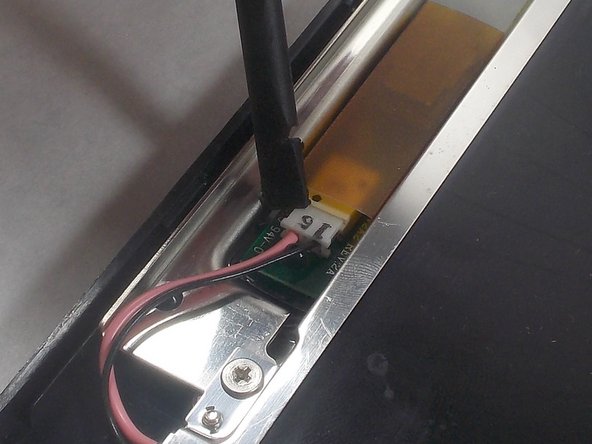
    • Disconnect the connectors using a plastic opening tool.

    • Once these two connectors are released, the screen should be electronically freed from the rest of the laptop.

  7. HP Pavilion N3350 Screen Assembly Replacement: passo 7, immagine 1 di 1
    • At each corner, there is a 1 centimeter silver screw connecting the screen frame to the laptop. Remove these using a Phillips #1 Screwdriver.

  8. HP Pavilion N3350 Screen Assembly Replacement: passo 8, immagine 1 di 3 HP Pavilion N3350 Screen Assembly Replacement: passo 8, immagine 2 di 3 HP Pavilion N3350 Screen Assembly Replacement: passo 8, immagine 3 di 3
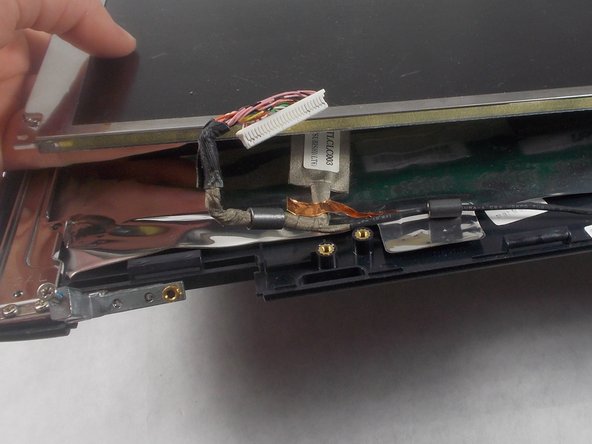
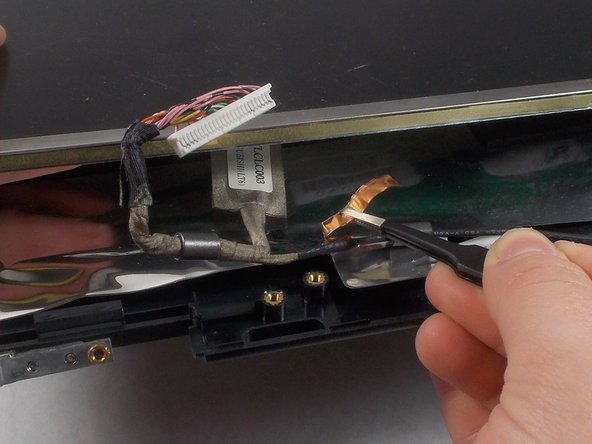
    • There should be thin piece of copper 'tape' holding the LCD cable down. Remove this gently with tweezers.

    • Remove the screen from the device.

Conclusione

To reassemble your device, follow these instructions in reverse order.

Un'altra persona ha completato questa guida.

Emily Hatstat

Membro da: 03/19/18

481 Reputazione

4 Guide realizzate

Team

0 Commenti

Aggiungi Commento

Visualizza Statistiche:

Ultime 24 Ore: 0

Ultimi 7 Giorni: 0

Ultimi 30 Giorni: 7

Tutti i Tempi: 167