Salta al contenuto principale

HP Pavilion 17-e146us Motherboard Replacement

Cosa ti serve

  1. HP Pavilion 17-e146us Motherboard Replacement, Battery: passo 1, immagine 1 di 1
    • Turn the device over.

  2. HP Pavilion 17-e146us Motherboard Replacement: passo 2, immagine 1 di 2 HP Pavilion 17-e146us Motherboard Replacement: passo 2, immagine 2 di 2
    • Move the battery lock switch to the right to unlock. The battery release button will unlock the battery from the computer.

    • The battery release button is located above the the battery.

  3. HP Pavilion 17-e146us Motherboard Replacement: passo 3, immagine 1 di 1
    • The battery will unlock from the computer.

    • Remove the unlocked battery from the computer.

  4. HP Pavilion 17-e146us Motherboard Replacement, Keyboard: passo 4, immagine 1 di 3 HP Pavilion 17-e146us Motherboard Replacement, Keyboard: passo 4, immagine 2 di 3 HP Pavilion 17-e146us Motherboard Replacement, Keyboard: passo 4, immagine 3 di 3
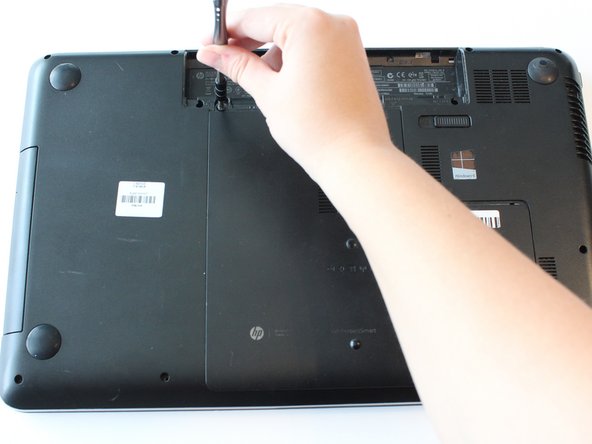
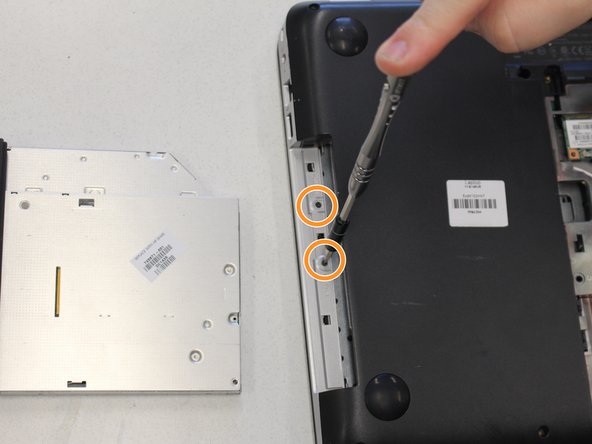
    • Remove the 6.25 mm screw in the left-lower hand corner of the battery port using a Phillips head screw driver.

  5. HP Pavilion 17-e146us Motherboard Replacement: passo 5, immagine 1 di 1
    • Remove the HP protect smart ventilation case.

    • The smart ventilation is a part of the back cover of the device

  6. HP Pavilion 17-e146us Motherboard Replacement: passo 6, immagine 1 di 1
    • Remove seven 6.5 mm screws using a Phillips #0 screwdriver.

    • Remove four 3.0 mm screws located in the charger port using a Phillips #0 screwdriver.

  7. HP Pavilion 17-e146us Motherboard Replacement: passo 7, immagine 1 di 2 HP Pavilion 17-e146us Motherboard Replacement: passo 7, immagine 2 di 2
    • Pull and remove the disk drive.

    • The disk drive is located on the left side of the device when it is turned over.

    • Remove two 3.00 mm screws on the inside of the disk drive using a Phillips screwdriver.

  8. HP Pavilion 17-e146us Motherboard Replacement: passo 8, immagine 1 di 1
    • Apply firm pressure inside the release port using a narrow tool such as a screw driver or tweezers.

    • The release port releases the keyboard.

  9. HP Pavilion 17-e146us Motherboard Replacement: passo 9, immagine 1 di 1
    • Flip device over so that the cover is facing towards you

  10. HP Pavilion 17-e146us Motherboard Replacement: passo 10, immagine 1 di 3 HP Pavilion 17-e146us Motherboard Replacement: passo 10, immagine 2 di 3 HP Pavilion 17-e146us Motherboard Replacement: passo 10, immagine 3 di 3
    • Open device. The keyboard should be separate from the inside panel.

    • If the keyboard does not automatically pop out, use a spudger or opening tool along the edge of the front panel and the keyboard to pop the keyboard out.

    • Detach the keyboard's cable connector from the motherboard.

  11. HP Pavilion 17-e146us Motherboard Replacement, Motherboard: passo 11, immagine 1 di 1
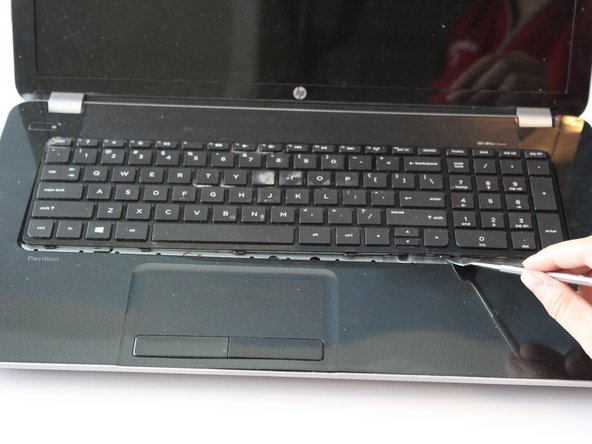
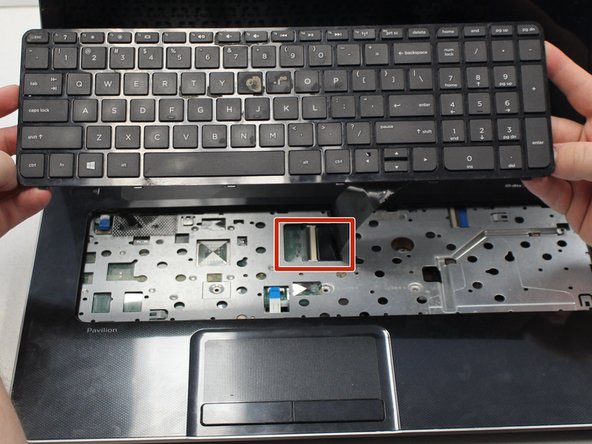
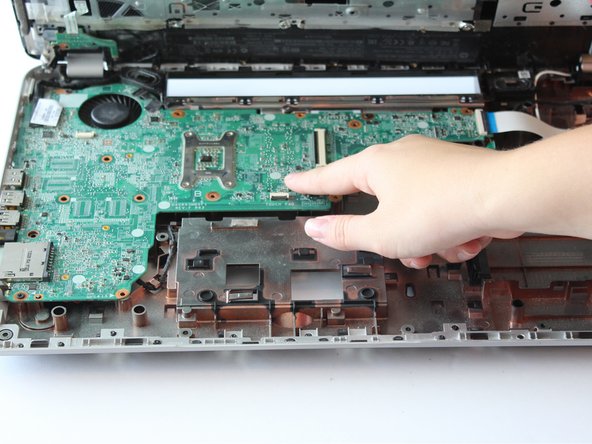
    • Remove three 6.5 mm Phillips screws located underneath the keyboard using a Phillips #0 screwdriver.

  12. HP Pavilion 17-e146us Motherboard Replacement: passo 12, immagine 1 di 1
    • Place wedge tool in-between the front panel and the cover underneath the keyboard

    • Use wedge tool to pop the two covers apart.

    • This may require some force.

  13. HP Pavilion 17-e146us Motherboard Replacement: passo 13, immagine 1 di 2 HP Pavilion 17-e146us Motherboard Replacement: passo 13, immagine 2 di 2
    • Remove the motherboard using your hands

    • The motherboard is large green portion located inside the device

Conclusione

To reassemble your device, follow these instructions in reverse order.

Un'altra persona ha completato questa guida.

0 Commenti

Aggiungi Commento

Visualizza Statistiche:

Ultime 24 Ore: 0

Ultimi 7 Giorni: 1

Ultimi 30 Giorni: 9

Tutti i Tempi: 885