Introduzione
Random Access Memory (RAM) is essential because it temporarily carries software and memorize in current use. It allows the processor to access data much faster and mor efficient, compared to a hard drive or solid state drive.
HP Envy x360 m6-w105dx has 8GB DDR3L SDRAM (1 DIMM).
This guide page will provide instructions for dealing with RAM problem and replacing RAM.
Cosa ti serve
-
-
Use the opening pick to lift up the eight rubber grips on the underside of the device.
-
With the #1 Phillips screwdriver, remove the twelve 6mm screws from the back case.
-
-
-
-
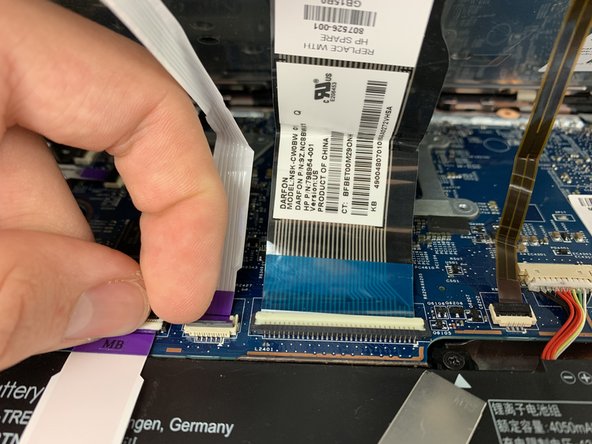
Gently open the ZIF connectors and remove the ribbon cables.
-
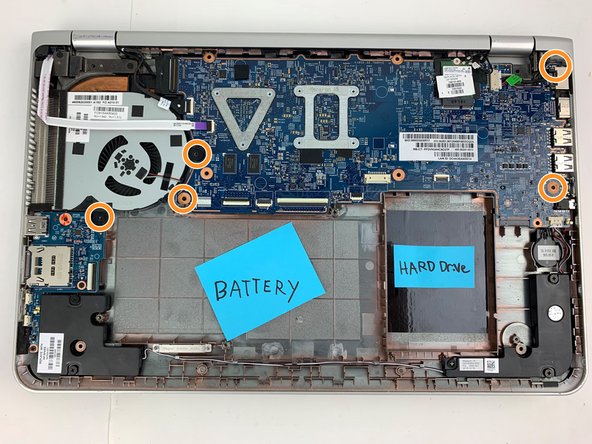
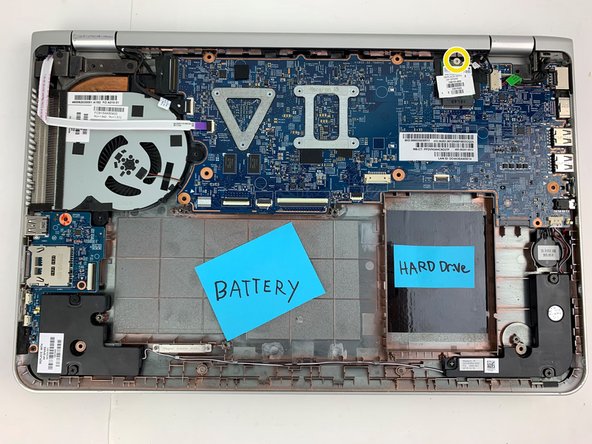
Unscrew the five 4mm screws with the Phillips #1 screwdriver.
-
Unscrew the WLAN chip and push the chip up and out of the port.
Make sure to capitalize Phillips. For all ZIF connectors, indicate how to remove, just not to remove them. Each of these steps should have pictures depicting you doing these things, not just to do them with markup.
-
-
-
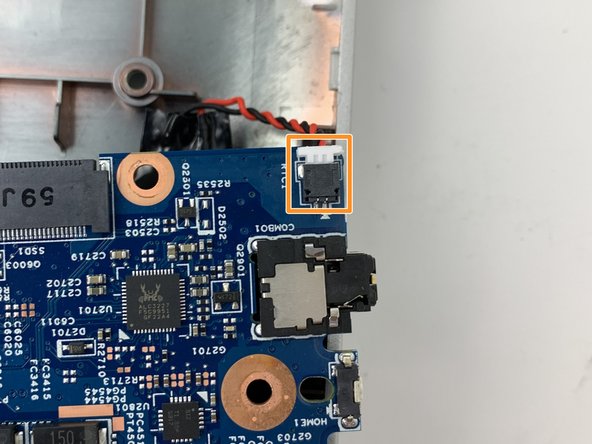
Disconnect the cable connectors for the speakers.
-
Lift the motherboard up and flip towards you to disconnect an additional cable connector on the rear side.
-
Use an opening pick to pull the motherboard up on the fan side. Then pull the motherboard assembly out towards the left.
How should I disconnect the connectors? What do these connectors do? How should I lift and flip the motherboard? How should I remove the pieces? I also need more pictures.
-
-
-
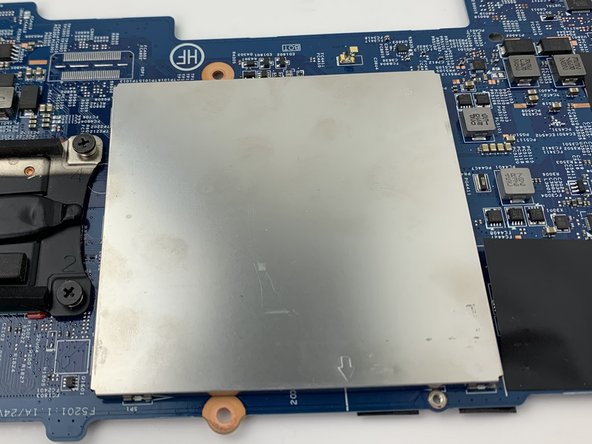
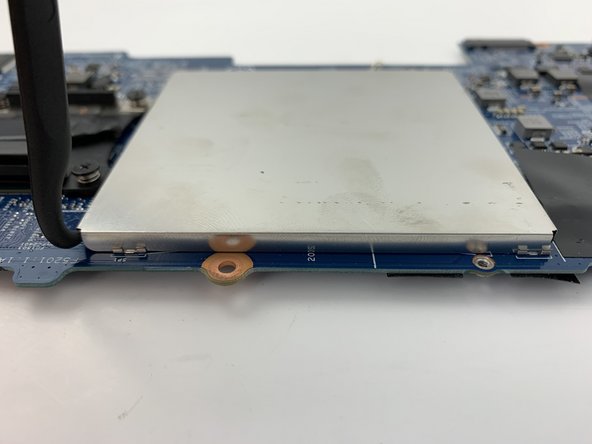
On the underside of the motherboard, use the halberd spudger to pry up the square metal cover.
I think you could just markup the first shot, then get a shot of you lifting the covering with the spudger. Also, be sure to indicate how to use the spudger, not just to do it.
-
-
-
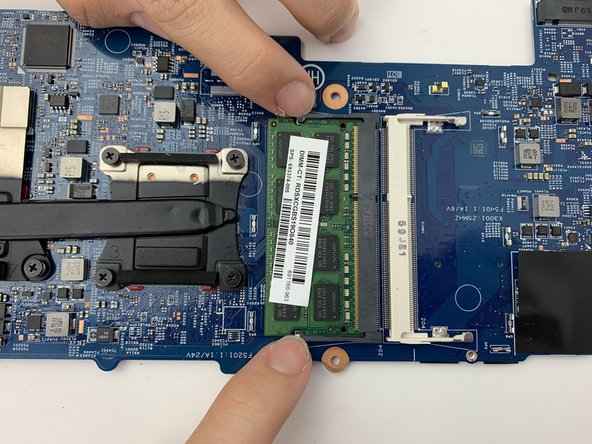
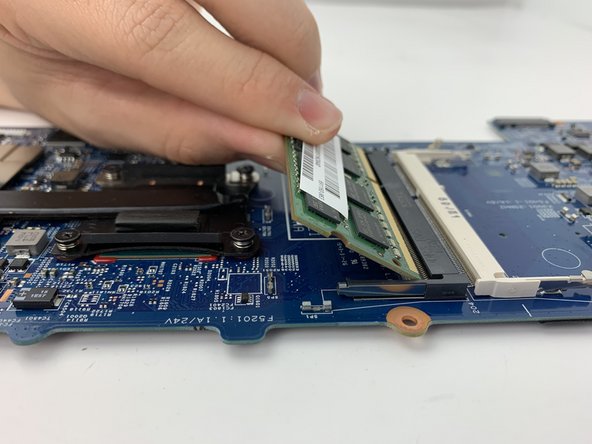
Pull the metal retaining pins on either side of the RAM stick apart. The RAM stick will pop up.
-
Remove the RAM and insert a new one that is compatible.
Which metal pins? Do you need a tool, or use your hands? Do you have a picture of it popped up, before you grab it out? I think you could replace the first picture with one in the middle with the component popped out.
-


To reassemble your device, follow these instructions in reverse order.
To reassemble your device, follow these instructions in reverse order.
Annulla: non ho completato questa guida.
Altre 3 persone hanno completato questa guida.

Team

Embry-Riddle Aeronautical University, Team S5-G3, Watkins Spring 2020 Membro di Embry-Riddle Aeronautical University, Team S5-G3, Watkins Spring 2020
ERAU-WATKINS-S20S5G3
4 Membri
5 Guide realizzate
Un commento
this is the first time i’ve been on the ifixit site but thanks to my google search of this topic, I found this and it is extremely simple and helpful. I haven’t actually done this yet but am confident I can once I get the replacement ram. I need my laptop to be a portable video editing work station and the stock ram on these will run premiere pro, just very very slowly.