Salta al contenuto principale

Fusion5 5.5 Gen II Front & Rear Camera Replacement

Cosa ti serve

  1. Fusion5 5.5 Gen II Front & Rear Camera Replacement, Back Cover: passo 1, immagine 1 di 2 Fusion5 5.5 Gen II Front & Rear Camera Replacement, Back Cover: passo 1, immagine 2 di 2
    • Hold the device with the screen facing away from you and the back of the device facing you.

    • Locate the groove at the bottom corner of the device.

    • Begin prying the back cover of the device off from the groove and working your way around the outside edges of the device.

  2. Fusion5 5.5 Gen II Front & Rear Camera Replacement, Midframe: passo 2, immagine 1 di 2 Fusion5 5.5 Gen II Front & Rear Camera Replacement, Midframe: passo 2, immagine 2 di 2
    • Remove thirteen 3mm Phillips #00 screws from the midframe.

    • Remove the single 5mm Phillips #0 screw below the camera.

  3. Fusion5 5.5 Gen II Front & Rear Camera Replacement: passo 3, immagine 1 di 2 Fusion5 5.5 Gen II Front & Rear Camera Replacement: passo 3, immagine 2 di 2
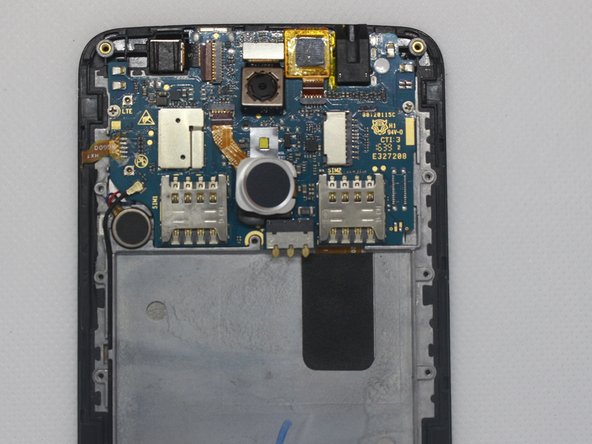
    • Using an opening pick, begin prying one of the top corners to remove the midframe from the device.

    • Be careful not to damage the cables inside the device when you pry the midframe off.

  4. Fusion5 5.5 Gen II Front & Rear Camera Replacement, Front & Rear Camera: passo 4, immagine 1 di 1
    Attrezzo utilizzato in questo passaggio:
    Tweezers
    $4.99
    Compra
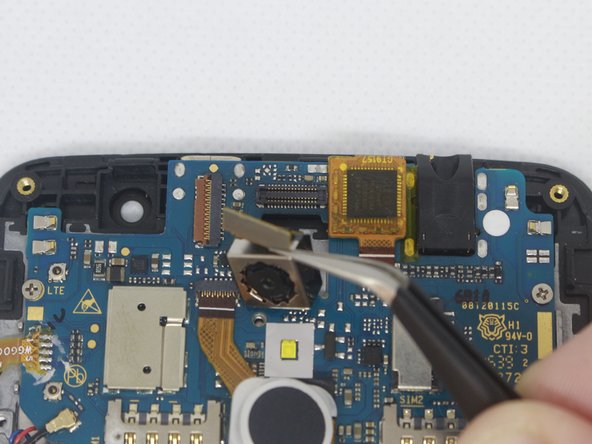
    • Using tweezers, flip the brown tab securing the ribbon cable.

    • Make sure to only lift the flap and not the connector socket due to its susceptibility to break off.

  5. Fusion5 5.5 Gen II Front & Rear Camera Replacement: passo 5, immagine 1 di 1
    • Using the tweezers, grab the ribbon cable and pull it out from its connector.

    • Then pull the front camera component out of its socket on the motherboard.

  6. Fusion5 5.5 Gen II Front & Rear Camera Replacement: passo 6, immagine 1 di 1
    • Using tweezers, grasp the ribbon cable's metal tab and gently lift it to disconnect it from its connector on the motherboard.

    • Make sure to only lift by the metal tab and not the connector socket due to its susceptibility to break off.

  7. Fusion5 5.5 Gen II Front & Rear Camera Replacement: passo 7, immagine 1 di 2 Fusion5 5.5 Gen II Front & Rear Camera Replacement: passo 7, immagine 2 di 2
    • You may now grab and lift the rear-facing camera out of its socket on the motherboard.

Conclusione

To reassemble your device, follow these instructions in reverse order.

Un'altra persona ha completato questa guida.

0 Commenti

Aggiungi Commento

Visualizza Statistiche:

Ultime 24 Ore: 0

Ultimi 7 Giorni: 0

Ultimi 30 Giorni: 11

Tutti i Tempi: 290